Linear Power Supply’s Current Limiter Is A Lesson In Simplicity

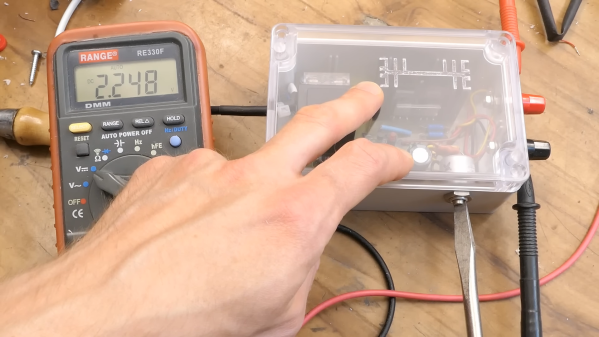
Here at Hackaday we really like to feature projects that push the limits of what’s possible, or ones that feature some new and exciting technology that nobody has ever seen before. So what’s so exciting about this single-voltage linear power supply? Honestly, nothing — until you start looking at its thermally compensated current limiting circuit.

This one is by [DiodeGoneWild], who you’ve really got to hand it to in terms of both the empirical effort he went through to optimize the circuit, as well as the quality of his explanation. The basic circuit is dead simple: a transformer, a full-wave rectifier, an LD1085 adjustable regulator — a low-dropout version of the venerable LM317 — and associated filter caps and trimmer pot to adjust the output between 2.2 and 5.5 volts.

The current limiting circuit, though, is where things get interesting. Rather than use an op-amp, [DiodeGoneWild] chose a simple discrete transistor current-sense circuit. To make it less susceptible to thermal drift, he experimented with multiple configurations of resistors and Schottky diodes over a wide range of temperatures, from deep-freeze cold to hair-dryer-in-a-box hot. His data table and the resulting graph of current versus temperature are works of art, and they allowed him to make sensible component selections for a fixed 250-mA current limit with a reasonably flat thermal response.

As for construction, it’s all classic [DiodeGoneWild], including a PCB with traces ground out with a Dremel and a recycled heat sink. He also dropped a couple of interesting build techniques, like adding leads to turn SMD tantalum caps into through-hole components. The video below shows all the build details along with the exhaustive breadboard testing.

From taking on a potentially risky magnetron teardown to harvesting lasers from headlights, there’s always something to learn from a [DiodeGoneWild] video.

Continue reading “Linear Power Supply’s Current Limiter Is A Lesson In Simplicity”

The Printing Of Pi

It really isn’t necessary, but there is some geek cred to learning pi to some bizarre number of digits. One way to do that is via a piem — a mnemonic device that is easy to remember and gives you the digits. Don’t know any? [Roni Bandini] has you covered with the PiemPi machine. It prints a random piem on a thermal printer and calculates each digit on the fly. You can watch the machine in action in the video below.

Unfortunately, the Raspberry Pi Zero inside doesn’t have enough language skills to ensure the thing makes sense, so you get word salad that may or may not have any real meaning. For example, [Roni] quotes astronomer [Sir James Jeans’] phrase: “How I want a drink, alcoholic, of course, after the heavy lectures involving quantum mechanics.” Before the advent of calculators, we always used: “May I have a large container of coffee today?” In each case, you count the number of letters in each word to get the digits. However, some of the piems you can see from the machine start off with phrases like: “# leon a yahoo execution im actual total pit eagle detector christmas…”

Continue reading “The Printing Of Pi”

Front and back views of a square, purple PCB with op amps and BNC outputs

Op Amp Contest: Generate Spirograph Shapes Using Only Op Amps And Math

If you’re a child of the ’80s or ’90s, chances are you’ve spent hours tracing out intricate patterns using the pens and gears of a Spirograph kit. Simple as those parts may be, they’re actually a very clever technique for plotting mathematical functions called hypotrochoids and epitrochoids. [Craig] has spent some time analyzing these functions, and realized you can also implement them with analog circuits. He used this knowledge to design a device called Op Art which generates Spirograph shapes on your oscilloscope using just a handful of op amps.

A spirograph shape shown on an oscilloscope screenTo draw either a hypotrochoid or an epitrochoid, you need to generate sine and cosine waves of various frequencies, and then add them with a certain scaling factor. Generating sines and cosines is not so hard to do with op amps, but making an adjustable oscillator that reliably churns out matching sine and cosine waves over a large frequency range turned out to be tricky. After a bit of experimentation, [Craig] discovered that a phase-shift oscillator was the right topology, not only for its adjustability but also because it generates sine, cosine and inverted sine terms that all come in handy when drawing various Spirograph shapes. Continue reading “Op Amp Contest: Generate Spirograph Shapes Using Only Op Amps And Math”

This Vending Machine Is For The Birds

The early bird may get the worm, but [Stephen Chasey’s] birds only get to eat if they are smart. He’s created a vending machine for bird feeding. While this is a classic and simple exercise for a microcontroller, [Stephen’s] design is all op amps and 555 timers. The feeder comes on when it detects a warm body and waits for something to drop through a hole. Birds don’t have coins, so the hole will accept anything that will trigger the IR sensor within. In response, it dispenses a few peanuts. Rodents and squirrels won’t figure out the machinery, and so they can’t pilfer the peanuts meant for the pigeons — or other birds, even if they don’t start with the letter P.

A PIR sensor detects a warm body. A 555 keeps the system going for about 24 seconds after the last PIR event. Pairs of IR LEDs and phototransistors act as sensors that look through heat shrink tubing, which is, apparently, IR transparent. When a virtual coin drops through the hole, one of the sensors picks it up and starts another 555, which turns on a vibration motor. Another sensor watches for a nut to drop, which stops the motor. It also will time out after 11 seconds.

Continue reading “This Vending Machine Is For The Birds”

Increasing System Memory With The Flick Of A Switch

There’s an apocryphal quote floating around the internet that “640K ought to be enough memory for anybody” but it does seem unlikely that this was ever actually said by any famous computer moguls of the 1980s. What is true, however, is that in general more computer memory tends to be better than less. In fact, this was the basis for the Macintosh 512k in the 1980s, whose main feature was that it was essentially the same machine as the Macintosh 128k, but with quadruple the memory as its predecessor. If you have yet to upgrade to the 512k, though, it might be best to take a look at this memory upgrade instead.

The Fat Mac Switcher, as it is called by its creator [Kay Koba], can upgrade the memory capability of these retro Apple machines with the simple push of a switch. The switch and controller logic sit on a separate PCB that needs to be installed into the computer’s motherboard in place of some of the existing circuitry. The computer itself needs its 16 memory modules replaced with 41256 DRAM modules for this to work properly though, but once its installed it can switch seamlessly between 512k and 128k modes.

Another interesting quirk of the retro Macintosh scene is that the technically inferior 128k models tend to be valued higher than the more capable 512k versions, despite being nearly identical otherwise. There are also some other interesting discussions on one of the forum posts about this build as well. This module can also be used in reverse; by installing it in a Macintosh 512k the computer can be downgraded to the original Macintosh 128k. For this the memory modules won’t need to be upgraded but a different change to the motherboard is required.

A product like this certainly would have been a welcome addition in the mid 80s when these machines were first introduced, since the 512k was released only months after the 128k machines were, but the retrocomputing enthusiasts should still get some use out of this device and be more able to explore the differences between the two computers. If you never were able to experience one of these “original” Macintosh computers in their heyday, check out this fully-functional one-third scale replica.

Art of 3D printer in the middle of printing a Hackaday Jolly Wrencher logo

Microsculptures 3D Printed With Advanced Macromolecular “Inks”

When we think about 3D printing, our mind often jumps to hot nozzles squirting out molten plastic. Other popular techniques include flashing bright light into resin, or using lasers to fuse together metal powders. All these techniques are great at producing parts with complicated geometries at desktop scales.

However, it’s also possible to 3D print at altogether microscopic scales. Researchers in Germany have now developed advanced macromolecular “inks” that can be used to create microscopic 3D sculptures with finer control than ever before.

Continue reading “Microsculptures 3D Printed With Advanced Macromolecular “Inks””

Getting Started In Ham Hack Chat

Join us on Wednesday, June 7 at noon Pacific for the Getting Started in Ham Hack Chat with Mark Hughes and Beau Ambur!

If you were to scratch any random hacker from the last 100 years, chances are pretty good you’d find an amateur radio operator just beneath the surface. Radio is the first and foremost discipline where hacking was not only welcomed, but required. If you wanted to get on the air, you sat down with some coils of wire, a few random parts — as often as not themselves homemade — and a piece of an old breadboard, and you got to work. Build it yourself or do without, and when it broke down or you wanted to change bands or add features, that was all on you too.

Like everything else, amateur radio has changed dramatically over the decades, and rolling your own radio isn’t exactly a prerequisite for entry into the ham radio club anymore. Cheap but capable handheld radios are available for a pittance, better quality radios are well within most people’s budget, and commercially available antennas have reduced the need to dabble in that particular black art. The barrier to entry for amateur radio has never been lower; you don’t even have to learn Morse anymore! So why haven’t you gotten a license?

join-hack-chatWhatever your reason for putting off joining the club of licensed amateur radio operators, we’re going to do our best to change your mind. And to help us do that, we’ve asked Mark Hughes (KE6WOB) and Beau Ambur (K6EAU) to swing by the Chat and share their experiences with getting on the air. Both are relatively recent licensees, and they’ll do their best to answer your questions about getting on the air for the first time, to get on your way to building that first radio.

Our Hack Chats are live community events in the Hackaday.io Hack Chat group messaging. This week we’ll be sitting down on Wednesday, June 7 at 12:00 PM Pacific time. If time zones have you tied up, we have a handy time zone converter.

Click that speech bubble to the right, and you’ll be taken directly to the Hack Chat group on Hackaday.io. You don’t have to wait until Wednesday; join whenever you want and you can see what the community is talking about.