A Supercapacitor From Mushrooms

The supercapacitor is an extremely promising energy storage technology, and though they have yet to reach parity with the best batteries in terms of energy density, offers considerable promise for a future of safe and affordable energy storage. Perhaps best of all from our point of view, they are surprisingly simple to make. A practical supercapacitor can be made on the bench by almost anyone, as the ever-resourceful [Robert Murray-Smith] demonstrates using mushrooms as his feedstock.

The idea of a supercapacitor is to replace the flat plate on the simple capacitor from your physics textbook with one that has as large a surface area as possible for charge to accumulate on. In this case the surface is formed from organic charcoal, a substance which retains something of the microscopic structure of whatever it was made from. Mushrooms are a good feedstock, because their mycelium structure has a naturally huge surface area. He takes us in the video below the break through the process of carbonizing them, much easier when you have a handy kiln than trying the charcoal-burner method, and then grinds them to a powder before applying them as a paste with a binder to a piece of graphite foil. With two of these electrodes and a piece of paper towel as a dielectric, he demonstrates a simple benchtop supercapacitor running a small electric motor for a surprisingly longer time than we expected.

We’d like to see further work on home made supercapacitors, as we believe they have immense potential as well as storing the stuff. Meanwhile, this is by no means the most unexpected supercapacitor material we’ve seen.

Continue reading “A Supercapacitor From Mushrooms”

Multi-way Capacitor Replacement Without The Pain

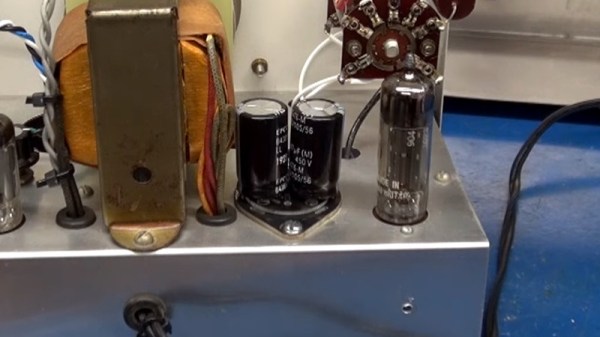
Anyone who’s worked with older tube-based equipment will be familiar with the type of vintage electrolytic capacitor which integrated several capacitors into one can. Long obsolete, they can be bought as reproduction, but unfortunately at an eye-watering price. [D-Lab Electronics] introduces us to a solution using a very useful kit, that it’s worth sharing.

The piece of equipment in the video below the break is a rather lovely Heathkit oscillator, following the familiar phase shift model with a light bulb in its feedback loop. It’s a piece of test equipment that produces a low-distortion sine wave output, and would still be of use to an audio engineer today. He replaces the capacitor with two modern ones on a multi-cap board from [W8AOR], who sells a variety of these kits for different configurations.

We’ve done this very repair more than once, and it has usually involved wiring, heatshrink sleeving, hot glue, and cable ties, looking very messy indeed. It’s not that often that a kit catches our eye as this one has, but we know we’ll be finding it useful here some time in the future. Meanwhile if you’d like to know why this oscillator has a light bulb, take a look at our piece on distortion.

Continue reading “Multi-way Capacitor Replacement Without The Pain”

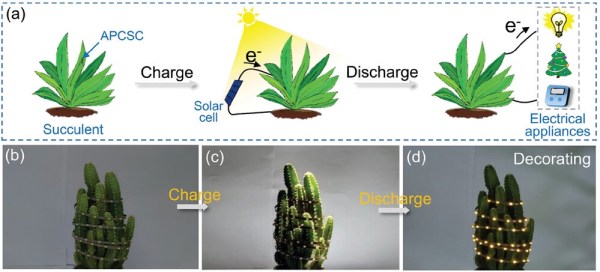
a) Schematic illustration of energy storage process of succulent plants by harnessing solar energy with a solar cell, and the solar cell converts the energy into electricity that can be store in APCSCs of succulent plants, and then utilized by multiple electrical appliances. b–d) The energy is stored in cactus under sunlight by solar cell and then power light strips of Christmas tree for decoration.

Succulents Into Supercapacitors

Researchers in Beijing have discovered a way to turn succulents into supercapacitors to help store energy. While previous research has found ways to store energy in plants, it often required implants or other modifications to the plant itself to function. These foreign components might be rejected by the plant or hamper its natural functions leading to its premature death.

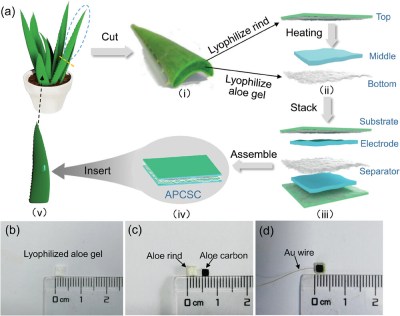
This new method takes an aloe leaf, freeze dries it, heats it up, then uses the resulting components as an implant back into the aloe plant. Since it’s all aloe all the time, the plant stays happy (or at least alive) and becomes an electrolytic supercapacitor.

Using the natural electrolytes of the aloe juice, the supercapacitor can then be charged and discharged as needed. The researchers tested the concept by solar charging the capacitor and then using that to run LED lights.

This certainly proposes some interesting applications, although we think your HOA might not be a fan. We also wonder if there might be a way to use the photosynthetic process more directly to charge the plant? Maybe this could recharge a tiny robot that lands on the plants?

Building A Rad Super Capacitor RC Plane

[Tom Stanton] is a fan of things like rubber band planes, and has built many of his own air-powered models over the years. Now, he’s built a model powered by a supercapacitor for a thoroughly modern twist on stored-energy flying toys.

It’s not a wholly original idea; [Tom] was inspired by a toy he bought off-the-shelf. His idea, though, was to make one that could be hand-cranked to charge it to make it more like the rubber-band planes of old. He thus built his own geared generator for the job using a big pile of magnets and 3D printed components. It’s capable of putting out around 17 volts when cranked at a reasonable speed. Hooked up to the toy plane, his hand-crank generator was able to fully charge the plane in just a few turns.

His generator was really overkill for the small toy, though. Thus, he elected to build himself a much larger supercapacitor-powered model. He wired up a pack of six supercapacitors in series, designed for roughly 18 volts. The pack was given balance leads to ensure that no individual capacitor was charged beyond its 3.0 V rating. The pack was placed inside a nice aerodynamic printed fuselage. The plane was then given a brushless motor and prop, speed controller, servos, and an RC receiver. Indeed, far from a simple throwable model, it’s a fully flyable RC plane.

The plane is quite a capable flyer with plenty of power, but a fairly short run time of just under two minutes. Though, with that said, it can be recharged in just about that same amount of time thanks to its supercapacitor power supply. [Tom] reckons it should be capable of a 1:1 crank time to flight time ratio in ideal conditions.

Supercapacitors are super cool, but we don’t see enough of them. They’ve popped up here and there, and obviously have many important applications, but we’re not sure they’ve had a real killer app in the consumer space. XV Racers were killer fun, though. Continue reading “Building A Rad Super Capacitor RC Plane”

Building A Solar-Powered, Supercapacitor-Based Speaker

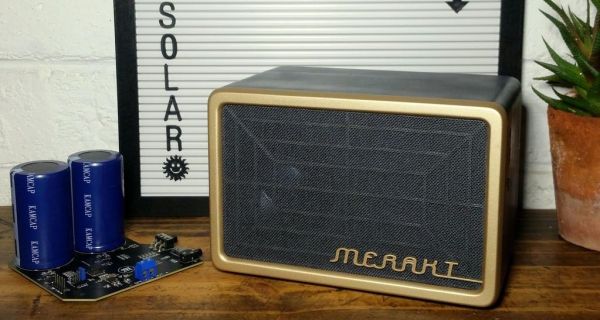
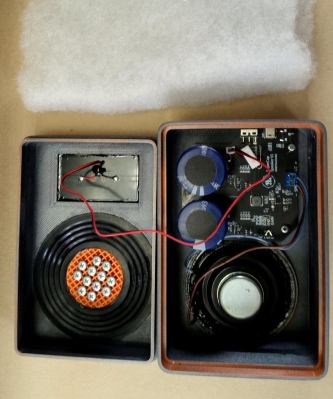
Inspired by many months of hours-long load shedding in South Africa, [JGJMatt] decided to make a portable speaker that can play tunes for hours on a single charge and even charge off the integrated solar panel to top the charge off. None of this should sound too surprising, but what differentiates this speaker is the use of two beefy 400 F, 2.7 V supercapacitors in series rather than a lithium-ion battery on the custom PCB with the Ti TPA2013D1 Class-D mono amplifier.

Insides of the speaker prior to stuffing and closing.

The reason for supercapacitors is two-fold. The first is that their lifespan is much longer than that of Li-ion batteries, the second that they can charge much faster. The disadvantages of supercapacitors come in the form of their lower energy density and linear discharge voltage. For the latter issue the TPA2301D1 amplifier has a built-in boost converter for an input range from 1.8 – 5.5 V, and despite the lower energy density a solid 6 hours of playback are claimed.

Beyond the exquisitely finished 3D printed PETG shell and TPU-based passive bass radiator, the functionality consists out of a single full-range speaker and an analog audio input (TRS jack and USB-C). To add Bluetooth support [JGJMatt] created a module consisting out of a Bluetooth module that connects to the USB-C port for both power and analog audio input.

Charging the speaker can be done via the USB-C port, as well as via the solar panel. This means that you can plug its USB-C port into e.g. a laptop’s USB-C port and (hopefully) charge it and play back music at the same time.

For those feeling like replicating this feat, the Gerbers, bill of materials, enclosure STLs, and everything else needed can be be found in the tutorial.

Continue reading “Building A Solar-Powered, Supercapacitor-Based Speaker”

Learning About Capacitors By Rolling Your Own Electrolytics

Ever wonder what’s inside an electrolytic capacitor? Many of us don’t, having had at least a partial glimpse inside after failure of the cap due to old age or crossed polarity. The rest of us will have to rely on this behind-the-scenes demo to find out what’s inside those little aluminum cans.

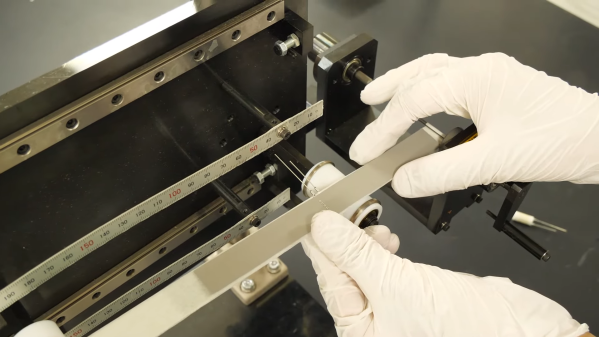
Perhaps unsurprisingly, it’s more aluminum, at least for the electrolytics [Denki Otaku] rolled himself at the Nippon Chemi-Con R&D labs. Interestingly, both the anode and cathode start as identical strips of aluminum foil preprocessed with proprietary solutions to remove any oils and existing oxide layers. The strips then undergo electrolytic acid etching to create pits to greatly increase their surface area. The anode strips then get anodized in a solution of ammonium adipate, an organic acid that creates a thin aluminum oxide layer on the strip. It’s this oxide layer that actually acts as the dielectric in electrolytic capacitors, not the paper separator between the anode and cathode strips.

Winding the foils together with the paper separator is pretty straightforward, but there are some neat tricks even at the non-production level demonstrated here. Attachment of lead wires to the foil is through a punch and crimp operation, and winding the paper-foil sandwich is actually quite fussy, at least when done manually. No details are given on the composition of the electrolyte other than it contains a solvent and an organic acid. [Denki] took this as an invitation to bring along his own electrolyte: a bottle of Coke. The little jelly rolls get impregnated with electrolyte under vacuum, put into aluminum cans, crimped closed, and covered with a heat-shrink sleeve. Under test, [Denki]’s hand-rolled caps performed very well. Even the Coke-filled caps more or less hit the spec on capacitance; sadly, their ESR was way out of whack compared to the conventional electrolyte.

There are plenty more details in the video below, although you’ll have to pardon the AI voiceover as it tries to decide how to say words like “anode” and “dielectric”; it’s a small price to pay for such an interesting video. It’s a much-appreciated look at an area of the industry that few of us get to see in detail.

Continue reading “Learning About Capacitors By Rolling Your Own Electrolytics”

An SMD Capacitor Guide

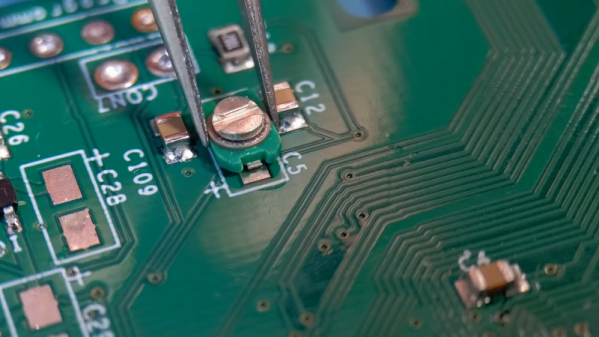
For electronics, your knowledge probably follows a bit of a bell curve over time. When you start out, you know nothing. But you eventually learn a lot. Then you learn enough to be comfortable, and most of us don’t learn as much about new things unless we just happen to need it. Take SMD components. If you are just starting out, you might not know how to find the positive lead of an SMD capacitor. However, if you’ve been doing electronics for a long time, you might not have learned all the nuances of SMD. [Mr SolderFix] has been addressing this with a series of videos covering the basics of different SMD components, and this installment covers capacitors.

If you are dyed-in-the-wool with SMD, you might not get a lot out of the video, but we picked up a few tips, like using a zip tie for applying flux. The video starts with an examination of the different packages and markings. Then it moves on to soldering the components down.

Continue reading “An SMD Capacitor Guide”