DIY Lap Counters For Drone Racing

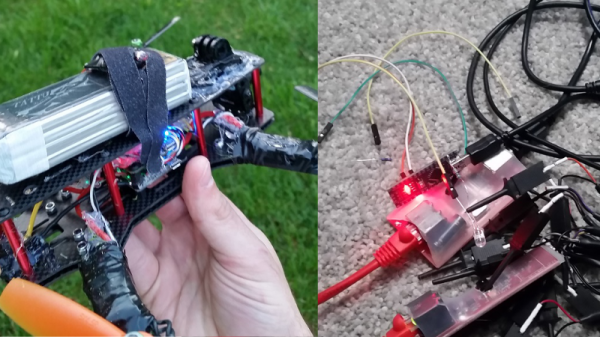
Drone racing is a very exciting sport, in which there is a lot of room for hackers and makers to add that special sauce into the mix. Usually the aerial finish line requires special race-timing hardware to do the lap counting, and there are timing gate transponders available for around $40. In his project CoreIR and CoreIR-Uplink, [Michael Rickert] decided to reverse engineer the IR Protocol that goes into these beacons and made a homebrew version that mimics the original. The transponders send a 7-digit number out repeatedly to a receiver at the finish line as the UAV passes by and that helps track how fast drone pilots flew around a race track. The hack involves flipping an IR LED ON and OFF with the correct timing, and [Michael Rickert] confesses that it was not as easy as he had imagined.

Using a logic analyser he was able to capture the modulated 38Khz carrier signal and extract the timing from the original beacon, but it took a number of iterations to get the code just right. The IRRemote library has a ‘sendRaw’ function which is quite helpful in these situations and was employed for the task. He experimented with a number of Arduino boards to power the project, before finally going with the Arduino Pro Mini. He has shared the code on github, along with photos of the finished hack which replaces the original circuit. The final sketches include functions to generate the 7-digit code to uniquely identify the quadcopter, which completes the hack in itself.

If that was not enough, he’s gone a step further by coding and sharing a desktop client as well, which turns this hack into a full-fledged project and should prove quite useful for drone racers on a budget. The app is written in NodeJS and packaged using the electron framework, a choice that makes for a very simple way to create cross-platform desktop applications.

A build tutorial is available for you to get started, and if drone racing seems a bit tame, check out Drone Wars for a little more carnage.

Neural Networks Walk Better Than Humans For Game Animation

Modern day video games have come a long way from Mario the plumber hopping across the screen. Incredibly intricate environments of games today are part of the lure for new gamers and this experience is brought to life by the characters interacting with the scene. However the illusion of the virtual world is disrupted by unnatural movements of the figures in performing actions such as turning around suddenly or climbing a hill.

To remedy the abrupt movements, [Daniel Holden et. al] recently published a paper (PDF) and a video showing a method to greatly improve the real-time character control mechanism. The proposed system uses a neural network that has been trained using a large data set of walking, jumping and other sequences on various terrains. The key is breaking down the process of bipedal movement and its cyclic behaviour into a series of sub-steps or phases. Each phase translates to a natural posture for the character while moving. The system precomputes the next-phases offline to conserve computational resources at runtime. Then considering user control, previous pose of the character(including joint positions) and terrain geometry, the consequent frame of the animation is computed. The computation is done by a regression network that calculates future position of the joints and a blending function is used for Motion Matching as described in a presentation (PDF) and video by [Simon Clavet]. Continue reading “Neural Networks Walk Better Than Humans For Game Animation”
Google AIY: Artificial Intelligence Yourself

When Amazon released the API to their voice service Alexa, they basically forced any serious players in this domain to bring their offerings out into the hacker/maker market as well. Now Google and Raspberry Pi have come together to bring us ‘Artificial Intelligence Yourself’ or AIY.

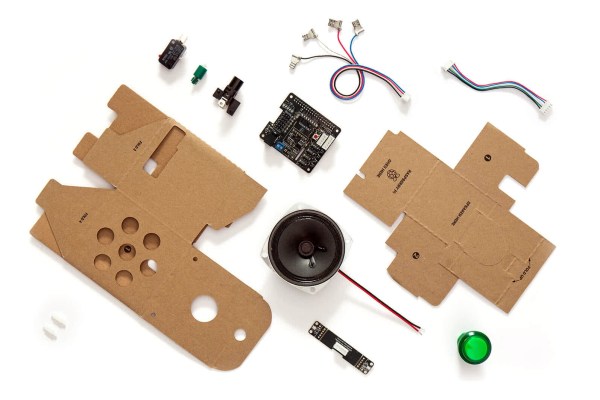
A free hardware kit made by Google was distributed with Issue 57 of the MagPi Magazine which is targeted at makers and hobbyists which you can see in the video after the break. The kit contains a Raspberry Pi Voice Hat, a microphone board, a speaker and a number of small bits to mount the kit on a Raspberry Pi 3. Putting all of it together and following the instruction on the official site gets you a Google Voice Interaction Kit with a bunch of IOs just screaming to be put to good use.

The source code for the python app can be downloaded from GitHub and consists of a loop that awaits a trigger. This trigger can be a press of a button or a clap near the microphones. When a trigger is detected, the recorder function takes over sending the stream to the Google Cloud. Speech-to-Text conversion happens there and the result is returned via a Text-To-Speech engine that helps the system talk back. The repository suggests that the official Voice Kit SD Image (893 MB download) is based on Raspbian so don’t go reflashing a memory card right away, you should be able to add this to an existing install.

Continue reading “Google AIY: Artificial Intelligence Yourself”

Adding A Debugger To A Teensy 3.5/3.6

The Teensy is a powerful ARM-based development board with loads of features that can do fun stuff with USB as well. Like many dev boards, it uses a less powerful processor as an interface. Teensy designer [Paul Stoffregen] added a debug header to allow direct SWD JTAG access to the main chip, but the interface microcontroller has to be silenced for that to work, and the code to do so is still in progress.

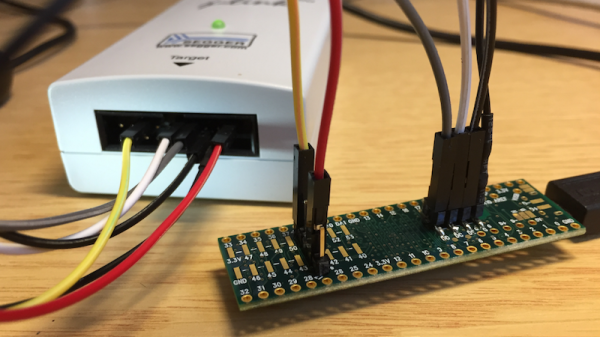
Impatient, [Erich Styger] documents the changes he made to add support for the J-Link SWD protocol by removing the offending NXP Kinetis KL02Z that serves as the as the onboard interface and bootloader that helps the Arduino IDE talk to the K64F which is the main chip. After the KL02Z was removed, [Erich] populated the debug headers and then wired up the Segger J-Link to the board and tested it out with Eclipse, GDB, and standard SWD debug tools.

The end result is a Cortex M4F board that can work with standard tools at a third of the price of the Kinetis’ development board. [Paul Stoffregen] confirms that the debugging functionality will be added to the bootloader code soon but until then, a hardware hack is a working, if brutal, approach to debugging on the platform.

More information on the JTAG interface is available for the interested. And if Teensy isn’t your thing, you might consider an STM32-based development board.

Vintage Vending Machine Makes The Perfect Gift

Nothing says ‘I Love You’ like an old vending machine, and if it is a restored and working vintage Vendo V-80 cola dispenser then you have yourself a winner. [Jan Cumps] from Belgium was assigned the repair of the device in question by a friend. He started off with just a working refrigerator and no electronics. In a series of repairs, he began with replacing the mechanical coin detector’s switches with optical and magnetic sensors to detect the movement of the coin. These sensors are in turn connected to an Arduino which drives the dispensing motor. The motor itself had to be rewound as part of the repair. Since the project is on a deadline, the whole thing is finished using protoboards and through-hole parts. The final system works by dispensing one frosty bottle every time a coin is inserted.

In contrast to most vending machine repairs, this project was a simple one. Instead of using an off-the-shelf coin detector, a simple LED and photodiode pair brought the hack to life. This could easily be adapted to any machine and even be used to create a DIY vending machine on the cheap.  Continue reading “Vintage Vending Machine Makes The Perfect Gift”

The Connected Calculator With ESP8266

Calculator hacks have been around for a while now and we have seen the most action around the Texas Instruments TI-83 and TI-84. When [johnkimdinh] found a way to add an ESP8266 to a scientific calculator (machine translation) and this time around it’s a Kenko FX-82M calculator which appears eerily similar to the Casio FX-82M.

In his video, [johnkimdinh] demonstrates his hack which has a web interface for transmitting numbers to the calculator. This is accomplished by accessing the keypad using the ESP8266 GPIOs and it is essentially the equivalent of typing remotely. The rest of the circuit remains intact so bit more work and the other functions should be available remotely as well.

Perhaps this hack is best suited as a dedicated display for outputting measurements and other data which requires some type of post-processing to be human readable. If the next iteration delivers the ability to read from the display we’ll really be getting somewhere. We envision such calculators being used as the future of education where the connectivity is used to retrieve an array of real time parameters for assignments. Add a few sensors into the mix and it could be the next big thing for STEM.

In the past, we have had calculators brought to life to do vector and matrix math and ESP8266s connected to TI-84 calculators. After all, everyone has calculators, they simply must be hacked!

Continue reading “The Connected Calculator With ESP8266”

Heavy Metal Detectors

Helsinki has a strong underground Heavy Metal scene, so what better way to show it off than to have listeners literally unearth the local sounds themselves with converted metal detectors that play, naturally, Metal? [Steve Maher] built these modified detectors and handed them to a bunch of participants who went on exploratory walks around the city. The tracks from local bands changed as the user moved from one concealed metallic object to the other to create the experience of discovering the hidden soundscape of the land.  Continue reading “Heavy Metal Detectors”