Maker Faire NY: Programmable Air

At this year’s World Maker Faire in New York City we’re astonished and proud to run into some of the best projects that are currently in the running for the Hackaday Prize. One of these is Programmable Air, from [Amitabh], and it’s the solution to pneumatics and pressure sensing in Maker and IoT devices.

The idea behind Programmable Air is to create the cheapest, most hacker-friendly system for dealing with inflatable and vacuum-based robotics. Yes, pneumatic robotics might sound weird, but there’s plenty of projects that could make use of a system like this. The Glaucus is one of the greatest soft robotic projects we’ve ever seen, and it turns a bit of silicone into a quadruped robot with no moving parts. The only control you have over this robot is inflating one side or the other while watching this silicone slug slowly crawl forward. This same sort of system can be expanded to a silicone robot tentacle, too.

On display at the Programmable Air booth were three examples of how this device could be used. The first was a simple pressure sensor — a weird silicone pig with some tubing coming out of the nostrils was connected to the Programmable Air module. Squeeze the pig, and some RGB LEDs light up. The second demo was a balloon inflating and deflating automatically. The third demo was a ‘jamming gripper’, basically a balloon filled with rice or coffee grounds, connected to a pump. If you take this balloon, jam it onto an odd-shaped object and suck the air out, it becomes a gripper for a robotic arm. All of these are possible with Programmable Air.

Right now, [Amitabh] has just finalized the design and is getting ready to move into mass production. You can get some updates for this really novel air-powered robotics platform over on the main website, or check out the project over on Hackaday.io.

Prusa Introduces A Resin Printer At Maker Faire NY

For one reason or another, the World Maker Faire in New York has become the preeminent place to launch 3D printers. MakerBot did it with the Thing-O-Matic way back when, and over the years we’ve seen some interesting new advances come out of Queens during one special weekend in September.

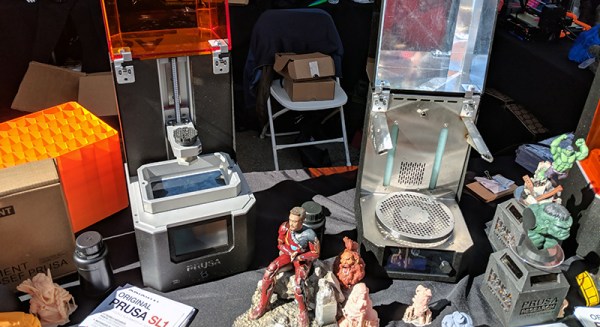
Today Prusa Research announced their latest creation. It’s the resin printer you’ve all been waiting for. The Prusa SL1 is aiming to become the Prusa Mk 3 of the resin printer world: it’s a solid printer, it’s relatively cheap (kit price starts at $1299/€1299), and it produces prints that are at least as good as resin printers that cost three times as much.

The tech inside the SL1 is about what you’d expect if you’ve been following resin printers for a while. The resin is activated by a bank of LEDs shining through a photomask, in this case a 5.5 inch, 1440p display. Everything is printed on a removable bed that can be transferred over to a separate ‘curing chamber’ after the print is done. It’s more or less what you would expect, but there are some fascinating refinements to the design that make this a resin printer worthy of carrying the Prusa name.

Common problems with a masked SLA printer that uses LEDs and an LCD are the interface between the LCD and the resin, and the temperature of the display itself. Resin is not kind to LCD displays, and to remedy this problem, Prusa has included an FEP film on the bottom of the removable tank. This is a user-replaceable part (technically a consumable, at least to the same extent as a PEI build plate on a filament printer), and Prusa will be selling those as spare parts on their store. The LCD is also cooled; one of the major drawbacks of shining several watts of UV through an LCD is the lifetime of the display. Cooling the display helps, and should greatly increase the lifetime of the printer. All of this is wrapped up in an exceptionally heavy metal case with the lovely hinged UV-opaque orange plastic lid.

Of course, saying you’ve built a resin printer is one thing, but how do the prints look? Exceptional. The Prusa booth at Maker Faire was loaded up with sample prints from the machine, and they’re of the same high quality you would expect from the Form 3D printers that have been the go-to in the resin printer world. The Prusa SLA also works with big-O Open resins, meaning you’re not tied to a single resin vendor.

This is just the announcement of the Prusa resin printer, but they are taking preorders. The price for the kit — no word on how complex of a kit it is — is $1300, while the assembled printer is $1600, with the first units shipping in January.

The Un-Economy Of Building Your Own Spot Welder

If there’s one thing that brings hackers together, it’s the ability to build something for less money than it takes to buy it. It’s an exercise [Great Scott Gadgets] put to the test because he was playing around with some 18650 lithium cells, and had a huge need to put some tabs on batteries. This can be done by soldering, but to do it right you should really use a spot welder. Here’s the rub: you can buy a spot welder for about $250, and you can build one for a little less. So, the question: should [Great Scott] build or buy a spot welder? This wouldn’t be worth reading if he started off with an eBay order.

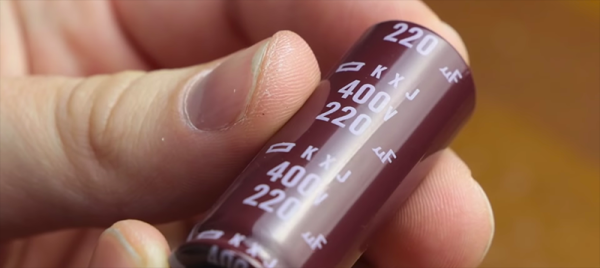
[Great Scott] designed this spot welder around a half-dozen supercaps, all securely held together with Kapton tape. This goes through a set of MOSFETs, and everything is controlled through an Arduino, a rotary encoder, and a dirt-cheap OLED display. It’s a simple enough circuit but a bit too much for perfboard, so [Great Scott] laid out a PCB and got a few boards for under $40. A bit of solder and some debugging later, and theoretically a spot welder was created.

After all that work, how did the spot welder work? Well, it didn’t. A slight misstep in the schematic meant this board didn’t have reference ground on the MOSFETs, so all this work was for naught. Of course, the only thing required to fix this board was a second board spin, as [Great Scott] probably bought more parts than necessary because that’s what smart people do. Still, he decided to cut his losses and shelve the project.

Continue reading “The Un-Economy Of Building Your Own Spot Welder”

The N64 Controller Gets Brass Gears Through 3D Printing

The controller for the Nintendo 64 is a masterpiece of design, and despite being more than two decades old, people are still using this controller competitively. Smash Bros, you know. Those competitive gaming enthusiasts are hard on their controllers, and after decades and tournaments, the analog stick will wear out. Previously, this required a rebuild or simply replacing the entire controller. Now there’s another option: a completely re-engineered analog stick, all made possible thanks to 3D printing.

[Nam Le] is a student at Cal Poly, and as would be expected for a very specific subset engineering students, had to track down new N64 controller every few months. The stick on these controllers wear out, so [Nam] decided to make the most durable joystick that has ever fit inside an N64 controller.

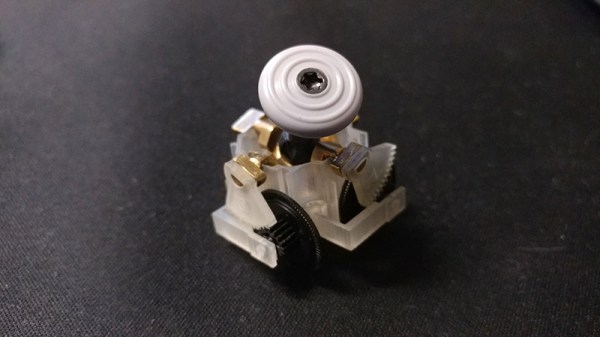
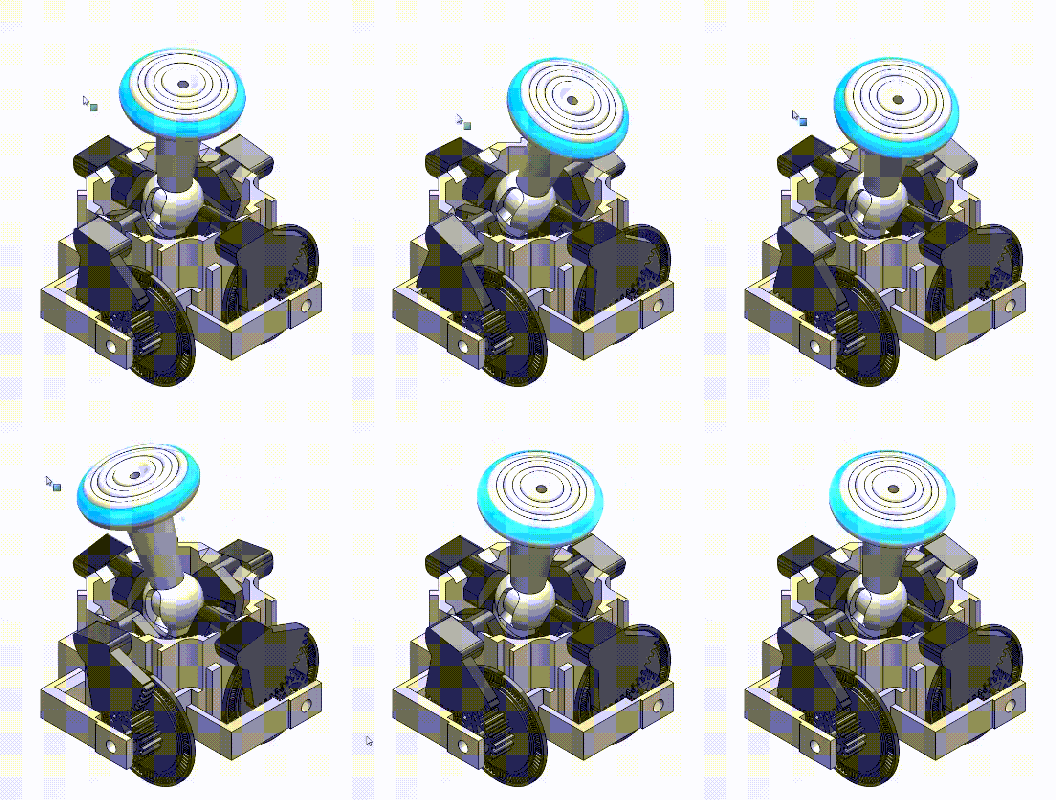
The design of the N64 stick is pretty simple, and exactly what you would expect if you’ve ever opened up an analog joystick. There’s the stick itself, which is connected to gears on the X and Y axes, which are in turn connected to encoders. This entire assembly sits in a bowl. After twenty years, the mating surface between the stick and the gears wear down, and the bowl becomes deformed. The solution here is obviously to engineer something sturdier, and despite what most of the 3D printing community will tell you, ABS and PLA just won’t cut it.

[Nam] re-designed the gears and bowl out of brass using lost-wax casting using 3D printed parts. These brass parts were mated with 3D printed gears and an enclosure for the bowl. The stick is nylon, an important design choice because this is the first part to wear down anyway, and it’s also the easiest part to replicate. Yes, this is designing an analog stick for the strength of materials and Real Engineering™ for those of you keeping track at home.

Right now, the joystick works as intended, and lasts much longer than the stock version. The goal now is to get this stick tournament-legal for some serious Smash time, in the hopes of not replacing controllers every few months.

New Part Day: Put An Alexa In Everything

The last great hope for electronics manufactures is smart home assistants. The Alexas and Siris and OK Googles are taking over homes across the country. At its best, it’s HAL 9000, only slightly less homicidal. It will entertain your children, and you can order cat litter just by saying you want cat litter. This is the future, whether we like it or not.

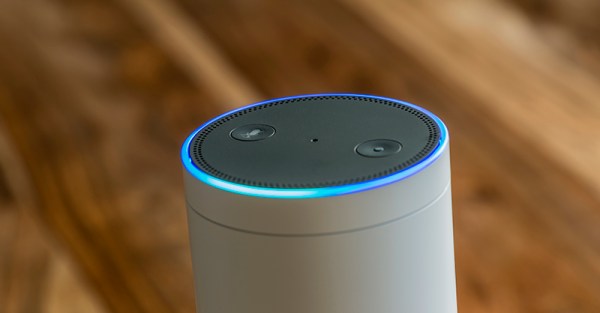
In an attempt to capture the market, Amazon has released the Alexa Connect Kit. This is an Amazon-Echo-On-a-Chip — a piece of hardware that adds Alexa to microwaves, blenders, and whatever other bit of home electronics you can imagine.

The Alexa Connect Kit is the hardware behind Amazon’s efforts to allow developers easy integration with Alexa. The options for adding Alexa to a product up until now have been using Zigbee to connect an Echo Show or Echo Plus, or simply giving a device the ability to connect to an Echo through Bluetooth. The Alexa Connect Kit, however, is a pure hardware solution that puts Alexa in anything.

Unfortunately you can’t get one yet. Right now, the Alexa Connect Kit is just a preview, and if you want to get your hands on one — or get any specs on this bit of hardware — you’ll need to apply to the developer program. We’ve signed up and will share and juicy details that come our way as part of the program.

According to the Wall Street Journal (try Google referral link if you hit the pay wall), several companies are already working on integrating the Alexa Connect Kit into their existing product lines. Hamilton Beach and Procter & Gamble are both working on something, although the press doesn’t say what kind of device will now be loaded up with a voice assistant. Amazon, however, has a microwave using the technology that the owner can, “command the microwave to do things like defrost a half-pound of chicken, or set it up to automatically reorder a favorite type of popcorn on Amazon”.

Despite the sparse details, this is relatively game-changing when it comes to the world of homebrew electronics. We’ve seen dozens of projects using hacked Raspberry Pis and other microcontrollers to at Alexa to hacked coffee machines, to shoot Nerf darts, and to control a projector. If you can actually get one of these Alexas-on-a-chip, all those projects could be done with one simple piece of hardware.

This Keyboard And Mouse Also Gives You A Workout

The Ergonomic Handheld Mouse / Keyboard Alternative from [Shervin Emami] is an all-in-one solution for your keyboarding and cursor moving needs.

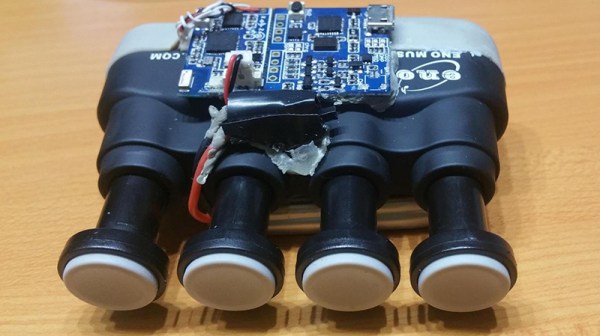
The core of this build is a ‘grip-strengthening’ device that’s sold to guitarists. While the actual benefit of these devices for guitarists is questionable — there are a few anecdotes any music teacher will tell you about classical pianists ruining their hands with similar devices — the device itself can be converted into a fantastic chording keyboard. All you really need for a full-functioned keyboard is a few buttons in a rugged shell, and this ‘grip strengthener’ has that going in spades.

Underneath the plungers for each button [Shervin] installed a magnet and a magnetic sensor, meaning these buttons are analog, and shouldn’t wear out ever. With just a little bit of code on a Tiny BLE board these analog sensors can become a keyboard, a quadcopter controller, an interface for your VR setup, or anything else that can be controlled with a bunch of buttons.

Not to outdo himself, [Shervin] also managed to add some cursor control functionality to this build. This is done via the IMU onboard the Tiny BLE board, and by all accounts it works great.  You can check out a video of this build pretending it’s both a keyboard and a mouse below.

Continue reading “This Keyboard And Mouse Also Gives You A Workout”

Join Hackaday For A Night Of Pre-Maker Faire Hacks

This weekend is the World Maker Faire in New York, and Hackaday will be there looking at the latest and greatest projects from makers around the globe. We’ll also be buying bottles of water for five dollars, but that’s another story entirely.

As always, this year’s World Maker Faire will be held at the wonderful New York Hall of Science, and the lineup is spectacular. There will be cosplay, and Adam Savage will be there with a half dozen Junior Mythbusters. There will be a twenty-six foot tall hydraulic hand trucked in from Burning Man. You’re looking at the greatest event in STEAM education since the Bay Area Maker Faire last May.

Hackaday has a fantastic New York community and we’re holding a meetup this Thursday to sync up with Maker Faire. Guess what?  You’re invited!

We’re teaming up with our friends at Kickstarter to bring you an awesome night of hardware builds, music hacks, snacks, and more. While this is an informal event, we do have a few people who will be bringing their latest hacks to show off. Nick Chelyapov, a designer turned gear head who designed an Arduino-based synthesizer and drum machine. This isn’t a toy, but it’s also not a complicated mess of patch cables and eurorack modules. The Bitty is a real instrument that’s easy enough for anyone to pick up and make bleep bloops.

Also confirmed for this meetup is Nick Yulman, an artist who works with sound and interactive media in a variety of contexts. He’s gearing up to install his robotic musical instruments in the Areté Gallery in Greenpoint, Brooklyn. But this week he’ll be showing us how musical robots helped him stop worrying and love digital music.

This isn’t an event to be missed. You can RSVP for the event over on Eventbrite, and be sure to bring whatever project you’re working on. It’s going to be an entire night of drinks and hacks, just the thing before Maker Faire really gets rolling. Once the weekend hits, find us at the Faire; several of us from the Hackaday crew will be wandering the grounds looking for awesome hardware projects. Stephen Tranovich is even giving a talk about the Hackaday Prize on Sunday at 11. See you at the Faire!