MIDI Controlled Speak-and-Spell

We all love the Arduino, but does the Arduino love us back? There used to be a time when the Arduino couldn’t express it’s deepest emotions, but now that [Nick] hooked up a speech synthesis chip from a Speak & Spell, it can finally whisper sweet robotic nothings to us.

The original 1980s Speak & Spell contained a fabulously high-tech speech synthesizer from Texas Instruments. This innovative chip predated [Stephen Hawking]’s voice and went on to be featured in the numerous speech add-ons for 80s microcomputers like the Apple II, BBC Micro, and a number of Atari arcade games.

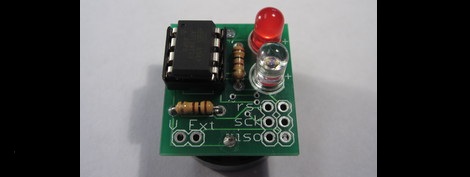
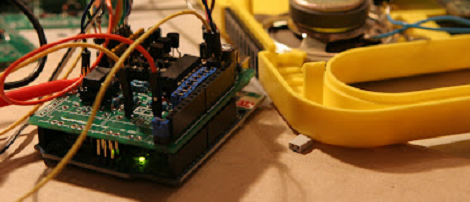
[Nick] has been working on his Speak & Spell project for several months now, and he’s getting around to testing the PCBs he made. By his own admission, connecting an Arduino to a Speak & Spell is a little difficult, but he’s got a few tricks up his sleeve to get around the limitations of the hardware. The final goal of [Nick]’s project is a MIDI-controllable Speak & Sound speech synth for the Arduino. This has been done before, but never from a reverse-engineered Speak & Spell.

You can check out [Nick]’s progress in interfacing the Speak & Spell speech chip after the break. There’s still work to do, but it’s still very impressive.
Continue reading “MIDI Controlled Speak-and-Spell”

Yet Another 3D Printer

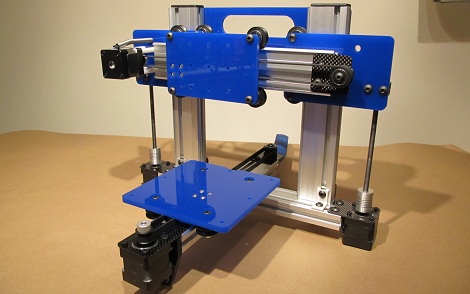
What would you do if you wanted to demonstrate a linear bearing system? If you’re like [Bart] the obvious solution is building a tiny little 3D printer. [Bart]’s Quantum ORD Bot is constructed out of a previous project of his, the MakerSlide linear bearing system.

The idea of a printer made out of MakerSlide materials came from [Bart]’s invitation to ORD Camp. The fact that this build went together in about 5 hours speaks volumes about the simplicity of the MakerSlide system. Right now, the printer is designed for NEMA 14 motors, but for larger builds there’s plenty of room for the larger NEMA 17 stepper motors. [Bart] put up a build log for his printer up on the buildlog.net forums.

The MakerSlide system has already been used in an open source laser cutter project, but [Bart] really just wanted something to demonstrate his linear bearing system. We like the bot anyway; not enough stuff is made out of aluminum extrusion these days.

[Bart] is going to be showing off his bot at the Chicago hackerspace Pumping Station: One tonight, February 8th. Stop by and check it out. Snap a few pictures for us and we’ll put them up.

EDIT: [gigawatts121] was kind enough to send in a picture of the printer at Pumping Station: One. There’s also a video of a calibration cube being printed courtesy of [David] in the comments. Check that out after the break.

Continue reading “Yet Another 3D Printer”

Color Sensor Gives The RGB Values Of Anything

[Rick Osgood] wanted to build a color sensor that could be held up to any object to get RGB color values. He originally started with a photoresistor and a few LEDs, but couldn’t get that to work reliably. [Rick] finally completed his color sensor after finding a digital luminosity sensor on Adafruit, ending up with a pretty accurate piece of hardware to judge the color of something.

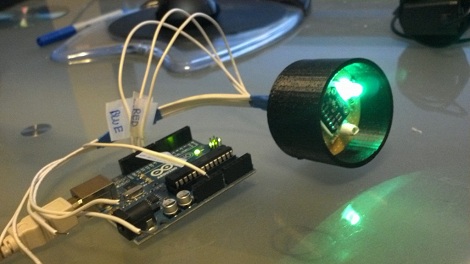
The idea behind the color sensor is to light up red, green, and blue LEDs and see how much light is reflected back from the object with a luminosity sensor. [Rick] chose an Arduino to do all the heavy lifting for the light sensor and activating the LEDs.

After a few tests [Rick] got his color sensor working, but it’s not up to par with what he had expected. This isn’t really a problem: the LEDs probably don’t have the same brightness and the luminosity sensor doesn’t respond evenly across the entire rainbow. Those things can always be fixed in software, though. It’s a nice project that could serve as part of a prototype for this color picker pen.

Building LED Walls On The Cheap

Around this time last year, [KopfKopfKopfAffe] was enlisted as a set designer and was told to build some sort of light effects for electronic music parties. The budget for the project wasn’t much at 200 Euros, but he did manage to build decent 5×5 RGB LED matrix that is fully controllable by a computer.

[KopfKopfKopfAffe] didn’t have the time or money to wait for manufactured PCBs, so a bunch of perfboard was placed in a CNC mill with a pen to act as a plotter. All the lines that needed soldered were drawn on by the mill, a feat that probably saved hours of looking at the design before committing solder to iron.

A total of five boards were constructed, each one capable of controlling five RGB LEDs. Each board can be dasiy-chained with an RS-232 serial connection for further expansion. The only thing that’s needed to control the matrix is 17 bits that includes an address and RGB color data for each LED. The system only cost about 10 Euros per node, but we think that could be significantly reduced by leaving out the Molex and DB-9 connectors. [Kopf] project turned out very nice, check it out after the break.

Continue reading “Building LED Walls On The Cheap”

Play Hide-and-go-seek With Infrared LEDs

Although we’re sure they exist, we wouldn’t want to meet anybody that can’t look back fondly on the halcyon days of youth that included playing hide-and-go-seek. Some kids never grow up and continue the tradition with geocaching or orienteering, but that sense of limitless discovery wanes over time. [Kurt] came up with a small scavenger hunt beacon that brings back the unending wonder that accompanies the unknown.

The beacon is just a simple ATtiny13 that flashes a message with an invisible IR LED. To receive the messages, [Kurt] made a scavenger decoder shield for an Arduino. The decoder includes a phototransistor and a 20×4 LCD display. All [Kurt] needs to do is hold the decoder up to the beacon for the text in the firmware of the ATtiny to be displayed. The beacon is only one inch square and powered by a watch battery, so it can be hidden anywhere.

[Kurt] suggests that the text of one beacon should provide the clue to the next. We’re thinking this is just a great excuse for a walk in the park. You can check out [Kurt]’s IR decoder getting data from a beacon after the break.

Continue reading “Play Hide-and-go-seek With Infrared LEDs”

Replacing A Phantom Limb With A Kinect

Nearly everyone has heard of phantom limb syndrome. It occurs sometimes after a limb is amputated, but the mind of the patient still thinks that the limb is attached. Generally regarded as a mix-up in the wiring of the damaged nerves, a phantom limb can be very painful. [Ben] has been working on a way to alleviate some of the pain and frustration associated with a phantom limb and fortunately for us he went for a Kinect, VR goggles, and gyroscope build.

Today, most therapies for phantom limb syndrome use a Ramachandran Mirror Box. The theory behind the mirror box is pretty simple – if someone recently lost a hand, just insert one hand in one side of the box and the arm stump on the other side. Looking into the box from the side with the good hand will trick the patient’s brain into thinking the amputated hand is still there. It’s a good therapy that has been very successful, but [Ben] thought he could do something that is a little more immersive.

[Ben]’s project uses a Kinect and VR goggles to put the patient in a virtual environment. With the help of a few gyroscopes, the patient gets a virtual representation of their whole self projected into their goggles. The technique isn’t terribly different from VR phobia treatment, although there’s much more electronics and math involved in [Ben]’s build. The first test subject said his pain was going down, so it looks like he might have a success on his hand (no pun intended).

Check out the demos of [Ben]’s treatment plan after the break.

Continue reading “Replacing A Phantom Limb With A Kinect”

Improving Headphones By Voiding Warranties

[Dan] had been wanting a pair of Bluetooth headphones for quite a while. Most of the reviews for wireless headphones in the $50-$80 range complained of tinny sound and dropped bass. Nevertheless, he stumbled upon a $20 pair of headphones with similar reviews and realized that he could switch out the driver and make a decent pair of cans.

The donor drivers came from a pair of Sennheiser HD 540 headphones. These are very respectable headphone speakers that cost about what you would expect for pro audio gear. To to get Bluetooth working with the Sennheisers, [Dan] removed the PCB and battery enclosure and attached them to the headband with velcro.

For his build, he had to cut the cable on the Sennheisers and solder them to the Bluetooth board. There was never any danger of ruining a good pair of headphones, though. If he screwed up he was only out a headphone cable. Now [Dan] has a nice pair of Bluetooth headphones that can reproduce bass. Not a bad deal for a $20 pair of headphones.