DIY Ultrasonic Plastic Welding

Here’s something that may be of interest to all the reprappers, vacuum formers, and other plastic fabbers out there: ultrasonic welding of plastics. If you’ve ever wanted to join two pieces of plastic without melting them together with acetone or screwing them together, [circuitguru] is your guy.

Ultrasonic welder setups are usually reserved for companies that don’t mind spending tens of thousands of dollars on a piece equipment. There are smaller versions made for heat staking – melting plastic pillars into rivets on the work piece – and [circuitguru] was lucky enough a somewhat reasonable price.

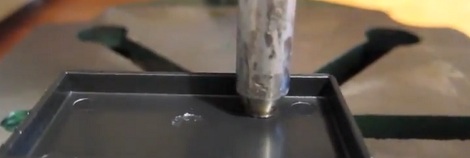
Because the heat staking gun was a handheld unit, a rotary tool drill press was put to work. The end result is a relatively inexpensive way to join two plastic parts without screws, glue, or solvents. The bond is pretty strong, too. Check out the video after the break to see [circuitguru] join two pieces of a plastic enclosure and try to tear them apart.

Continue reading “DIY Ultrasonic Plastic Welding”

Controlling A Cute Ikea Night Light With Android On The Cheap

When [trandi]’s wife saw a cute night light at Ikea, she had to have it. She actually bought several of these for when her husband would inevitably crack one open and start tinkering with the microcontroller inside. The inevitable hack is pretty cool, and also gives us some ideas for interfacing with Android on the cheap.

The build started as an Ikea Spoka night light, an adorable anthropomorphized night light with a squishy silicone skin. Inside the Spoka are a dozen tri-color LEDs that [trandi] can cycle through with the push of a button. After deciding to control the lights inside the Spoka with an Android phone he reached for an IOIO Android breakout board. Fate intervened and [trandi] ended up with a ridiculously cheap Bluetooth modules that provides a simple serial connection to other Bluetooth devices.

The build reuses the blue, red, orange LEDs in the night light but replaces the no-name 8-pin micro with an ATtiny2313. [Trandi] wrote a small Android app to control the color over a Bluetooth serial connection. Check out his demo after the break.

Continue reading “Controlling A Cute Ikea Night Light With Android On The Cheap”

Tutorial: Replacing Bad Capacitors

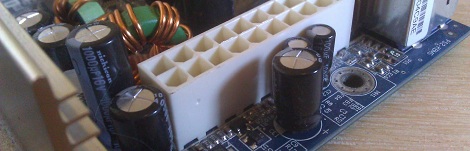
[glytch] sent in a tutorial on replacing dying capacitors on a motherboard, and we honestly can’t think of a better subject for an introductory tutorial. There’s nothing like having your friends think you’re a wizard for bringing broken electronics back from the grave.

For the repair a dead motherboard was [glytch]’s quarry. After taking a look at the board, he found a few bulging caps that were ready to burst. After ordering a few caps with the same voltage, capacitance, and dimensions (trust us, you want the same size cap), [glytch] took an iron and desoldering braid to the board and replaced a few caps.

Sooner or later, all capacitors are going to go break down. This isn’t always a bad thing – we picked up quite a few “broken LCD monitors” in the years after the capacitor plague and repaired them with a few dollars worth of caps. A lot of the caps in our late 80s computers have been replaced, and these machines are still chugging along.

Augmented Reality Using Pez Dispensers

[Johan] really got himself out of a bind with this one.

After his son started playing AppMates, he desperately wanted the requisite figures to complete the experience. AppMates is an iPad game where a child drives a small plastic car around a virtual environment displayed on the touchscreen. Unfortunately for [Johan]’s son, the officially licensed Cars characters would take at least three months to make it to his home in Sweden. [Johan] did the next best thing and made his own.

[Johan] took a pair of Cars Pez dispensers and took off the figure. The bottom of the character was covered with a bit of plastic from the base of the Pez dispenser and a little bit of conductive foam and was added to the body. Now [Johan]’s son can drive his toys around Radiator Springs just like he could with the official figurines. There’s also the aspect of not making a child wait months for a bit of plastic, so we’ll call this one a win for [Johan].

Continue reading “Augmented Reality Using Pez Dispensers”

Music Box Is Still Alive With Wavetable Synthesis

For all the wonder of dulcet tones coming from a century-old music box, we’ve got to admit that [Markus]’ wavetable synthesis build is still pretty impressive. Of course, the Internet cred gained by doing a demo of Still Alive helps too.

Wavetable synthesis stores a one cycle long waveform in RAM that can be played on a loop at varying frequencies. This technique has been around since the late 70s and can be found in a lot of the classic synths of the 80s and serves as the basis for Atari MOD music and the Game Boy chiptunes produced with Little Sound DJ

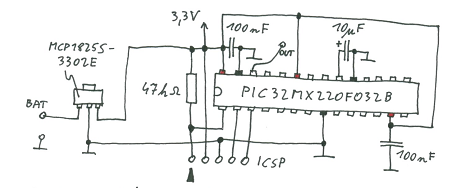
[Markus] found a pair of battery-powered laptop speakers and decided a music box would be a wonderful project. Inspired by [ChaN]’s ATtiny wavetable synthesizer, [Markus] decided to up the ante and use a PIC32 microcontroller to make the programming a little more digestable. The entire project (with an awesome dead bug soldering job) is nearly as large as the PIC itself.

[Markus] threw up the source code along with some Python scripts to convert waveforms and MIDI files into something the chip can understand. Before you check that out, be sure to look at the Still Alive demo.

Continue reading “Music Box Is Still Alive With Wavetable Synthesis”

Wii Nunchuck On An 80s Computer

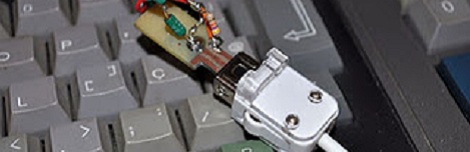
For a computer that debuted in the early 80s the MSX was a very respectable machine. Of course  these were the days that superimposing graphics over a video was an amazing feat, but  [Danjovic] and [Igor] are still having fun with their boxen. They designed a software interface for the Wii Nunchuck (translation) on their trusty MSX computer.

The plug coming out the back of a standard Wiimote is just a simple I2C bus. Many things can be done with this port from plugging in ancient controllers to controlling robots. [Danjovic] and [Igor] managed to write a routine in Basic that converts the I2C data coming out of the Nunchuck to data the MSX can understand without any modification of the hardware whatsoever.

All the guys needed to plug the Nunchuck into the MSX was a voltage divider and a few pull-up resistors between the computer and controller. They got data from both buttons, the joystick and the accelerometer in the Nunchuck and made a small program to display some sprites on the screen to demonstrate this. Check that out after the break.

Continue reading “Wii Nunchuck On An 80s Computer”

The TIM-8 Is The Smallest 8-bit Relay Computer Ever

Who wouldn’t want to build a computer out of relays? We do, but we’ve got too many projects on our plate already. It looks like [rory] has his priorities in order because his build is one of the most amazing we’ve ever seen.

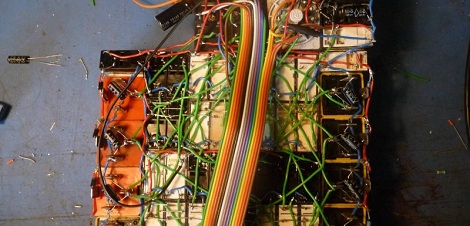
We’ve seen [Harry Porter]’s amazing relay computer and we’re familiar with [Konrad Zuse]’s WWII era endeavours. Relay computers aren’t exactly uncommon, but [rory] built the TIM-8, that may be the smallest 8-bit relay computer ever. The total relay count in the TIM-8 is 152 compared to [Harry Porter]’s 415 relays. This isn’t a fair comparison because [Harry]’s uses 4-pole relays, while the TIM-8 uses 1-pole relays, making the [rory]’s project 8 times smaller than [Harry]’s.

There are a couple of neat features that makes the TIM-8 really exceptional. Programs for the TIM-8 are written in a text editor on [rory]’s desktop,  then compiled and printed onto receipt paper. The TIM-8 has a few phototransistors to read the bands of white and black printed on the paper. [rory] has come a long way from a three bit adder made with relays and light bulbs.

Check out a ton of videos after the break. There’s a few demos of programs running off of receipt tape, calculating the Fibonacci sequence, and playing ‘Mary Had a Little Lamb’ on the relay sound card. Thanks to [J. Peterson] for sending this one in.

Continue reading “The TIM-8 Is The Smallest 8-bit Relay Computer Ever”