The Amazing Hacks Of World Create Day

For this year’s Hackaday Prize, we started an amazing experiment. World Create Day organized hundreds of hackerspaces around the world to come together and Build Hope for the future. This was an experiment to bring community shops and workspaces together to prototype their entries for the Hackaday Prize, and boy was it a success. We had hackerspaces from Portland to Pakistan taking part, and these are just a few of the amazing hacks they pulled off.

Students In Canada Repairing LipSyncs!

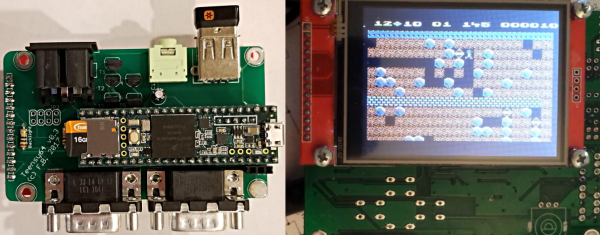
The theme of this year’s Hackaday Prize is to Build Hope, and students in Burnaby, British Columbia worked on some very cool projects that did just that. They created custom video game controllers, prototyped a few exoskeleton arms, and repaired LipSyncs. A LipSync is a mouth-operated joystick that allows a person to control a cursor on a computer with a minimum amount of head and neck movement. The idea behind the LipSync is to give wheelchair-bound people access to computers. This is important because an estimated one million people in Canada and the United States have limited or no use of their arms, rendering touchscreens inoperable.

The LipSync was an entry into the 2016 Hackaday Prize, and while it didn’t win the grand prize, it did bring a device that usually costs $3,000 down to about $300. That’s an order of magnitude of cost reduction that Builds Hope for the future. It’s amazing!

Raspberry Pis and Tschunk Slushies!

You might think that mixing alcohol and electronics might be dangerous, but not the people of kraut space, the hackerspace in Jena, Germany. For their World Create Day adventures, they made Tschunk Slushies! What is Tschunk? It’s rum and Club Mate, the definitive hacker drink! You might even say the addition of ethanol made it even more of a hacker drink. Ha ha.

While the Tschunk Slushies were mixing up, the team at the Jena Hackerspace set to work on their World Create Day project, an interface that logs their electricity usage. In reality this is just a photosensor taped to their power meter, but they’ve hooked everything up to a Raspberry Pi, giving them the ability to monitor electricity consumption over the Internet. That’s amazing. Governments and utility companies have spent billions of dollars developing ‘smart’ electricity meters, but a few ‘hackers’ have created their own in just hours! It’s almost as if that ‘hacker’ title isn’t bad at all, and being a ‘hacker’ is a good thing!

Making Laser Cutters Safe And Soldering Keychains

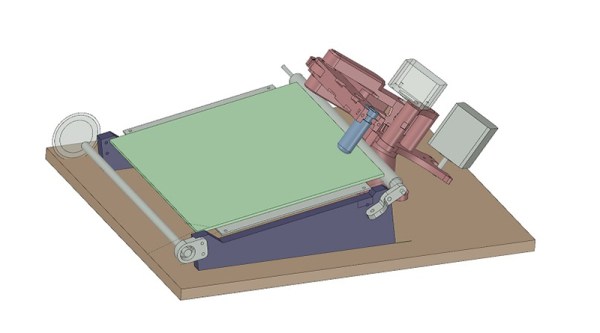
You’ll shoot your eye out, kid! Or at least you stand a decent chance of suffering irreversible eye damage if you’re running a laser cutter with the lid open. And for some reason, most of the cheap laser cutters out there come without safety interlocks if you can believe it. For his World Create Day Project, [RoboterFreak] made a laser cutter more secure. By putting a relay, microswitch, and Arduino in line with the laser tube, you can safely modify an off-the-shelf laser cutter to be vastly safer.

It’s not much, but it goes a long way toward making a laser cutter safe. With the simple addition of a switch, this laser cutter is now a machine that can be used within a quarter mile of children. This is something simple that you should do at your own hackerspace.

But World Create Day and the Hackaday Prize isn’t only about fretting over safety concerns. The folks at Thimble.io had fun soldering their own keychain flashlight. This is an awesome way to learn how to solder and hardware development. That’s exactly what we’re looking for in this year’s Hackaday Prize, by the way. We want people who will Build Hardware to Change The World.

The Hackaday Prize is running until November, and there’s still plenty of time to get your entry in. It doesn’t even have to be related to World Create Day, the most amazing virtual congregation of hackerspaces the world has ever seen. You can start your entry for the Hackaday Prize right here, build a project that will Build Hope, and be in the running to win tens of thousands of dollars. It’s an amazing contest, and we couldn’t have done it without the support of our amazing online community.

Detoured: RF And Film

The technology behind capturing aerial video is so unbearably cool. Not only do you have fancy cameras that cost as much as a car, you also have remote control camera mounts on helicopters and amazing microwave links going to the ground. This isn’t your typical FPV setup on a quadcopter; there are jet turbines and S-band transmitters here.

One of the people behind these amazing aerial shots is [Greg Johnson] of RF Film based out of Whiteman airport in sunny southern California. He’s done work for Black Panther, several fo the Fast & Furious films, Marvel movies, and is working on the new Top Gun reboot. As part of the Supplyframe Design Lab’s Detoured series, lead Staff Designer [Majenta Strongheart] visited RF Film to take a look at what goes into getting high-quality images from aerial video platforms.

[Greg] got his start at a helicopter company in Michigan, and eventually moved up to working for ESPN, shooting video of offshore speedboat races. There’s no other way to do this than by the air, but there are problems. You need to get video to the ground somehow, and that means microwave transmitters. [Greg] learned all of this by simply doing it, demonstrating some hacker cred. In fact, some of the first remote control systems he built were built around sprinkler systems.

Now, [Greg]’s work is significantly more advanced than modified sprinkler systems. He’s making custom hardware for 1080 cameras worn in a hat for drag racing. There are gimbals that roll a camera around its axis, and all of this is custom made in [Greg]’s shop.

There’s a lot of work that goes into producing video for aerial photography, and it’s much more complex than sticking a runcam on a quad. There’s antenna design, FCC regs, and custom robots that point the camera where it needs to be. RF Films is one of the best in the business, and we’d like to thank them for giving us a glimpse into their shop and workflow.

You can check out the video tour of the shop below.

Continue reading “Detoured: RF And Film”

Hackaday Links Column Banner

Hackaday Links: Some Sort Of Fool’s Day, 2018

A few years ago, writing for a blog called Motherboard of all things, [Emanuel Maiberg] wrote PC Gaming Is Still Way Too Hard. The premise is that custom building a gaming PC is too hard, because you have to source components and comparison shop. Again, this was written for Motherboard. Personally, I would have shopped that story around a bit more. Now, the same author is back again, telling us PC Building Simulator is way more fun than building a real computer. It’s my early nomination for worst tech article of the year.

Speaking of motherboards, This is a GoFundMe project to re-create the Amiga 4000 mainboard, with schematics. Building PCs is too hard, but the Amiga architecture is elegant. Some of these boards are dying due to electrolytic capacitor and battery leakage. This project is aiming to deconstruct an original A4000 board and turn it into Gerbers and schematics, allowing new boards to be manufactured. Building a PC is way too hard, but with this GoFundMe, you won’t have to design an entire system from scratch. Don’t worry, I already tipped off the Motherboard editors to this one.

Alright, story time. In 6th grade science class, the teacher was awesome. On the days when there was really no chance of any learning happening (the day before Christmas break, the last day of school), the teacher broke out the Electric Chicken. What’s an Electric Chicken? It’s a test tube rack, two wires, and a Wimshurst generator. “Here, grab ahold of this for as long as you can.” It got even cooler when you get a bunch of kids to hold hands and tell them pride is better than pain. Here’s a Kickstarter for a mini Wimshurst generator. It’s made out of PCBs! Hat tip to [WestfW] for finding this one.

It’s no secret that I get a lot of dumb press releases. Most of these are relegated to the circular file folder. It’s also no secret I get a lot of ICO announcements hitting my email. These, also, are trashed. I recently received a press release for an ICO that goes beyond anything else. ONSTELLAR is a blockchain-powered social media network for paranormal and metaphysical enthusiasts.  It’s the crypto for Coast to Coast AM listeners, UFO enthusiasts, and people who think PKE meters are real. This is it, we’ve reached peak crypto.

If you want to decapsulate an IC — and why wouldn’t you? — the usual way of doing things involves dropping acid, ego death, toxic chemicals, and a fume hood. There is another way. Here’s [A Menadue] decapping a quartz watch IC with just fire. The process is about as ‘hold my beer’ as you would expect. Just take a small butane torch, heat up a chip, and recover the die. A bit of ultrasonic cleaning later and you get a pretty clean chip. Microscope not included.

Autodesk Introduces Serpentine Router For Eagle

Since Autodesk acquired Eagle a few years ago, they’ve been throwing out all the stops. There is now a button in Eagle that flips your board from the front to the back — a feature that should have been there twenty years ago. There’s parametric part generation, push and shove routing, integration with Fusion 360, and a host of other features that makes Eagle one of the best PCB layout tools available.

Today, Autodesk is introducing something revolutionary. The latest version of Eagle (version 8.7.1) comes with a manual serpentine routing mode, giving anyone the same tools as the geniuses at Nokia twenty years ago.

An exclusive first look at Eagle’s new serpentine routing mode

The new serpentine routing mode is invoked via the SNAKE command. This brings up serpentine routing interface, where you can add nets and place your serpentine router. Click anywhere on the screen, and you can route around pads and traces to collect all the vias, hopefully netting a high score.

There are some tricks to this new mode. Control and Shift change the speed of serpentine routing, and the current zoom level changes the initial speed. As you route between vias, the serpentine router grows longer, making routing significantly more difficult, but if you’re up to the task you’ll eventually get a ‘You’re Winner’ screen.

This is just the innovation we’ve been looking for from Autodesk since their acquisition of Eagle. It’s not push and shove routing, and it’s not parametric part generation. Serpentine routing is the next big thing in EDA tools, and already this routing mode is on the upcoming feature list for KiCad. The KiCad version of serpentine routing will be pronounced, ‘sneak’.

A High Speed, Infinite Volume 3D Printer

One of the most interesting developments in 3D printing in recent memory is the infinite build volume printer. Instead of a static bed, this type of printer uses a conveyor belt and a hotend set at an angle to produce parts that can be infinitely long in one axis, provided you have the plastic and electricity. For this year’s Hackaday Prize, [inven2main] is exploring the infinite build volume design, but putting a new spin on it. This is a printer with a conveyor belt and a SCARA arm. The goal of this project is to build a printer with a small footprint, huge build volume, no expensive rails or frames, and a low part count. It is the most capable 3D printer you can imagine using a minimal amount of parts.

Most of the documentation for this build is hanging around on the RepRap forums, but the bulk of the work is already done. The first half of this build — the SCARA arm — is well-traveled territory for the RepRap community, and where there’s some fancy math and kinematics going on, there’s nothing too far out of the ordinary. The real trick here is combining a SCARA arm with a conveyor belt to give the project an infinite build volume. The proof of concept works, using a conveyor belt manufactured out of blue painter’s tape. These conveyor belt printers are new, and the bed technology isn’t quite there, but improvements are sure to come. Improvements will also be found in putting a small crown on the rollers to keep the belt centered.

All the files for this printer are available on the Gits, and there are already a few videos of this printer working. You can check those out here.

Emulating A Complete Commodore 64

When the Commodore 64 was released in 1982, it was a masterpiece of engineering. It had capabilities far outstripping other home computers, and that was all due to two fancy chips inside the C64. The VIC-II, the video chip for the C64, had sprites and scrolling, all stuffed into a single bit of silicon. The SID chip was a complete synthesizer on a chip. These bits of silicon made the C64 the best selling computer of all time, but have also stymied efforts to emulate a complete C64 system on a microcontroller.

[Frank Bösing] has just managed to emulate an entire C64 on a Teensy 3.6. The Teensy uses an exceptionally powerful microcontroller, but this is a labor of love and code.

The inspiration for this project comes from a reverse-engineered SID chip that was ported to the Teensy 3.2. The SID chip is the make it or break it feature of any C64 emulation, but the Teensy 3.2 didn’t have enough RAM for the most recent versions of reSID. With the release of the Teensy 3.6, [Frank] figured the increased amount of RAM would allow a complete C64 system, so he built it.

The new C64 emulator uses a Teensy 3.6, with a small add-on ‘shield’ (or whetever we’re calling them) to provide connectors for joysticks and the Commodore IEC bus. There’s audio out, support for USB keyboards, and support for an IL9341 SPI display or a regular ‘ol VGA display.

The entire development of this Commodore emulator has been documented over on the PJRC forums, and all the code is over on GitHub. It’s a fantastic piece of work, and as the video (below) shows, this is a real Commodore 64 that fits in your pocket.

Continue reading “Emulating A Complete Commodore 64”

Friday Hack Chat: Simulating Analog

Simulation is a valuable tool for any hardware developer. Instead of building hardware for a long debugging session, you can emulate a microcontroller and blink your lights with some Javascript. Instead of working on a Bluetooth protocol for your fitness wearable, you can just whip up some Javascript and get it working that way. Once all your Javascript is in order, then you can finally move over to hardware. It saves development time, and it saves money.

But this is all digital. What do you do if you’re working on an analog system? Lucky for you, there’s a system built for analog and mixed-signal analysis, and it’s been around for decades. This week we’re talking all about PSpice, a simulator for analog analysis that will give you voltages and currents across every node in a schematic.

For this week’s Hack Chat, we’re going to be talking about PSpice with [Abha Jain] and [Alok Tripathi]. [Abha] has worked at Cadence for 19 years and has been part of the PSpice R&D team for the last decade. She’s an MTech in VLSI Design Tools and Technology and holds multiple EDA patents. [Alok] graduated in 1993 with a B. Tech in Electrical Engineering. He started working at the Department of Atomic Energy in 1993 as a power supply and control system designer for particle accelerators. Currently, he’s working with Cadence and is the Product Engineering Architect for PSpice and OrCAD.

For this Hack Chat, we’re going to be discussing the challenges of system-level simulation, improving reliability, yield, and productivity of circuit design, the issues of Spice simulation, and answer the question, ‘on an infinite grid of one Ohm resistors, what is the resistance between two nodes a knight’s move apart?’ You are, of course, encouraged to add your own questions to the Hack Chat. You can do that by leaving the questions as a comment on this Hack Chat’s event page.

join-hack-chat

Our Hack Chats are live community events on the Hackaday.io Hack Chat group messaging. This week it’s going down at an unusual time: 8 AM Pacific, Friday, March 30th  Want to know what time this is happening in your neck of the woods? Have a countdown timer!

Click that speech bubble to the right, and you’ll be taken directly to the Hack Chat group on Hackaday.io.

You don’t have to wait until Friday; join whenever you want and you can see what the community is talking about.