If you hail from somewhere to which Australian beers have been exported, you could be forgiven for forming a view of the country based solely on TV adverts for Foster’s, or Castlemaine XXXX. Entertaining 30-second stories of wily young Aussies, and their inventive schemes to get their hands on a cool glass of the Amber Nectar.
Whether it’s an accurate depiction or not is something you’d have to ask an Australian, but it seems to provide a blueprint for at least some real-life stories. An Australian man in Sunbury, west of Melbourne, is to face a fine of up to A$9000 for using his multirotor to pick up a sausage in a bun from a stall in a superstore car park, and deliver it to him relaxing in his hot tub.
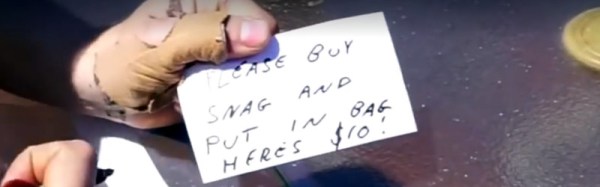
From one perspective the video of the event which we’ve posted below the break is a very entertaining film. We see the flight over houses and a main road to a local branch of Bunnings, an Australian hardware store chain. Their sausage sizzle is a weekly institution in which local non-profit groups sell barbecued sausages from a stall in the car park as a fundraiser. The drone lowers a bag on a string over people queuing, with a note saying “Please buy snag(Aussie slang for sausage) and put in bag, here’s $10”. Someone complies, and the tasty treat is flown back over suburbia to our hero in his tub. It’s fairly obviously a production with many takes and supporting actors rather than a real continuous flight, but the Australian Civil Aviation Safety Authority is nevertheless investigating it. Breaches of the rules are reported as being use of a drone within 30 metres of people, as well as flight beyond the line of sight and over a populated area. The original video has been taken down, but it lives on courtesy of Australian tech site EFTM.
Aside from providing our readership with entertainment courtesy of our Australian friends there is an important message to take away from this story. It’s likely that if they can adequately prove that their flight was never out of the line of sight they can escape some of the charges, but even so they have strayed into difficult territory. We’ve written about drone hysteria on the part of authorities before, and we are living in an age during which twitchy agencies have shown themselves willing to view what we know to be little more than grown-up toys as something akin to terror weapons. Of course people who use multirotors for wilful endangerment should be brought to book in no uncertain terms, but the line between that and innocuous use feels sometimes to have been shifted in an alarming direction. Please keep entertaining us with your multirotor exploits and hacks, but never take your eye off how what you are doing could be misconstrued by those in authority. We’d prefer not to be writing up drone stories involving fines.