3D Printed Post Modern Grandfather Clock

Projects can often spiral, not down or up, but out. For [Derek] he started playing around with a 3D printed escapement mechanism and thought it was a wonderful bit of engineering. But with a simple drum and weight, it only had a runtime of a few minutes. What started as a simple “can I make it run longer” spiraled into a full-blown beautiful grandfather clock.

A gear drive, a ratcheted winding sprocket, and a ball chain gave the clock about one hundred minutes of runtime. Adding a recharging mechanism was fairly straightforward. The weight automatically rewinds with the help of an ESP32, a motor, and some limit switches. While an ESP32 is absolutely overkill for this simple project, it was cheap and on hand. A quick hall effect sensor to detect the pendulum passing made it into a proper clock. Considering it’s a printed plastic clock, losing only 2-3 seconds per day is incredibly good. The whole thing is wrapped in a gorgeous wood case with a distinct design.

Surprisingly, everything was designed in OpenSCAD and Blender. [Derek] includes some great tips such as cleaning out the ball bearings to make them run smoother and suggestions on how to make a plastic clock move without binding. Clock making is a complex and sometimes arcane art, which makes watching the process all the more interesting.

An Ultra Low Power Dash Cam

Dash cameras are handy as they provide a video recording of interactions on the road. However, their utility comes from the fact that they are always recording while driving. This always-on means power draw. [Kuzysk] took it upon himself to cut that power draw by a factor of almost 70x.

He found his existing dash cam from MiVue consumed 3.5mA in idle which works out to be a whole amp-hour every 12 days. The custom version takes just 50uA which means it will draw an amp-hour in two years. The brains of the chip are formed by an ATmega328 and an LM2596M, which is a simple step-down regulator. Interestingly, [Kuzysk] purchased clones and original chips and found that the cheaper clones had a lower switching frequency but a much lower power draw. Programming an Arduino bootloader onto the board is fairly straightforward and [Kuzysk] kindly provides his code. It can detect the ACC voltage that’s on when the engine is on and is powered by a permanent 12v connection to the battery.

Overall it’s a straightforward hack that goes through rolling your own Arduino, optimizing for low power, and putting it all together into a polished project. Perhaps for the next version, he can use the ATmega to control a cheaper camera and make it smart.

Thanks to [Microchip makes] and [Abe] for the tip!

Minecraft Finally Gets Multi-Threaded Servers

Minecraft servers are famously single-threaded and those who host servers for large player bases often pay handsomely for a server that has gobs of memory and ripping fast single-core performance. Previous attempts to break Minecraft into separate threads haven’t ended successfully, but it seems like the folks over at [PaperMC] have finally cracked it with Folia.

Minecraft is one of (if not the most) hacked and modded games in history. Mods have been around since the early days, made possible by a dedicated group who painstakingly decompiled the Java bytecode and reverse-engineered it. Bukkit was a server mod back in the Alpha days that tried to support plugins and extend the default Minecraft. From Bukkit, Spitgot was forked. From Spitgot, Paper was forked, which focused on performance and gameplay mechanics. And now from Paper, Folia is a new fork focused on multi-threading.

A Minecraft world is split up into worlds (such as the nether or the overworld) and chunks. Chunks are 16x16xZ vertical columns of blocks. Folia breaks up sections of chunks into regions that can be ticked independently. Of course, moving to a multi-threaded model will cause existing plugins to fail. Very little was made thread-safe and the idea is that data cannot move easily across ticking regions. Regions tick in parallel, not synchronously.

Naturally, the people benefiting from Folia the most are those running servers that support hundreds of players. On a server with a vanilla-like configuration only around a hundred or so players can be online. Increasing single-core performance isn’t usually an option past this point. By moving to other cores, suddenly you can scale out significantly without restoring to complex proxying. Previous attempts have had multiple Minecraft servers and then synced players and entities between them. Of course, this can cause its own share of issues.

It’s simply incredible to us what the modding community continues to develop and create. It takes deep patience to reverse-engineer the system and rearchitect it from the outside. The Folia codebase is available on GitHub under a GNU GPL 3.0 license if you’d like to look through it.

Move Aside Yoda, It’s Furby’s Turn On Luke’s Back

When you want a backpack that turns heads and gets people talking, you can get ahead of the conversation with a talking backpack. [Nina] created a rucksack with the legendary babbler itself, the infamous Furby.

Believe it or not, no actual Furbies were sacrificed in the making of this backpack. The build uses an Arduino Nano, two servos, and a DFPlayer Mini for audio. A 3D printed faceplate is used for the iconic eyes and face. The code is fairly simple, waiting for a random delay and then triggering one of four effects. It can play a sound or blink and does its best to move the mouth while the sound is playing thanks to the handy busy line coming off the sound module. A unicorn children’s backpack offered a furry shell to stuff the electronics inside. A custom PCB makes the whole thing just a little neater internally.

Perhaps next [Nina] can integrate voice recognition so that the backpack can answer simple questions like an Alexa-powered Furby we’ve seen before.

Continue reading “Move Aside Yoda, It’s Furby’s Turn On Luke’s Back”

Generating Instead Of Storing Meshes

The 64kB is a category in the demoscene where the total executable size must be less than 65,536 bytes, and at that size, storing vertexes, edges, and normal maps is a waste of space. [Ctrl-Alt-Test] is a French Demoscene group that has been doing incredible animations for the last 13 years. They’ve written an excellent guide on how they’ve been procedurally generating the meshes in their demos.

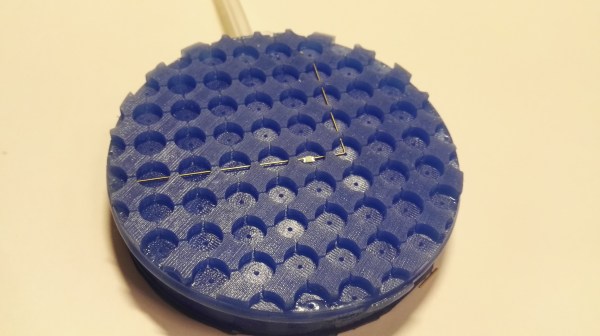
It all starts with cubes. By stacking them, overlaying them, reusing them, and tiling them you can get better compression than raw vertexes. Revolution was the next trick, as it uses just a few points, plotting it via Catmul-Rom splines, and revolving around an axis. The numbers are pairs of 32-bit floats and before compression, a detailed pawn on a chess board can weigh in at just 40 bytes. Just these few techniques can take you surprisingly far (as seen in the picture above).

They later worked on deforming cubes and placing them into a semi-randomized column, which happened to look a lot like plants. This isn’t the first generated vegetation we’ve seen, and the demoscene technique focused more on getting the shape and setting the mood rather than being accurate.

Signed distance fields are another useful trick that allows you to generate a mesh by implementing a signed distance function and then running a marching cubes algorithm on it. In a nutshell, a signed distance function just returns the distance to the closest point on a surface from a given point. This means you can describe shapes with just a single mathematical equation. As you can imagine, this is a popular technique in the demoscene world because it is so space efficient in terms of code and data. [Ctrl-Alt-Test] even has a deep dive into one of their projects, Immersion, with a breakdown of where the space is allocated.

There are plenty of other tips and tricks here, such as generating textures and developing a C++ hot reload system for faster iteration. It’s just incredible that the executable that plays the whole video is smaller than just a JPEG screenshot of the video. It’s a reminder that the demoscene is still fascinating with new tricks and experiences even as the hardware stays the same. Continue reading “Generating Instead Of Storing Meshes”

A New Gaming Shell For A Mouse

For some gamers, having a light fast polling mouse is key. [Ali] of [Optimum Tech] loved his 23-gram mouse but disliked the cord. Not seeing any options for a comparable wireless mouse, he decided to make one himself.

Trying to shortcut the process, he started with an existing wireless mouse from Razer weighing in at a hefty 58 grams. The PCB on its own weighed in at 11 grams and after swapping to a smaller battery, [Ali] had a budget of 10 to 15 grams for the shell. Here is where the meat of this project lives. The everyday objects in your life like the poles that hold up traffic signals or the device you’re reading this article on are looked at and used without much thought into why they are what they are. The design of everyday things is a surprisingly deep field and designing a curvy mouse is no exception. With a 3d version of the PCB, he went through several iterations of how to lay out the mouse triggers. The scroll wheel was removed as he didn’t need it for the game he was playing.

The shell was printed in resin and came out great. [Ali] found himself with an ultralight 4000hz wireless mouse that was thoroughly enjoyable. It’s a great example of someone diving in and designing something for their personal use. Whether it’s a mouse or a chair, we love anyone taking on a design challenge. Video after the break.

Continue reading “A New Gaming Shell For A Mouse”

A Survey Of Long-Term Waterproofing Options

When it comes to placing a project underwater, the easy way out is to just stick it in some sort of waterproof container, cover it with hot glue, and call it a day. But when you need to keep water out for several years, things get significantly harder. Luckily, [Patricia Beddows] and [Edward Mallon] from the Cave Pearl Project have written up their years of experience waterproofing data loggers for long-term deployment, making the process easier for the rest of us.

Cleaning cheap eBay boards in alcohol.

It starts with the actual board itself. Many SMD boards have at least some flux left over from the assembly process, which the duo notes has a tendency to pull water in under components. So the first step is to clean them thoroughly with an ultrasonic cleaner or toothbrush, though some parts such as RTCs, MEMs, or pressure sensors need to be handled with significant care.

Actual waterproofing starts with a coating like 422-B or nail polish which each have pros and cons. [Patricia] and [Edward] often apply coatings to PCBs even if they plan to otherwise seal it as it offers a final line of defense. The cut edges of PCBs need to be protected so that water can’t seep between layers, though care needs to be made for connectors like SD cards.

Encapsulation with a variety of materials such as hot glue, heat shrink tubing, superglue and baking soda, silicone rubber, liquid epoxy, paste epoxy (like J-B Weld), or even wax are all commented on. The biggest problem is that a material can be waterproof but not water vapor proof. This means that condensation can build up inside a housing. Temperature swings also can play havoc with sealings, causing gaps to appear as it expands or contracts.

Overall, it’s an incredible guide with helpful tips and tricks for anyone logging data underwater for science or even just trying to waterproof their favorite watch.

Continue reading “A Survey Of Long-Term Waterproofing Options”