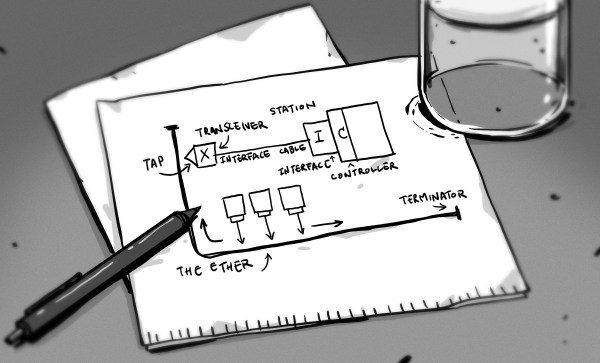
Making Floating Point Calculations Less Cursed When Accuracy Matters

Inverting the earlier exponentiation to reduce floating point arithmetic error. (Credit: exozy)

An unfortunate reality of trying to represent continuous real numbers in a fixed space (e.g. with a limited number of bits) is that this comes with an inevitable loss of both precision and accuracy. Although floating point arithmetic standards – like the commonly used IEEE 754 – seek to minimize this error, it’s inevitable that across the range of a floating point variable loss of precision occurs. This is what [exozy] demonstrates, by showing just how big the error can get when performing a simple division of the exponential of an input value by the original value. This results in an amazing error of over 10%, which leads to the question of how to best fix this.

Obviously, if you have the option, you can simply increase the precision of the floating point variable, from 32-bit to 64- or even 256-bit, but this only gets you so far. The solution which [exozy] shows here involves using redundant computation by inverting the result of ex. In a demonstration using Python code (which uses IEEE 754 double precision internally), this almost eradicates the error. Other than proving that floating point arithmetic is cursed, this also raises the question of why this works.

Continue reading “Making Floating Point Calculations Less Cursed When Accuracy Matters”

Two ICL PERQ 1 workstation computers, Department of Computer Science, North Machine Hall, James Clerk Maxwell Building, University of Edinburgh. (Credit: J. Gordon Hughes)

The Flex Computer System: UK’s Forgotten Capability Computer Architecture

During the 1970s many different computer architectures were being developed, many of them focused on making computer systems easier and more effective to use. The Flex Machine developed at the UK Ministry of Defence’s Royal Signals and Radar Establishment (RSRE) was one of them, falling in the category of Capability Architectures. These architectures required hardware with programmable microcode, which required either custom hardware, or computer systems like the Xerox Alto-inspired ICL PERQ (pictured). What’s interesting about Flex is that it didn’t just remain in the 1980s as a quaint footnote, but as detailed by [Martin C. Atkins] – who worked on the system – evolved into the Ten15 system, which later got renamed to TenDRA.

Capability architectures have a long history – including the Intel iAPX 432 and more recent implementations – but they all have in common is that they effectively implement an object-based memory architecture, rather than the low-level, flat memory space that we usually see with computer systems. These object-based capabilities, as they were termed, provides a level of memory protection and security that would be hard to implement otherwise. The book Capability-Based Computer Systems by [Henry M. Levy] forms a good introduction here.

Continue reading “The Flex Computer System: UK’s Forgotten Capability Computer Architecture”

Gentle Introduction To White Light Interferometry

Screenshot of the Zygo white light interferometry microscope software. (Credit: Huygens Optics)

White light interferometry (WLI) is a contact-free optical method for measuring surface height. It uses the phase difference between the light reflected off a reference mirror and the target sample to calculate the height profile of the sample’s surface. As complex as this sounds, it doesn’t take expensive hardware to build a WLI microscope, as [Huygen Optics] explains in a detailed introductory video on the topic. At its core you need a source of white light (e.g. a white LED), with a way to focus the light so as to get a spatially coherent light source, like aluminium foil with a pin hole and a lens.

This light source then targets a beam splitter, which splits the light into one beam that targets the sample, and one that targets the reference mirror. When both beams are reflected and return to the beam splitter, part of the reflected light from either side ends up at the camera, which captures the result of the reference and sample beams after their interference (i.e. combination of the amplitudes). This creates a Michelson interferometer, which is simple, but quite low resolution. For the demonstrated Zygo Newview 100 WLI microscope this is the first objective used, followed by a more recent innovation: the Mirau interferometer, which integrates the reference mirror in such a manner that much higher resolutions are possible, down to a few µm.

Continue reading “Gentle Introduction To White Light Interferometry”

A Solar-Powered Wristwatch With An ATtiny13

Wristwatches come in many shapes, sizes, and types, but most still have at least one thing in common: they feature a battery that needs to be swapped or recharged somewhere been every other day and every few years. A rare few integrate a solar panel that keeps the internal battery at least somewhat topped up, as environmental light permits.

This “Perpetual” wristwatch designed by [Serhii Trush] aims to keep digitally ticking along using nothing but the integrated photodiodes, a rechargeable LIR2430 cell, and a power-sipping face that uses one LED for each hour of the day.

The face of the perpetual wristwatch. (Credit: Serhii Trush)

The wristwatch’s operation is demonstrated in the linked video (in Ukrainian, auto-generated subtitles available): to read out the current time, the button in the center is pressed, which first shows the hour, then the minutes (in 5 minute intervals).

After this the ATtiny13 MCU goes back to sleep, briefly waking up every 0.5 seconds to update the time, which explains why there’s no RTC crystal. The 12 BPW34S photodiodes are enough to provide 2 mA at 0.5 V in full sunlight, which together keep the LIR2430 cell charged via a Zener diode.

As far as minimalistic yet practical designs go, this one is pretty hard to beat. If you wish to make your own, all of the design files and firmware are provided on the GitHub page.

Although we certainly do like the exposed components, it would be interesting to see this technique paired with the PCB watch face we covered recently.

Continue reading “A Solar-Powered Wristwatch With An ATtiny13”

Randomly Move Marionette With Steel Balls And Geneva Drives

The ball driven Geneva drives that move the marrionette. (Credit: Karakuri channel, YouTube)

Over the years we have seen many marble machines, but this one on the [Karakuri channel] (hit CC for subtitles) on YouTube is somewhat special, as it uses Geneva drives to turn the motion of the steel balls going around the circuit into random movement of a marionette. The Geneva drive type of gear mechanism normally converts a constant rotary motion into intermittent rotary motion by having a singular pin on the first wheel drive the second wheel. In the demonstrated mechanism, however, the pin is replaced by the steel balls, which are only intermittently and randomly present because of how each steel ball picks one of four paths, one towards each Geneva drive.

As a result of this, the motion of the marionette’s appendages – attached to the red wheel – is random. The only powered element of the (mostly 3D printed) system is the drive mechanism that carries the steel balls up again and keeps the primary wheels on the Geneva drives rotating. We have to give the creator pops for what is both an interesting art piece and a demonstration of how to creatively use this somewhat unusual gear mechanism to introduce randomness without a lot of complexity.

Thanks to [MrTrick] for the tip.

Continue reading “Randomly Move Marionette With Steel Balls And Geneva Drives”

Unusual Port Combines DisplayPort And HDMI

Everyone knows you can’t plug an HDMI cable into a DisplayPort… port, and yet a recent video from [Jon Bringus] challenges that seemingly obvious assumption. The hardware in question is a variant of the 2013-era Xi3 X7A mini PC, code-named ‘Piston’ and also known as a ‘Steambox’, from back when that was still something that Valve was working on. Although the physical format here is definitely quaint, it might be implementing DisplayPort Dual-Mode (DP++), which was introduced around the same time.

With DP++ the DP port can detect when a DVI or HDMI adapter is connected and then transmit DVI/HDMI TMDS signals rather than DP signals. Since DP and HDMI/DVI use a different signaling scheme, normally an active adapter would be required. One disadvantage of DP++ is that the HDMI signal will be limited to e.g. 1920×1080 @ 120 Hz and 4K only at 30 Hz.

Normally a DP++ port is marked as such, and requires an adapter that works with the DP++ port. What Xi3 did in this case to make regular DP and HDMI connectors work seems to be somewhat of a mystery, with any information on this type of port being rather scarce. [Jon] thinks he may have found the part itself listed on Mouser, but isn’t completely sure.

Feel free to leave your thoughts and any information you have on this oddity in the comments.

Continue reading “Unusual Port Combines DisplayPort And HDMI”

Playing ZX Spectrum’s Manic Miner On The Arduino Uno

Composite output shield with audio driver and controller inputs for Arduino Uno (Credit: Scott Porter)

Although it seems many have moved on to 32-bit MCUs these days for projects, there is still a lot of fun to be had in the 8-bit AVR world, as [Scott Porter] demonstrates with a recent Arduino Uno project featuring his game engine running a port of the Manic Miner game that was originally released in 1983 for the ZX Spectrum. For the video and audio output he created an add-on board for the Uno that creates a composite signal using two resistors, along with an audio driver circuit and control inputs either from the onboard buttons or from a NES controller. Audio can be sent either over the composite output or via the audio jack.

A demonstration of the game is provided in a number of videos on [Scott]’s YouTube account, which shows off a few levels, at 256×256 resolution. It contains all 20 original levels, with a few quality of life upgrades with animation. It also features original music, which may or may not work for you, but music can be turned on or off in the main menu. Compared to the 3.5 MHz Z80 MPU in the ZX Spectrum, the 16 MHz AVR of the Uno is a lot beefier, which raises the hope that a color version like the ZX Spectrum one is also in the future, even if it may require an add-on board with a framebuffer. As [Scott] notes, the weakness of the Uno is that the ZX Spectrum has significantly more RAM, which limits what can be done.

Thanks to [256byteram] for the tip.

Continue reading “Playing ZX Spectrum’s Manic Miner On The Arduino Uno”