Autonomous Fixed-wing Drone Threads The Needled In A Parking Garage

We’ve got something of a love affair going on with quadcopters, but there’s still room for a little something on the side. This fixed-wing drone can pull off some pretty amazing navigation. MIT’s Robust Robotics Group is showing off the work they’ve done with the plane, culminating in a death-defying flight through a parking garage (video after the break). This may not sound like a huge accomplishment, but consider that the wingspan is over two meters and repeated runs at the same circuit brought it within centimeters of clipping support columns.

Unlike the precision quadcopters which depend on stationary high-speed cameras for feedback, this drone is self-contained. It does depend on starting out with a map of its environment, using this in conjunction with a laser rangefinder and inertial sensors to plot its route and adjust as necessary. We think the thing must have to plan a lot further ahead than a quadcopter since it lacks the ability to put on the brakes and hover. This is, however, one of the strengths of the design. Since it uses a fixed-wing approach it can stay in air much longer than a quadcopter with the same battery capacity.

Continue reading “Autonomous Fixed-wing Drone Threads The Needled In A Parking Garage”

Raspberry Pi Wedded To A DSLR

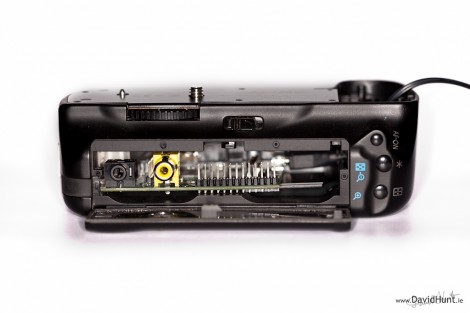
This is a Raspberry Pi outfitted in a DSLR battery grip. [Dave H] was very interested in the idea of combining a single-board computer with a high-end camera. The size and cost of such a computer was prohibitive until the RPi came along. He managed to fit the board into the broken battery grip he had on hand, and he already has the prototype up and running.

[Dave’s] alterations to the battery grip allow access to the USB, Ethernet, and Composite video ports. Powering the RPi was a bit of a challenge. He tried using an iPhone charger with four AA batteries but that only provided 4.2V. After going back to the drawing board he discovered he could rework the parts that he removed from the grip, using a Cannon 7.2V 1800 mAh battery. So far he can automatically pull images from the Camera and transmit them over a network connection. But since the RPi is running Linux, there’s a whole world of hacks just waiting to be exploited. What comes to mind first is image manipulation software (like ImageMagick) which has a command-line interface.

[Thanks Christian]

Building An LED Suit

[Rob] has been hard at work designing and building this LED suit which he can wear to parties. He’s got it working, although right now it’s just a pair of pants. It reacts to sound, and has the potential to be controlled from a smartphone via Bluetooth. You’ll find a video description of the build embedded after the break.

The planning started off by selecting driver hardware for the LEDs. [Rob] wanted the suit to pulse to the music in the room so he grabbed an MSGEQ7 chip. When connected to a microphone and opamp this chip will output a signal which can be used as a VU meter. He built the hardware into an Arduino shield, then got to work on the LED driver board. He’s using LED strips, but they’re not individually addressable. Instead he cut loops which wrap around the wearer’s legs. Each loop connects the pins of a TLC5947 LED driver chip which sinks a constant current and offers PWM abilities. He’s using PNP transistors on the high side.

For anyone that’s ever worked in a Tyvek suit before you’ll know they don’t breathe. Sweat will literally be pouring off of you. And we’d bet that’s what cause the short that burned the back of [Rob’s] leg at a recent party. Then again, your light-up pimp coats are going to be hot to wear too.

Continue reading “Building An LED Suit”

Adding Inductive Charging To An Android Tablet

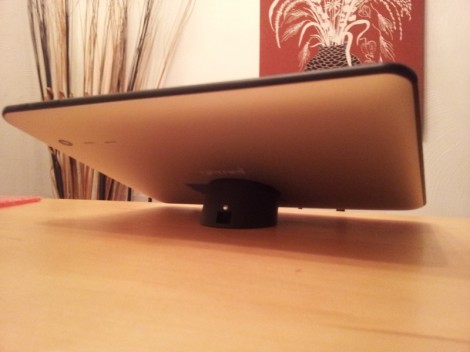
This is a Gemei G9T, a 9.7″ Tablet running Android 4.0. [Carnivore] shows us how to modify it to use inductive charging. The inductive charging hardware is taken from a Palm device (this uses the Touchstone charging hardware seen in several other hacks). It’s easy to interface with the tablet’s electronics, but physically placing the coil and magnets is another story.

The video after the break gives you a full walk-through of the process. He starts by removing the screws and prying the case off of the tablet. From there [Carnivore] shows how to carefully remove the coil, circuit board, shielding, and magnets from a Palm back plate. The magnets are the first to be positioned on the tablet’s back plate. The metal is too thick for them to hold well so he uses a Dremel to grind away just enough material for a strong connection. Unfortunately the metal will shield the magnetic fields the coil needs to work so he cuts a hole in the case the same size as that coil. The area is covered in liquid electrical tape to prevent shorts, and everything is taped in place. Two jumper wires connected from the coil’s circuit board to the 5V charging input are all it takes to finish up the hack.

Continue reading “Adding Inductive Charging To An Android Tablet”

Cat Palace With An Automatic Heat Lamp

[Herpity] was getting tired of his cat manipulating him into turning on a lamp above her bed every time she wanted a nap. She likes the warmth put off by the light bulb but he knew he could do better than that so he built a bed which includes an automatic heat lamp. To help introduce her to the new enclosure he set it on the chair where she normally naps.

The bed has two parts, the lower chamber acts as the sleeping area. There is a false bottom underneath the blanket which acts a platform for the weight sensors which detect when the cat is ready for a nap. A PIC microcontroller monitors two sensors and switches on mains voltage to a heat lamp once the pre-calibrated weight threshold has been reached. The upper part of the enclosure holds all of the electronic components and makes room for the recessed light housing. [Herpity] included an exhaust fan for the upper chamber but it turns out a grating is all he needs to keep the temperature at an acceptable level.

[via Reddit]

R2D2 Drink Dispenser Will Happily Tinkle In Your Glass

As with Jabba the Hutt we’d like to have our own service droid to serve up a cold one. We’re in luck; it looks like you can make your very own beverage dispensing droid if you don’t mind a little awkward dispensation.

The body started as one of those big protein drink mix containers. After spraying it white and masking off the entire thing with blue painter’s tape, the shapes for the blue designs were cut out and painted. Half of a foam sphere from the hobby shop was used to form the dome.

Liquids are dispensed by the pump system from a Super Soaker motorized water gun. You can see it fill up a beaker with a mysterious blue liquid in the video after the break. It’s a long way from challenging the Bar2D2, but it’s also something a mere mortal can build

Continue reading “R2D2 Drink Dispenser Will Happily Tinkle In Your Glass”

Laser Diode Controller For A CNC Mill

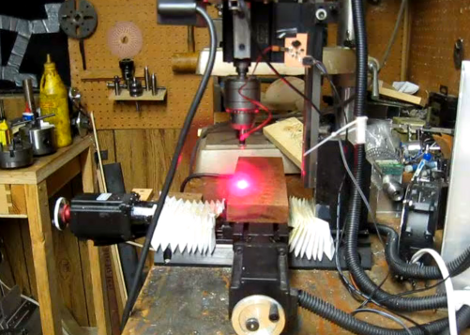
[Smells of Bikes] wanted to add laser etching to the list of tricks his home CNC setup is capable of. He has a diode which will work for the task, but he needed a driver that could be interfaced with the CNC system. He ended up designing a driver board based around the LM3402 chip.

Now driving one of these laser diodes isn’t all that different from driving a Light Emitting Diode. He chose to use the LM3402 chip because he’s the TI engineer who designed the official evaluation board for the part. It’s meant for high-power LED applications, and the 700 mA he needs for the laser is within spec. Since he’s soldering by hand, and this part has a ground pad on the bottom, he shares his soldering technique in detail. Once the driver board is ready, he uses a ‘sed’ command to replace the g-code Z axis commands with digital on/off commands to switch the diode.

Check out the demo video after the break. He uses a diffuse beam since the cutting beam is bright enough to damage his camera.

Continue reading “Laser Diode Controller For A CNC Mill”