Overhauling A Battle Bot

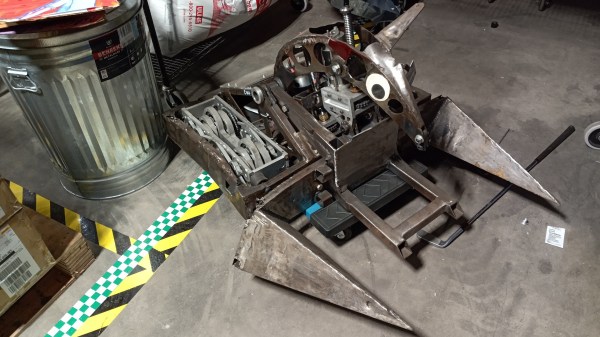
Where do old battle bots go to die? Well the great parts-bin in the sky corner of the workshop, where they await disassembly and use in other projects. But once in a while, if a battle bot is really lucky, they get pulled out again and put back into working order. So is the story [Charles] is telling about Overhaul 1, a hulk of a robot who was last see in fighting shape during the 2015 season of the show.

Having been succeeded by newer designs (Overhaul 2 and Overhaul 3), it’s a surprise to see some work being poured into these old bones. It didn’t escape the parts bin unscathed, having lost it’s wheels to another design called sadbot. What’s in place now are “shuffle drive pods”, a cam-based system that kind of crawls the robot along. They’re fun to watch in action in the video after the break, just make sure to turn your volume way down first. It’s no wonder [Charles] plans to replace them with newly-designed wheel modules.

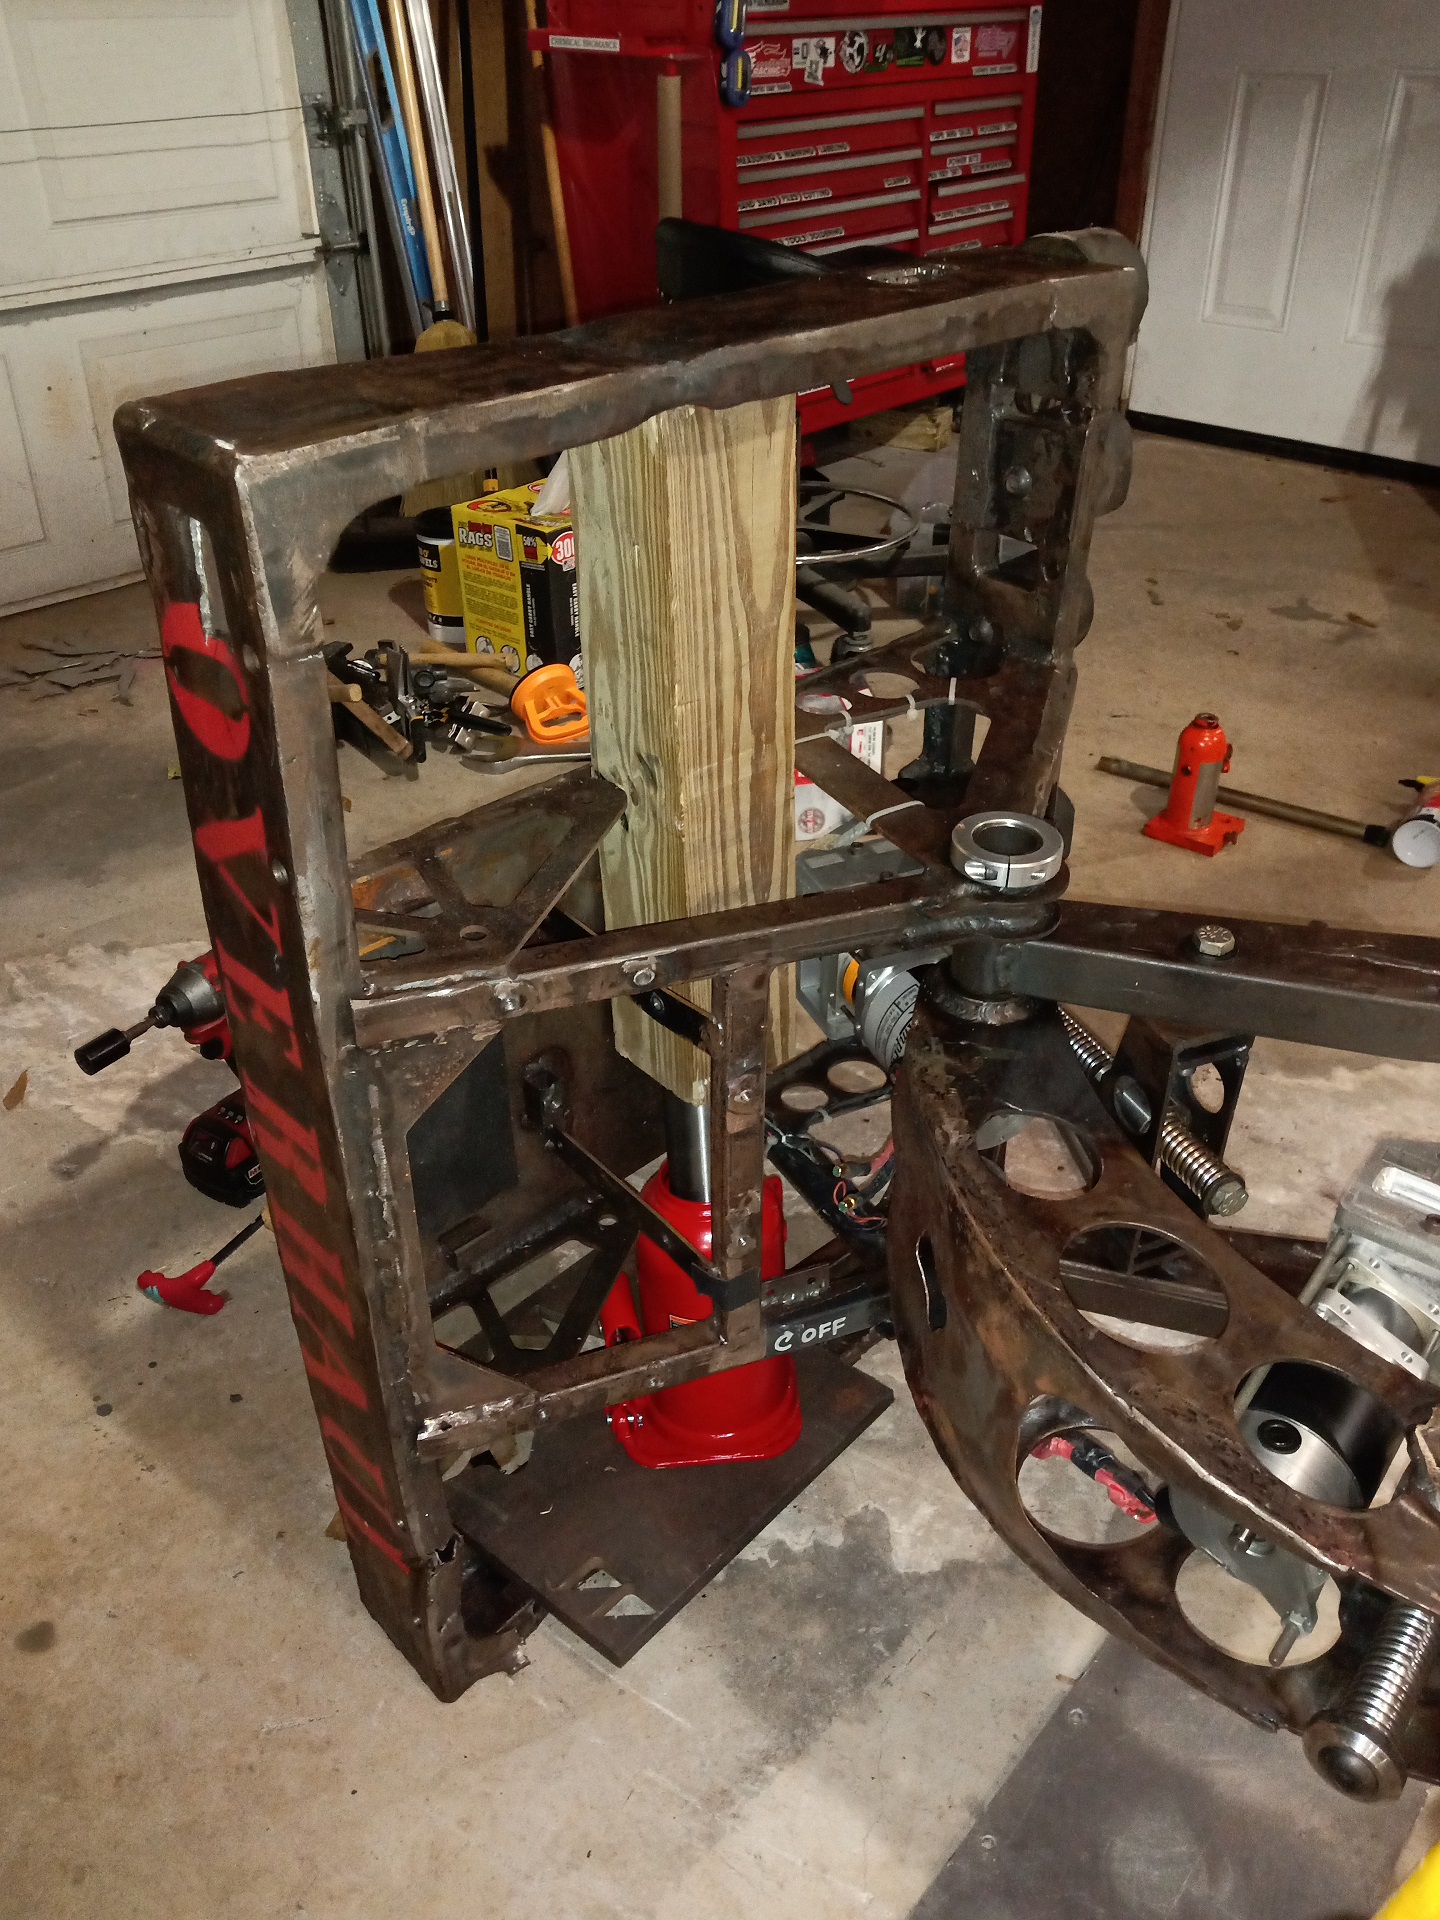
In the heat of a match these things take a lot of damage, and the frame of Overhaul 1 was still twisted and mangled. A hydraulic tire jack is the tool of choice as the damage was caused externally and needed to be pushed out from the inside. As a testament to how these things are built, any old jack just won’t do and a 20-ton unit was acquired for the purpose. A set of prongs on the front (called pontoons) was also bent inward and required a chain and a come-along to pull them out.

The nice thing about revisiting projects years later is that technology tends to move forward. We can imagine that the design work [Charles] has in progress for a new set of wheel modules is much easier, and the parts (motors, drivers, batteries, etc) of a much higher quality than when first built over half a decade ago. This is the first installment in the overhaul of Overhaul series, which we’ll be keeping an eye on.

Need to sate your appetite for how to build indestructible robots? Check out how the indestructible wheels for the “Copperhead” bot are fabricated!

Continue reading “Overhauling A Battle Bot”

Raspberry Pi Pico Used As A Transputer

You can’t fake that feeling when a $4 microcontroller dev board can stand in as cutting-edge 1980s technology. Such is the case with the working transputer that [Amen] has built using a Raspberry Pi Pico.

For a thorough overview of the transputer you should check out [Jenny List’s] longer article on the topic but boiled down we’re talking about a chip architecture mostly forgotten in time. Targetting parallel computing, each transputer chip has four serial communication links for connecting to other transputers. [Amen] has wanted to play with the architecture since its inception. It was expensive back then and today, finding multiple transputers is both difficult and costly. However, the RP2040 chip found on the Raspberry Pi Pico struck him as the perfect way to emulate the transputer design.

The RP2040 chip on the Pico board has two programmable input/output blocks (PIOs), each with four state machines in them. That matches up perfectly with the four transputer links (each is bi-directional so you need eight state machines). Furthermore, the link speed is spec’d at 10 MHz which is well within the Pico’s capabilities, and since the RP2040 runs at 133 MHz, it’s conceivable that an emulated core can get close to the 20 MHz top speed of the original transputers.

Bringing up the hardware has been a success. To see what’s actually going on, [Amen] sourced some link adapter chips (IMSC011), interfacing them through an Arduino Mega to a computer to use the keyboard and display. The transputer architecture allows code to be loaded via a ROM, or through the links. The latter is what’s running now. Future plans are to figure out a better system to compile code, as right now the only way is by running the original INMOS compiler on DOS in a VM.

Listen to [Amen] explain the project in the first of a (so far) six video series. You can find the links to the rest of those videos on his YouTube channel.

Continue reading “Raspberry Pi Pico Used As A Transputer”

This Is A 3D Ink Jet Printer

We spend a lot of time thinking of how to create 3D objects, but what about being able to print full color graphics on the objects we create? This isn’t just multicolor, this is full-color! Here’s one elegant solution that uses ink jets to print full color images on 3D terrain models.

Admittedly we are very late to the party on this one as the technology was spotted on season 22, episode 7 of How It’s Made that aired way back in 2013. The segment shows terrain models — think of the physical contour map under glass that you might see at a National Park or at the main lodge of a ski resort. It’s easy enough to envision how the elevation is carved out of foam by a CNC. But the application of color printing to those surfaces is what caught our eye this time around. It’s a custom rig that a company called Solid Terrain Modeling built for this purpose. Since the height at any point on the work material is already known from the milling process, four ink heads (black, cyan, magenta, yellow) have been added to individual Z-axis actuators, applying a raster image as they traverse the surface.

Part of what makes this work is the post-processing steps that follow milling. The model is very carefully cleared of debris before being sprayed with primer. Another coat of an undetermined material (“a specialty coating to receive the ink”) gets the piece ready for the ink. The final step after printing is a protective clear coat. In the How It’s Made episode, buildings and other structures are then 3D-printed and added.

It seems like the trick is to get the heads to have as small of a footprint as possible for clearance when printing in sloped areas. We’re not experts in all the available consumer ink-jet printers out there, but finding a setup where the heads are separated from the reservoirs would be key. Watching this segment made us so excited to think of the person/people who got to hack this rig together as part of their job.

Looking for other ways to abuse ink jet parts? [Sprite_TM] came up with a way to make them handheld so you print on anything from latte foam to your buddy’s forearm. There’s no better name for that than the Magic Paintbrush.

Continue reading “This Is A 3D Ink Jet Printer”

Knowing The Bits And Bytes That Make Images Live In Memory

We know we’re living in the future because there’s hi-resolution, full color images plastered on every high-density screen in sight. Of course this comes at a cost, one that’s been hidden away by the myriad improvements in the way we digitally represent those pretty pixels and how we push them to the screens. Nobody thinks about this, except those who are working behind the screen to store and light up those pixels. And hey, chances are that’ll be you some day. Time to learn a bit more about image encoding!

Test renders illustrate the time savings from premultiplied alpha formats

[Scott W Harden] put together a succinct primer on representing images in memory. It focuses on the basics of how images are stored: generally with the B before the G, sometimes including an alpha (transparent) channel, and with a number of different bit depths. Having these at the front of your mind is crucial for microcontroller projects, where deciding what types of images to support is often limited by the amount of memory available for frame buffers, and the capabilities of the screen chosen as the device’s display.

Speaking of display specifics, [Scott] shares some detail about mapping the memory to the dimensions of your screen. If the byte count of pixel data doesn’t line up nicely with the dimensions of the screen, padding the rows out may help in the processing overhead it takes to get those pixels onto the screen. He also has some tips about “premultiplied alpha” which makes the transparency calculation a part of the image itself, rather than demanding this be done when trying to update the screen. Running a test in C# on one million frame renders shows the type of savings you can expect.

Decades of trial and error landed us with these schemes. Looking back is literally an archaeology project, as one hacker discovered when trying to get a set of digital images off of a floppy from a 1990s photo processing service.

We’re Hiring: Come Join Us!

You wake up in the morning, and check Hackaday over breakfast. Then it’s off to work or school, where you’ve already had to explain the Jolly Wrencher to your shoulder-surfing colleagues. And then to a hackspace or back to your home lab, stopping by the skull-and-cross-wrenches while commuting, naturally. You don’t bleed red, but rather #F3BF10. It’s time we talked.

The Hackaday writing crew goes to great lengths to cover all that is interesting to engineers and enthusiasts. We find ourselves stretched a bit thin and it’s time to ask for help. Want to lend a hand while making some extra dough to plow back into your projects? We’re looking for contributors to write a few articles per week and keep the Hackaday flame burning.

Contributors are hired as private contractors and paid for each article. You should have the technical expertise to understand the projects you write about, and a passion for the wide range of topics we feature. You’ll have access to the Hackaday Tips Line, and we count on your judgement to help us find the juicy nuggets that you’d want to share with your hacker friends.

If you’re interested, please email our jobs line (jobs at hackaday dot com) and include:

  • One example article written in the voice of Hackaday. Include a banner image, at least 150 words, the link to the project, and any in-links to related and relevant Hackaday features. We need to know that you can write.
  • Details about your background (education, employment, interests) that make you a valuable addition to the team. What do you like, and what do you do?
  • Links to your blog/project posts/etc. that have been published on the Internet, if any.

What are you waiting for? Ladies and Gentlemen, start your applications!

AND!XOR’s DEF CON 29 Electronic Badge Is An Assembly Puzzle

For years I’ve looked forward to seeing each new unofficial hardware badge that comes out of the #Badgelife powerhouse known as AND!XOR. A mix of new and interesting components, alternate-reality game, and memes, you never know what they’re going to throw down.

A bubble pack landed on my desk on Thursday with the newest offering, the AND!XOR electronic badge built for DEF CON 29, happening this weekend as a hybrid in-person and online conference. While each previous year upped the ante on complexity and manufacturing magic tricks, it’s no surprise considering the uncertainty of both the global pandemic and global chip shortage that they took a different tack. What we have here is a badge hacking puzzle that challenges you to just figure out how to put the thing together!

Continue reading “AND!XOR’s DEF CON 29 Electronic Badge Is An Assembly Puzzle”

Hackaday Podcast 129: Super Clever 3D Printing, Jigs And Registration Things, 90s Car Audio, And Smooth LED Fades

Hackaday editors Mike Szczys and Elliot Williams have found a critical mass of projects this week that wouldn’t be possible without 3D printers. There’s an absolutely astounding model roller coaster that is true to the mechanisms and physics of the original (and beholden to hours of sanding and painting). Adding sheet material to the printing process is a novel way to build durable hinges and foldable mechanisms. Elliot picks out not one, but two quadruped robot projects that leverage 3D-printed parts in interesting ways. And for the electronics geeks there’s a server rack stuffed with Raspberry Pi, and analog electronic wizardry to improve the resolution of the WS2811 LED controller. We wrap it all up with discussions of flying boats, and adding Bluetooth audio to old car head units.

Take a look at the links below if you want to follow along, and as always, tell us what you think about this episode in the comments!

Direct download (60 MB or so.)

Places to follow Hackaday podcasts:

Continue reading “Hackaday Podcast 129: Super Clever 3D Printing, Jigs And Registration Things, 90s Car Audio, And Smooth LED Fades”