Waterproof DIY Momentary-push Switch

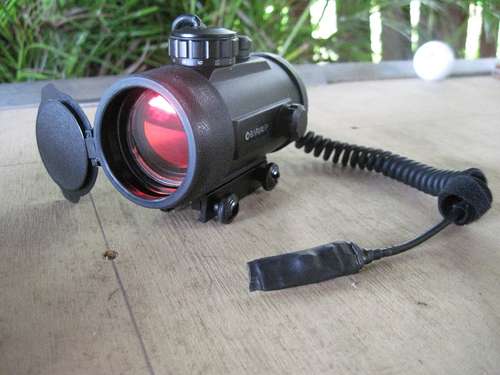
[Patman2700] has a nice scope for his paintball gun that uses a red dot instead of cross-hairs. The problem is that he kept forgetting to turn it off which ended up running the batteries down frequently. His solution to the problem was to get rid of the toggle switch used to turn it on and replace it will a home-made momentary push button switch. Now he presses the switch to aim and doesn’t waste juice when he’s running around, trying not to get pelted with paint.

Since this is used outside he wanted it to be water-tight. The switch is built using materials we’ve seen in previous diy switches; adhesive-backed copper sheets for conductors, foam to keep them separated until pressed, and plastic as a support. Copper is applied to the plastic base, with a ring of foam separating the base from the second layer of copper. When squeezed, the two layers of copper come in contact to complete the circuit. To make it work a bit better [Patman2700] added a dab of solder in the center of the bottom copper layer so there is less distance between conductors, and used extra foam to build up a bump in the center of the assembly for a better ‘button’ feel. The whole thing is encased in shrink-wrap with the seams sealed with super glue to keep moisture at bay.

Rodent-based Power Generation

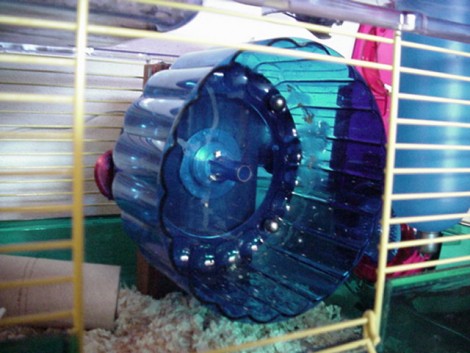
Your hamster lives to good life, with food delivery and a maid service that cleans up after him. [DanF] helped to brighten up this hamster’s life even more by improving its exercise equipment and giving it a small night-light as well. This project adds a low RPM alternator to the hamster wheel.

The first part of the process was to reduce energy lost to friction by fitting the wheel with a bearing. From there a ring of permanent magnets was added which will pass by a stationary coil and induce a current. It works, but unfortunately there’s not enough power generated to charge a battery. That means the light is only on when the hamster is running. But maybe you can figure out a way to use a super-capacitor like we saw in that exercise bike hack.

One nice finishing touch to the setup is a bicycle computer to track how much time was sent on the wheel, and the distance traveled.

[Thanks Dizzy]

Using A Cellphone LCD As Auxiliary Linux Display

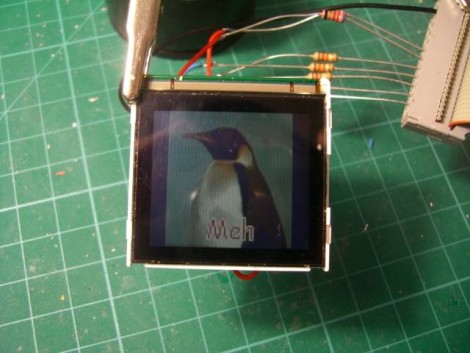
[Neil] is driving this Siemens A60 LCD using a parallel port on his Linux box. He likes this module because it has an integrated LED back-light, controller IC, and the pads are large enough for a human to solder. He notes that the screen runs on 2.9V, which matches the forward voltage of the LEDs used as back-lights. This means it is possible to use one f the LEDs as a shunt to drop  incoming voltage down to a safe level for the controller. In fact, that’s what he did. The data lines are connected to the parallel port along with some current limiting resistors. The LEDs are connected with resistor calculated for maximum brightness, with the output from the LED used as the source voltage for the LCD controller chip.Whether you want to use one of these screens with a PC or something else, the code that [Neil] worked out should provide the information necessary to do so.

The Nokia cellphone LCD post inspired [Neil] to send in a tip about this project. If you’ve got well documented hacks that you’re just sitting on why not let us know about them?

More EL Chemistry: Luminescent Ink

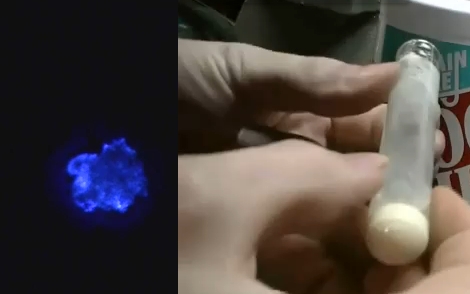
[Jeri Ellsworth] continues her experiments with electroluminescence, this time she’s making EL ink. The ink she’s looking for is Zinc Sulfate in a solution. The process she chose is to re-dope some glow powder so that it can be excited by the field around an AC current. In her video (embedded after the break) she talks about the chemical properties she’s after by detailing a cubic lattice of zinc and sulfur atoms with an added copper atom (adding that atom is a process called doping).

The quick and dirty synopsis of the experiment starts by washing the glow powder with dish soap to acquire zinc sulfide crystals. Then she combined copper sulfate and zinc shavings from the inside of a modern penny to yield copper metal and zinc sulfate suspended in solution. That was mixed with the zinc sulfide from the glow powder washing and doped with a little more copper sulfate. The excess liquid is poured off, the test tube is capped with glass frit, and the whole thing hits the kiln to start the reaction. The result glows when excited by alternating current, but could have been improved by adding chlorine atoms into the mix.

We’re excited every time we see one of [Jeri’s] new chemistry hacks. We’d love to see more so if you’ve come across interesting chemistry experiments during your Internet travels, please let us know about them. Just make sure you have some idea of what you’re doing when working with chemicals… safety first.

Continue reading “More EL Chemistry: Luminescent Ink”

Machining An SLR Camera From Scratch

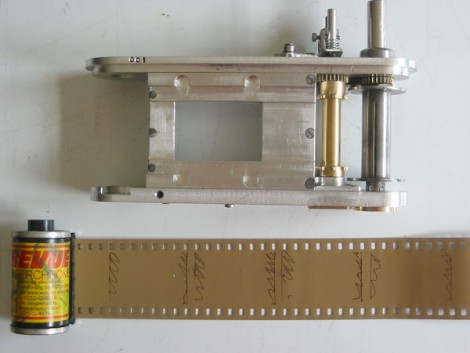
It took us a while to stop drooling long enough to write about this amazing machining project. [Denis MO] made a single-lens reflex camera from scratch. The banner image above is not the finished product, but just one step in the production chain. [Denis] has been thinking about doing this project for 25 years and finally took the plunge. From the start, the only parts he planned on NOT making himself were the screws, ball bearings, shutter, curtain fabric, and interchangeable lenses. Everything else is his own creation based off of his own design. Spend some time looking over his project. There’s plenty of information and images of both the machining process, and the drawings he mocked up in the design process. We’ve also included a pic of the finished camera and the contact sheet from his test roll of film after the break.

Continue reading “Machining An SLR Camera From Scratch”

Propeller Platform Prototyping Board Gets An Upgrade

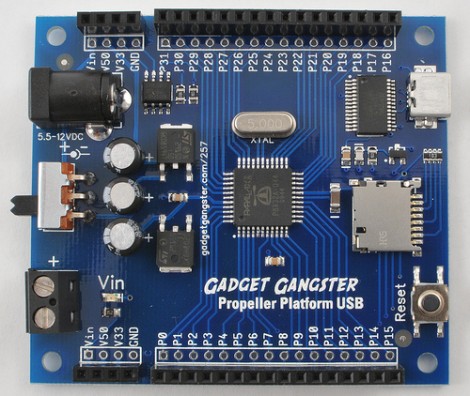
[Nick] over at Gadget Gangster has a new version of his prototyping hardware for Propeller microcontrollers, called the Propeller Platform USB. A little more than a year ago we looked at the last version which was larger, used a DIP processor, and came unassembled. The new version does come assembled because of the migration to surface mount components (which may take some of the fun out of it if you just love soldering kits). This not only reduces the board footprint, but makes room for more goodies. As the name implies, there’s now a mini-USB socket with a USB to UART bridge, a microSD card slot as been added, and the onboard EEPROM has been doubled. This is a nice hardware upgrade but the price has been upgraded by $25 as well. No worries, it’s open source so you can roll your own if you have the parts on hand.

Data Confirmation With RF Communications

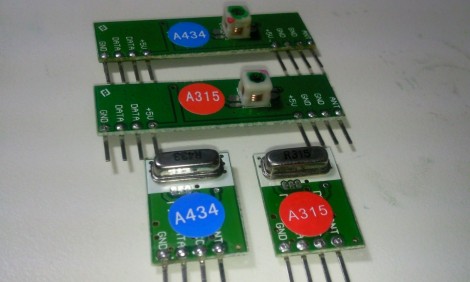
[Rafael] built a system that uses radio frequency for communications. The code he was using with the inexpensive receiver/transmitter pairs already had some error correction but from time to time an entire message would be missed by the receiver. He set out to make these RF communications more robust.

A little more than a year ago we looked at using these same transmitters with an Arduino. [Rafael] has a similar setup but since they are unidirectional he chose to use two pairs for bidirectional communication (each operating at a different frequency to avoid interference). On one end, a computer transmits data to the Arduino which is in a remote location. His confirmation protocol relies on a randomly generated message identifier. The computer will continually transmit the same message. The Arduino continually receives these messages, comparing them with the last successfully received message. If they match, it is considered a successful data transfer and the Arduino transmits a confirmation back to the computer which then starts transmitting the next message.

This isn’t an application-specific protocol. For demonstration purposes [Rafael] built a quick home automation setup that uses it to operate a house lamp.