Shiny Motorcycle Computer

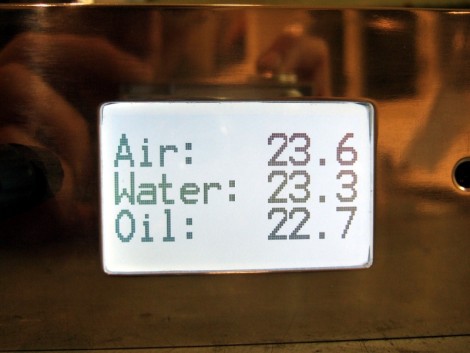
We’re rather surprised at how popular it has become to build your own motorcycle computer. [Mario Mauerer] tipped us off about his shiny motorcycle computer (translated) for his Yamaha XTZ 750. It uses an ATmega644 microcontroller to pull a variety of data together and display it on this white LED backlit display. He connected a flow meter to the fuel line to monitor gas consumption. Oil temperature is captured by inserting a brass tube (containing the sensor) through a hole in the oil cap and soldering it in place. Water temperature is gathered by measuring the external temperature of one of the cooling lines. [Mario] uses a rotary encode with a click function as the control interface device, and a battery backed real time clock keeps time.

A quick look at the PCBs tells the tale of good circuit design. But we do wonder about catching the reflection of the sun in that shiny bezel.

Computer Aided Cake Decoration

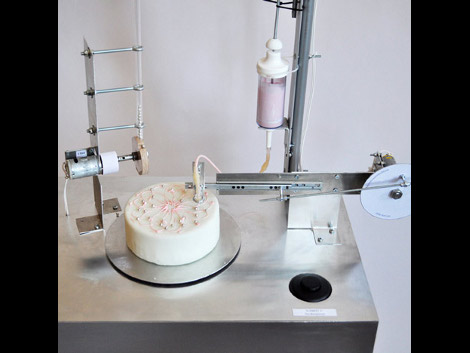
This contraption lets you decorate your cake at the push of a button. It’s a stretch to call it computer aided as this is purely a mechanical monster, but we still enjoy the apparatus and see its CNC potential (we’re still waiting for that pizza printer to hit the market too). An icing syringe has been modified with a flexible hose on the business end. As constant pressure is applied to the plunger, the nozzle oscillates while the cake rotates. What results is a spirograph drawing on the top of your dessert. But the fun doesn’t stop there. Another push of the button and you get shiny silver orb candies joining in the party.

What, no video? Aw! If you know where to find a clip, let us know and we’ll update this post.

[Thanks Mowcius]

Brightest Day, Darkest Night, Charge It With Arduino’s Light

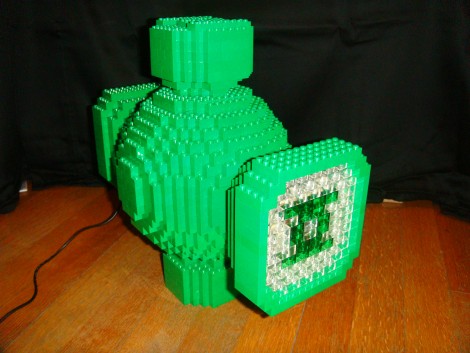
To userp the Green Lantern oath is a sacrilege. But calm your rage as you take in this Green Lantern battery and ring project. [Jon] built the power battery portion out of LEGO, but inside you’ll find an added bonus. An Arduino uses a set of LEDs and an RFID reader to bring the object alive. A matching ring contains the RFID tag that activates the lights when held up to the lantern’s lens. You can see this used to charge the power ring (and join in by saying the oath) in the video after the break.

Want to build something like this but don’t have an RFID reader? This would be easy to pull off by adding a magnet to the ring and a hall effect sensor in the lantern. Maybe this will make you rethink your Halloween costume this year.

Continue reading “Brightest Day, Darkest Night, Charge It With Arduino’s Light”

Cellphone Crowd-pleasers

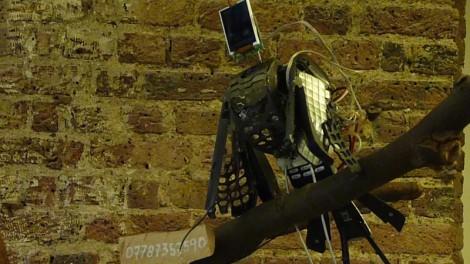
When you start to think about the cellphone waste our society produces it can be quite daunting. How many cell phones have you had in recent years? Now multiply that by five billion cellphone subscribers. [Anthony Goh] and [Neil Mendoza] found something to do with a very minuscule portion of those left-overs; building interactive birds out of the old parts. You’ll have to check out their accomplishments in the video after the break as the image above doesn’t do them justice. Interactivity for the exhibit is provided by an Arduino, which communicates with one working phone via a serial connection. The phone can still make and receive calls, and controls parts from other, less functional cellphones. They can call each other, or receive calls from the audience.

Yes, there is art in garbage. But there’s also a lot of hacks waiting to happen. Take a look at the Nokia cellphone LCD feature and then start scavenging.

Continue reading “Cellphone Crowd-pleasers”

Vapor Phase Reflow Soldering

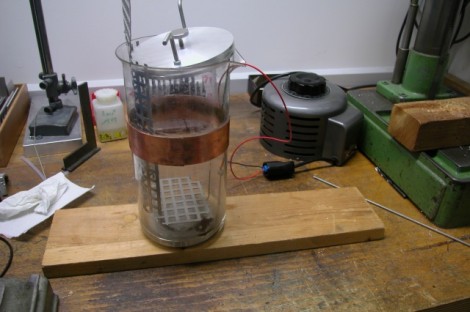
Ditch that old toaster oven and move to the next level of surface mount soldering with this vapor phase reflow method. [Ing.Büro R.Tschaggelar] put together this apparatus to use vapor phase reflow at his bench instead of sending out his smaller projects for assembly. It uses the heating element from an electric tea kettle to boil Galden HT 230 inside of a Pyrex beaker. There’s a copper heat break part way up the beaker to condense the chemical and keep it from escaping. When a populated board is lowered into the heated chamber, the solder paste reflows without the need to stress the components with unnecessary heat. Better than traditional reflow? At this level it’s hard to say, but we do find his method quite interesting.

[Thanks Chris]

3D Printing With Visible Light

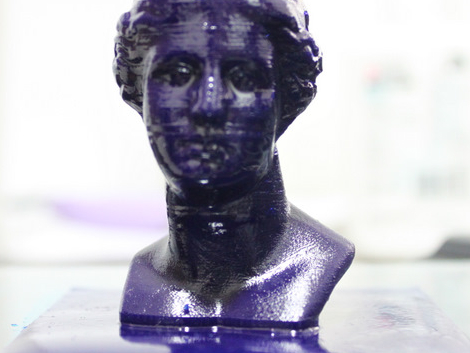
This 3D printer manages some pretty fantastic resolution, and these are just the early results of [Junior Veloso’s] build. He put together a machine that prints objects in resin that cures in visible light. To print, a thin layer of raw liquid resin self-levels across a printing surface and a DLP-based projector shines light from below, onto the portion to be hardened. The z-axis then pulls that layer up and the next to be printed will become the newest bottom layer. Horizontally the printer yields 1024×768 resolution with a layer thickness as small as 0.01 mm. No wonder he’s turning out this kind of quality.

The model above took 5 hours to print, with eight-second exposure for each layer, and 0.1mm layer thickness. There is lots of good information on his blog, from the early planning, to the finished hardware so take some time to learn about this fascinating project.

Update: Thanks to reader [Nave.notnilc] for pointing out that we’ve seen a chemical 3D printing technique before.

Self-balancing Unicycle 2.0

Focus Designs has a new version of their self-balancing unicycle for sale. This improves upon their original design in several ways. The battery pack has moved to LiFePO4, which is becoming more common in electric transportation. There’s also regenerative braking and fall protection which kills the motor when you fall off.

We’ve embedded their marketing video after the break. Our favorite part is the shot seen above: a guy on the unicycle cruising along next to a woman who is running. There’s nothing like sitting on your bum while some else exercises.

At any rate, from what we see in the video they’ve turned out a solid product.

Continue reading “Self-balancing Unicycle 2.0”