The Beginnings Of An LCR Meter

LCR Meter

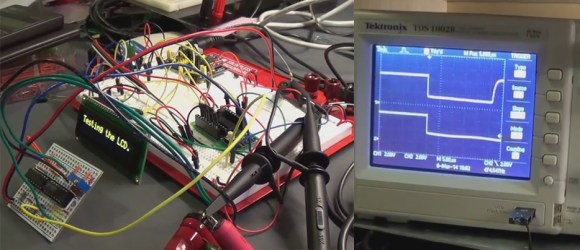
The inductor is an often forgotten passive electrical elements used to design analog circuitry. [Charles’s] latest proof of concept demonstrates how to measure inductance with an oscilloscope, with the hopes of making a PIC based LCR meter.

It is not that often one needs to measure inductance, but inductors are used in switching regulators, motor circuits, wireless designs, analog audio circuitry, and many other types of projects. The principles of measuring inductance can be used to test inductors that you have made yourself, and you can even use this knowledge to measure capacitance.

[Charles] originally saw a great guide on how to measure impedance by [Alan], and decided to run with the idea. Why spend over $200 on an LCR meter when you can just build one? That’s the spirit! Be sure to watch [Alan’s] and [Charles’s] videos after the break. What kind of test equipment have you built in order to save money?

Continue reading “The Beginnings Of An LCR Meter”

Manual Pick And Place

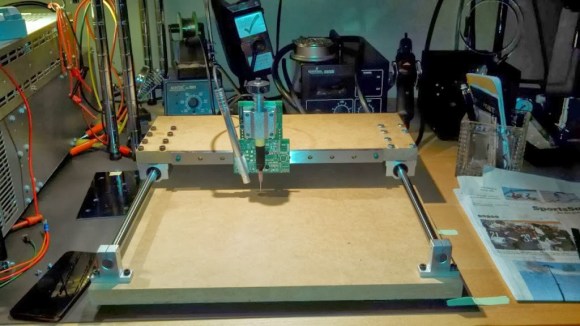
picknplacePopulating a large surface mount PCB can take forever. [craftycoder] from Freeside Atlanta has built a great looking manual pick and place machine, removing the need for tweezers. No more will passives stick to your tweezers while you are trying to place them on your PCB!

We have seen a lot of pick and place machines in the past few years. What makes this one stand out is its simplicity and the no-nonsense build. This pick and place is built on an MDF platform, uses bearings from Amazon, standard 12 mm rails, and has a small camera for a close-up look at your part placement. Sure it is a manual method, but it beats painstakingly placing each part with tweezers. It would be interesting to see how much this entire build cost; we expect that it was not too expensive. See this thing in action in the video after the break.

We hope this project has inspired you to go out and make something cool! If so, let us know what you have made!
Continue reading “Manual Pick And Place”

Automatically Accept Membership Fees Or Donations

MoneyMachine

Whether you run a club or a hackerspace, collecting membership fees and accepting donations can be a pain. [MRE] from TokyoHackerspace has the solution, an automated machine that can accept cash from anyone who is walking by.

Members can choose to either donate or pay their membership fee even when the hackerspace administrator is not around.  The interface consists of two buttons, an LCD display, a place to put your cash, and a thermal printer that prints out two receipts (one for you, one which goes right back into the box). One of the coolest parts of this build is the banknote validator, which can work with over 100 currencies (in this case, it is programmed to accept Japanese bills). Despite the simple interface, a lot of thought went into this build. There are backup batteries for the real time clock, an EEPROM to keep track of all the accounting, and an Arduino as the brains of the operation. If you take a look at the project page, there is a lot of information on the Arduino code, the PCB layout, how to interface with the banknote validator, and more! Check out the machine in action after the break.

We would love to see the banknote validator used in other projects. Have you used one before or built something similar?

Continue reading “Automatically Accept Membership Fees Or Donations”

New Version Of Energia Supports Wolverine And Connected

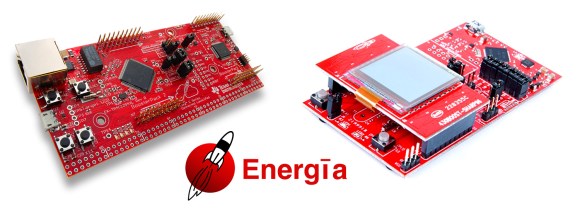
Energia UpdateThere is something to be said about how easy it is to write Arduino code. For those of who you are big fans of the MSP430 and Texas Instrument’s LaunchPad series, an upcoming release of Energia brings Arduino style coding to the two newest member of the LaunchPad family: the TivaC Connected LaunchPad EK-TM4C1294XL and Wolverine FRAM LaunchPad MSP-EXP430FR5969LP.
“Energia is an open-source electronics prototyping platform … with the goal to bring the Wiring and Arduino framework to the Texas Instruments MSP430 based LaunchPad.” The newest release of Energia is exciting for the sole reason that the new TivaC Connected LaunchPad and Wolverine FRAM LaunchPad are supported. The TivaC Connected LaunchPad is a $20 development board for TI’s low-power ARM processors that has Ethernet connectivity. The MSP430 at the heart of the Wolverine FRAM LaunchPad uses up to 250x less power than flash based MCUs at low speeds in addition to many other cool benefits.

Be sure to keep an eye out for the new version of Energia, it should be arriving sometime next week. Now is a better time than ever to try out the Tiva C or the MSP430 MCUs!

Real Or Fake? The Amazing Ping-Pong Robot

Would you like to play a robot in ping pong (translated)? We sure would. Inspired by an upcoming face-off between man and machine, [Jakob] wrote in to tell us about [Ulf Hoffmann’s] ping-pong playing robot. If you ever wanted to play ping-pong when no one else was around or are just sick and tired of playing against the same opponents this project is for you. Boy is this thing amazing; you simply must see the robot in action in the video after the break.

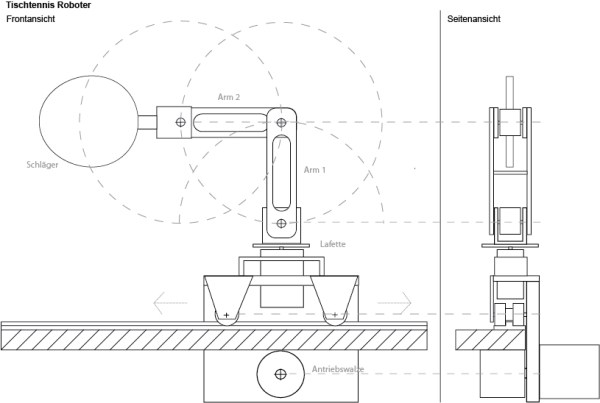
While the robot’s build is not documented all in one post, [Ulf Hoffmann’s] blog has many videos and mini posts about how he went about building the paddle wielding wonder. The build runs the range from first ideas, to hand-drawn sketches, to the technical drawings seen above. From these the parts of the arm were built, but the mechanical assembly is only one portion of the project. It also required software to track the ball and calculate how to properly return it. Be sure to browse through his past posts, there is a wealth of information there.

Also be sure to check in on March 11th to see who wins the epic face-off between man and machine. See the trailer (the second embedded video) after the break.

UPDATE: Many commentators are calling this one a fake. It’s so sad to think that, because this is a really cool project. But we’ve changed the title and are asking you to weigh in on whether you think it is real or fake. We’ve also contacted [Ulf] and asked if it is real hardware, or a CGI enhanced video. We’ll let you know if/when we hear back from him.

Continue reading “Real Or Fake? The Amazing Ping-Pong Robot”

Solving Endstop Woes With A Simple Analog Filter

NoiseEndstop

You know what’s cool? Using your engineering knowledge to solve problems that you have while building something. This is exactly what [Reinis] did when his 3D printer’s endstop wasn’t working.

Many of us automatically go to a microcontroller when we run into a problem with a sensor, but often a simple analog filter will do the trick. The endstop in [Reinis’s] RepRap style 3D printer was giving off an unusual amount of noise when closed. When he hooked the endstop up to his oscilloscope, he was shocked to see how much noise there really was. In comes the low-pass filter. Unhappy with the response time of his low-pass filter, [Reinis] solved the problem using a pullup resistor. Two resistors and a capacitor was all that he needed to fix the problem. A great solution!

How have you used analog filters in your projects? Send us a tip and let us know!

Interrupt Free V-USB

resync

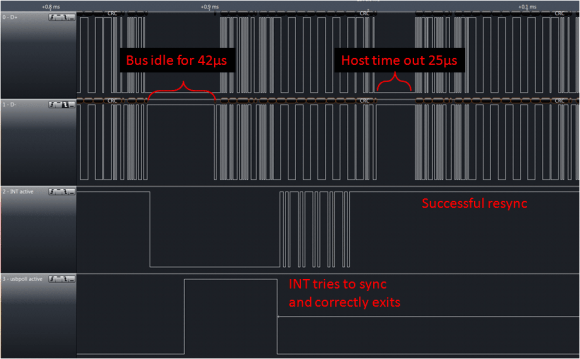
[Tim’s] new version of Micronucleus, Micronucleus 2.0, improves upon V-USB by removing the need for interrupts. The original Micronucleus was a very small implementation of V-USB that took up only 2KB. Removing the need for interrupts is a big leap forward for V-USB.

For those of you that do not know, “V-USB is a software-only implementation of a low-speed USB device for Atmel’s AVR® microcontrollers, making it possible to build USB hardware with almost any AVR® microcontroller, not requiring any additional chip.” One tricky aspect of using V-USB is that the bootloader requires interrupts, which can lead to messy problems within the user program. By removing the need for interrupts, Micronucleus 2.0 reduces the complexity of the bootloader by removing the need to patch the interrupt vector for the user program.

With the added benefit of  speeding up the V-USB data transmission, Micronucleus 2.0 is very exciting for those minimal embedded platforms based on V-USB. Go ahead and try out Micronucleus 2.0! Leave a comment and let us know what you think.