Morse Code RF Transmitter From A Micro’s Clock Output

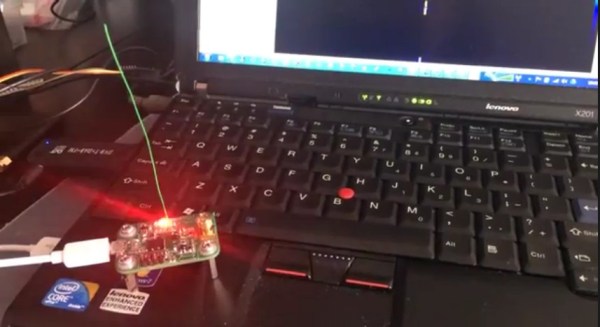
If you’re looking for a simple way to make an RF transmitter, check out [Tomasz]’s Morse code transmitter. His design uses nothing more than a microcontroller and a 16MHz crystal to transmit CW Morse code on 96MHz. We’ve seen some similar designs that work at lower frequencies, but transmitting up at 96MHz is pretty impressive.

[Tomasz] used an STM32L microcontroller for this project, which isn’t specced to run up at the high frequencies he wanted to transmit at. To get around this, [Tomasz] wired a 16Mhz oscillator up to microcontroller’s clock input. The clock input is run into the micro’s PLL which is capable of generating high frequencies. He mentions that you can use the internal oscillator instead of a crystal, but it has a ton of phase noise and splatters all over the spectrum.

[Tomasz] chose to start transmitting at 96MHz, which can be picked up by a standard FM radio. To generate this frequency, he set the PLL to multiply the 16MHz crystal up to 192MHz followed by a clock divide of 2 which brings it down to 96MHz. The microcontroller’s CPU runs on the 16MHz crystal input before it goes into the PLL. Next [Tomasz] enabled the MCO clock output pin which routes the 96MHz signal to the outside world.

Transmitting CW is pretty simple; it just involves turning a fixed-frequency transmitter on and off. [Tomasz] wrote a function that enables and disables the MCO output pin. This has the effect of keying any Morse code string you throw at it. Check out the video after the break to see the transmitter in action.

Continue reading “Morse Code RF Transmitter From A Micro’s Clock Output”

A DIY Pick And Place You Can Build Right Now

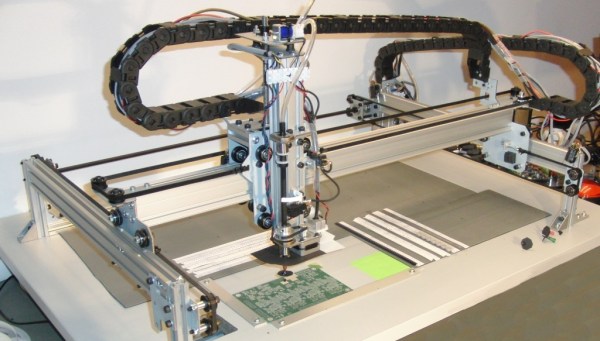
There have been quite a few DIY pick and place projects popping up recently, but most of them are limited to conceptual designs or just partially working prototypes. [Juha] wrote in to let us know about his project, LitePlacer, which is a fully functional DIY pick and place machine with working vision that can actually import BOMs and place parts as small as 0402 with pretty good accuracy.

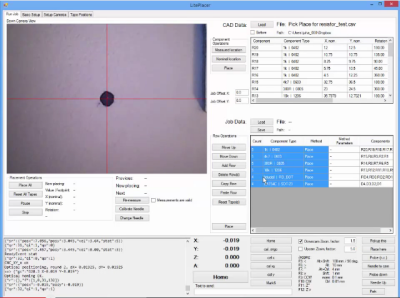
LitePlacer UIWhile some other DIY pick and place setups we’ve featured use fairly exotic setups like delta bots, this machine is built around typical grooved bearings and extruded aluminum. The end effector includes a rotating vacuum tip and a camera mounted alongside the tip. The camera provides feedback for locating fiducials and for finding the position of parts. Instead of using feeders for his machine, [Juha] opted to pick parts directly from pieces of cut tape. While this might be inconvenient if you’re placing large quantities of a single part, it helps keep the design simple.
The software that runs the machine is pretty sophisticated. After a bit of configuration it’s able to import a BOM with X/Y information and start placing within seconds. It also uses the camera to calibrate the needle, measure the PCB  using the fiducials, and pinpoint the location of cut tape sections.

If you want to build your own machine, [Juha] published detailed instructions that walk you through the entire assembly process. He’s also selling a kit of parts if you don’t want to source everything yourself. Check out the video after the break to see the machine import a BOM and place some parts (all the way down to 0402).

Continue reading “A DIY Pick And Place You Can Build Right Now”

Hacking The Nike+ Fuelband

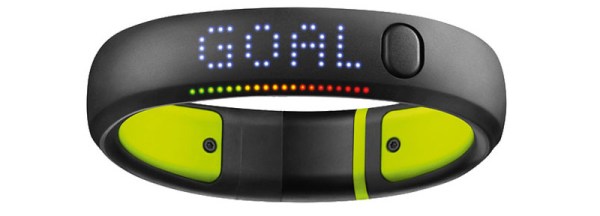
[Simone] was trying to reverse-engineer the Bluetooth protocol of his Nike+ Fuelband and made some surprising discoveries. [Simone] found that the authentication system of the Fuelband can be easily bypassed and discovered that some low-level functions (such as arbitrarily reading and writing to memory) are completely exposed to the end user or anyone else who hacks past the authentication process.

[Simone] started with the official Nike app for the Fuelband. He converted the APK to a JAR and then used JD-Gui to read the Java source code of the app. After reading through the source, he discovered that the authentication method was completely ineffective. The authenticator requires the connecting device to know both a pin code and a nonce, but in reality the authentication algorithm just checks for a hard-coded token of 0xff 0xff 0xff 0xff 0xff 0xff rendering the whole authentication process ineffective.

After he authenticated with the Fuelband, [Simone] started trying various commands to see what he could control over the Bluetooth interface. He discovered that he could send the device into bootloader mode, configure the RTC, and even read/write the first 65k of memory over the Bluetooth interface–not something you typically want to expose, especially with a broken authentication mechanism. If you want to try the exploit yourself, [Simone] wrote an Android app which he posted up on GitHub.

Raspberry Pi Learns How To Control A Combustion Engine

For his PhD at the University of Michigan, [Adam] designed a Raspberry Pi-based system that controls an HCCI engine, a type of engine which combines the merits of both diesel and gasoline engines. These engines exhibit near-chaotic behavior and are very challenging to model, so he developed a machine learning algorithm on a Raspberry Pi that adaptively learns how to control the engine.

[Adam]’s algorithm needs real-time readings of cylinder pressures and the crankshaft angle to run. To measure this data on a Raspberry Pi, [Adam] designed a daughterboard that takes readings from pressure sensors in each cylinder and measures the crankshaft angle with an encoder. The Pi is also equipped with a CAN transceiver that communicates with a low-level engine control unit.

RasPi HCCI Engine Control[Adam]’s algorithm calculates engine control parameters in real-time on the Pi based on the pressure readings and crankshaft position. The control values are sent over CAN to the low-level engine controller. The Pi monitors changes in the engine’s performance with the new values, and makes changes to its control values to optimize the combustion cycle as the engine runs. The Pi also serves up a webpage with graphs of the crankshaft position and cylinder pressure that update in real-time to give some user feedback.
For all the juicy details, take a look at [Adam]’s paper we linked above. For a more visual breakdown, check out the video after the break where [Adam] walks you through his setup and the awesome lab he gets to work in.

Continue reading “Raspberry Pi Learns How To Control A Combustion Engine”

Save Data From Old Scopes With A GPIB Disk Emulator

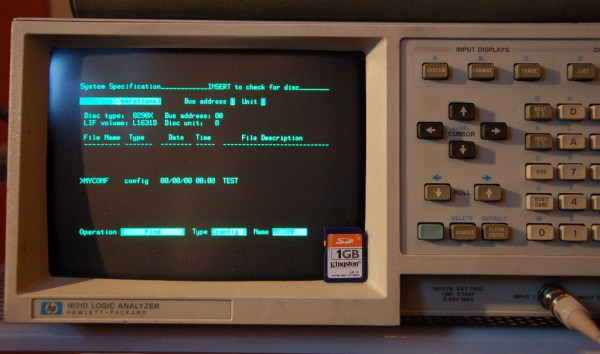
If you still use old test equipment on a regular basis, you probably have been frustrated by the lack of options for pulling data off these aging devices. Many higher-end devices are equipped with GPIB ports, which are general purpose buses for communicating with a variety of obsolete peripherals. Since GPIB disk drives aren’t too common (or practical) these days, [Anders] made a GPIB adapter that emulates a disk drive and stores data to an SD card.

[Anders] designed a PCB with a PIC microcontroller that plugs into a GPIB port. The PIC emulates a disk drive using the AMIGO protocol or the SS/80 protocol, which can be selected in a configuration file on the SD card. Most test equipment supports one of these two protocols, so his adapter should work with pretty much any GPIB-equipped kit.

Data is saved to a single image file on the SD card, which is encoded in a native HP disk format. The image file can be opened on Windows and Linux with some utilities that [Anders] mentioned on his project page. If you have any old test equipment withGPIB lying around and want to build your own, the schematic and source code are up on his site or [Anders] is selling bare boards.

Now if it’s a protocol converter that you need we’ve seen those in a couple of different varieties.

LED Matrix Infinity Mirror

[Evan] wrote in to let us know about the LED matrix infinity mirror he’s been working on. [Evan] built a sizable LED matrix out of WS2812B LEDs and mounted them to a semi-reflective acrylic sheet, which makes a pretty awesome infinity mirror effect.

Instead of buying pre-wired strands of serial LEDs like we’ve seen in some other projects, [Evan] purchased individual WS2812 LEDs in bulk. Since the LEDs just had bare leads, [Evan] had to solder wires between each of his 169 LEDs (with some help from a few friends). After soldering up hundreds of wires, [Evan] drilled out holes for each LED in a piece of semi-reflective acrylic and inserted an LED into each hole.

To create the infinity mirror effect, [Evan] mounted the LED matrix behind a window. [Evan] put some one-way mirror film on the outside of the window, which works with the semi-reflective acrylic to create the infinity mirror effect. The LEDs are driven by an Arduino, which is controlled by a couple of free programs to show a live EQ of [Evan]’s music along with patterns and other effects.

A Wireless Web-Connected Morse Code Keyer

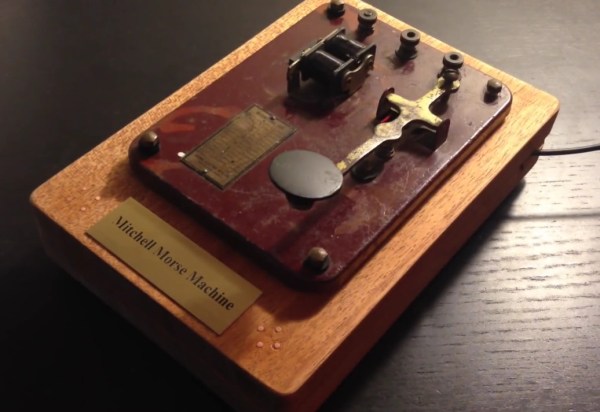
[Kevin] recently scored a Morse code keyer/sounder unit from the 1920s on eBay. While many hams would love to use an old keyer for CW, [Kevin] took a different route and repurposed it into a wireless web-connected morse code keyer.

[Kevin] mounted an Arduino Yun under the keyer, which listens for user input and provides web connectivity. The Yun connects to [Kevin]’s open-source web API he calls “morsel,” which allows it to send and receive messages with other morsel users. When a message is keyed in, the Yun publishes it to the API. When another keyer queries the API for incoming messages, the Yun downloads the morse sequence and replays it on the sounder.

[Kevin] also added some copper electrodes to the top of his enclosure, which act as capacitive buttons while keeping the keyer’s old-school appearance. The left button replays the most recently received message, and the right button sets the playback speed. Check out the video after the break to hear and see the keyer in action.

Thanks for the tip,  [Jarrod].

Continue reading “A Wireless Web-Connected Morse Code Keyer”