(Re)designing The LumenPnP Tape Feeder

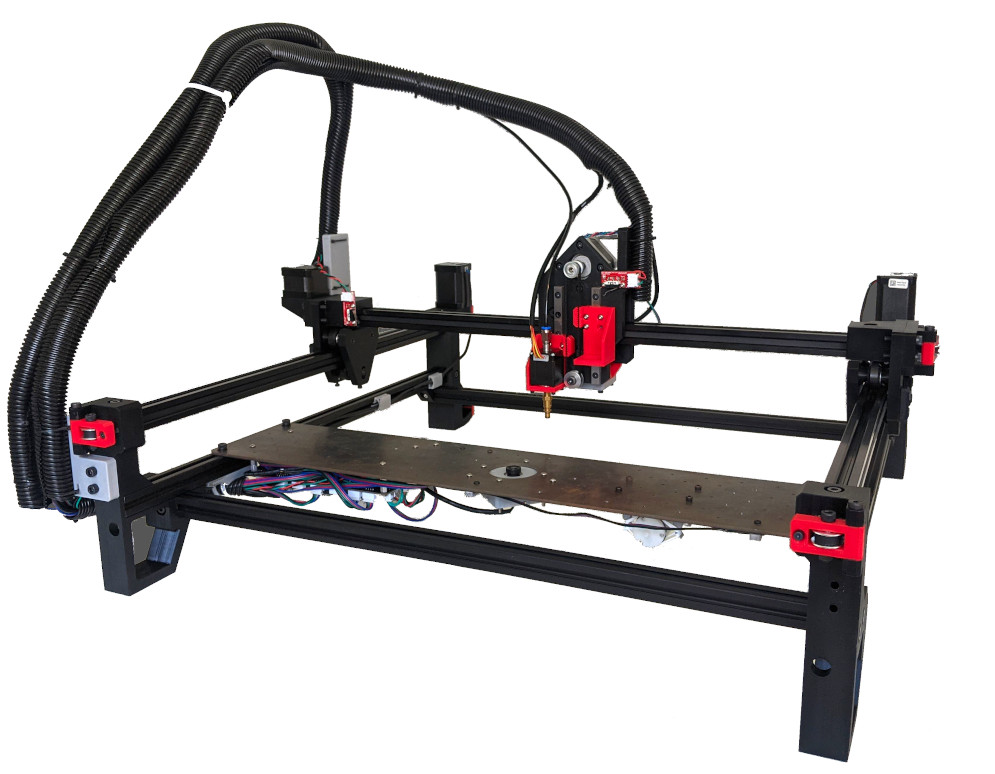
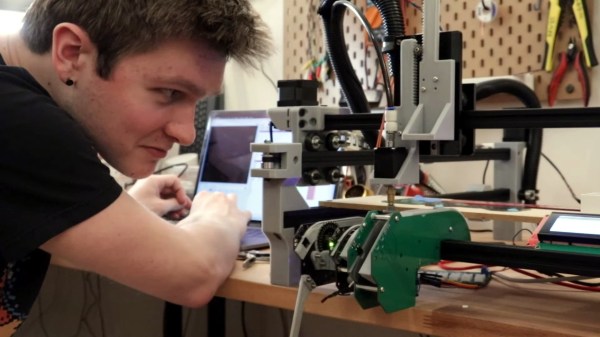
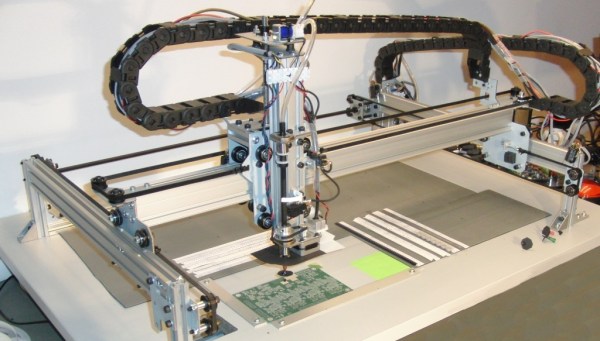
Many of the hardware orientated hackers among us will likely have been following along with the story of [Stephen Hawes] and the Lumen pick-and-place project but kind of waiting a bit for the project to mature some more before maybe taking the plunge and ordering a kit. One reason for this might be that whilst the basic machine design is there and working, the tape feeders did need a fair bit of work, and a lack of usable feeders does not make a great PnP machine. [Stephen] has been working on a newer design that addresses some of the identified shortcomings, and has started documenting his progress (video, embedded below) along the way.

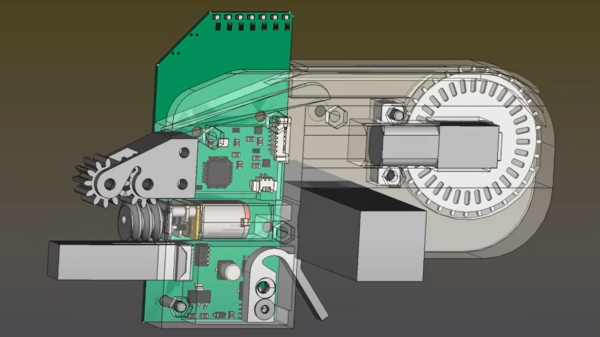
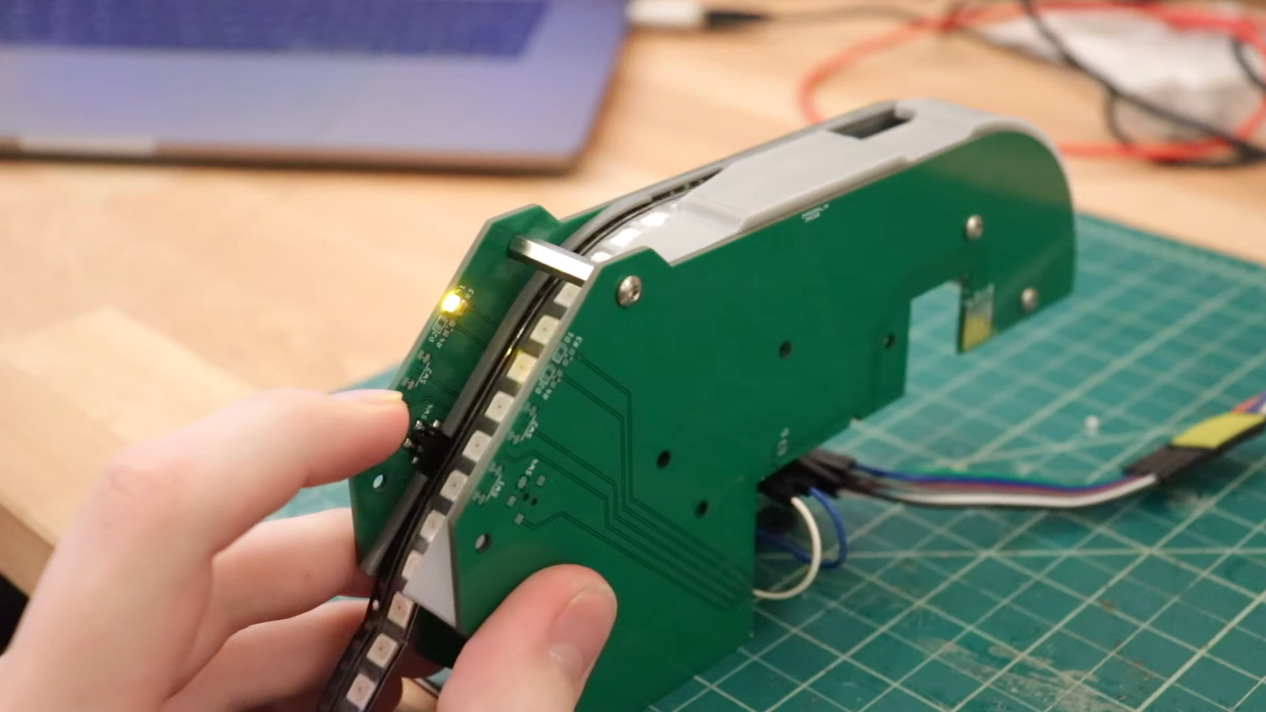
Gone is the PCB-based ‘case’, reverting back to a 3D printable affair and a much smaller PCB. After flip-flopping a bit between different geared DC motors, [Stephen] settled back on the original, smaller unit, which after a wee spot of hacking, was convinced to accept an optical encoder stripped from another unit, and this proved that it was indeed more than up to the tape-advancement duty. The reason for this change was physical size — the original motor resulted in an assembly 38mm wide — this limited the number for feeders on the front rail to barely eleven units. This is not really enough, but with the narrower assembly, the width is reduced to 15.5mm allowing 27 feeders to snuggle together on the rail, and that should make the machine much more usable.

Continue reading “(Re)designing The LumenPnP Tape Feeder”

Angel Investor Gives Open Source PnP A Massive Boost

We love it when an Open Source hardware project grows up and turns into a sustainable business, bootstrapped with nothing but hard work and great ideas, but it’s a really tough prospect to do it using your own money, ploughing the profits from any sales back into development and not taking a dime in wages whilst you do so. People obviously need an income to live off, and that time spent working on a startup is time you can’t spend earning your keep. So it’s with great pleasure that we can bring you the latest news from [Stephen Hawes] and his pick-and-place machine plans. In the year since we last checked in with the project, development has continued at a steady pace, with the guys quickly outgrowing the garage workspace, whilst they prepare PnP machine kits ready for sale.

The big news is that [Joel Spolsky], co-founder of Stack Exchange, creator of Kanban management tool, Trello, and angel investor, has made a sizable ($100K USD) investment in the company which has allowed them to take on a 3,000+ sq. ft office space, and given them the funds for stock and all that boring business overhead stuff. [Stephen] takes time to explain that [Joel] will not have any control of the company, and all hardware and software will remain fully Open Source. For those interested [Joel] implemented his investment as a SAFE note (Simple Agreement for Future Equity) and as such, [Joel] will only make a return in the form of a small share allocation, if they hit the big-time in the future. Can’t really say fairer than that!

[Stephen] did recently receive a ‘cease and desist’ notice regarding his use of the ‘Index’ name for the project, since that is already a trademarked term, defended by somebody else, the project will need change name very soon. A minor setback, but it is a bit annoying that a chunk of that investment now has to go to a lawyer to make sure that the name they do eventually choose isn’t already taken and is safe to use.

In terms of the machine itself, it is now is fully operating, with multiple automatic tape feeders, featuring up and down-facing machine vision, and all that OpenPnP goodness. It has even been demonstrated placing parts for its own custom motherboard PCB, reprap style. Nice!

We wish [Stephen] and partner [Lucian] all the success they deserve, and hope they get those kits out there, because there are people around these parts that need an affordable, hackable, desktop PnP machine ASAP, this scribe included!

Here’s the earlier story covering the machine, but it’s not the only Open Source PnP machine we’ve seen – here’s another one from a few years ago.

Continue reading “Angel Investor Gives Open Source PnP A Massive Boost”

Open Source Pick And Place Has A $450 BOM Cost

Give your grizzled and cramped hands a break from stuffing boards with surface mount components. This is the job of pick and place machine, and over the years these tools of the trade for Printed Circuit Board Assembly (PCBA) have gotten closer to reality for the home shop; with some models diving below the $10,000 mark. But if you’re not doing it professionally, those are still unobtanium.

The cost of this one, on the other hand, could be explained away as a project in itself. You’re not buying a $450 shop tool, you’re purchasing materials to chase the fever dream of building an open source pick and place machine. There are two major parts here, an X/Y/Z machine tool that can also rotate the vacuum-based parts picker, and the feeders that reel out components to be placed. All of this is working, but there’s still a long road to travel before it becomes a set and forget machine.

The rubber hits the road in two ways with pick and place machines: the feeders, and the optical placement. The feeders are where [Stephen Hawes] has done a ton of work, all shown in his video series that began back in January. The stackup of PCBs and 3D-prints hangs on the front rail of the gantry assembly, is adjustable for tape widths, and uses an interesting PCB encoder wheel and worm-gear for fine-tuning the feed. [Stephen’s] main controller board, a RAMPS shield for and Arduino Mega that runs a customized version of Marlin, can work with up to 32 of these feeders.

So far it doesn’t look like he’s tackled a vision system, although the Bill of Materials does include  “Downwards Camera”, confirming this is a planned feature. Vision is crucial in commercial offerings, with at least one downward camera for precise board positioning, and often an up-facing camera as well to ensure component position and orientation (if not multiple cameras for each purpose). Without these, the machine would be dead reckoning and that can lead to drift over the size of the board and the duration of the placement run as well as axial misalignment. Adding vision shouldn’t be a ground-up effort though, as [Stephen] chose to use OpenPnP to drive the machine and that project already has vision support. This will be much simpler to add when compared to the complexity of the feeders.

[Stephen] admits that much work still needs to be done and he would love to have help dialing in the performance of the feeder design, and fleshing out features on the road to perfection. Although we suspect that as in the early days of bootstrapping 3D printers, a project like this can never be truly finished. At least it’ll make his next run of LED glowties a lot easier to fabricate.

Continue reading “Open Source Pick And Place Has A $450 BOM Cost”

A Pick-And-Place That Is A Work Of Art

It’s a Holy Grail among hackerspaces, the possession of a pick-and-place machine. These robotic helpers for placing surface-mount components on PCBs are something of a gateway to electronic production, but they can carry a fearsome cost. Happily for the cash-strapped would-be electronic manufacturer, it is possible to build a pick-and-place for yourself. [Mcuoneclipse] has demonstrated this with a rather impressive build that works with the freely available OpenPnP software.

Superficially it shares much with what you might expect from a small CNC mill, in that it has a frame made from extruded aluminium that carries rails that trace an X and a Y axis supporting a tool head. But instead of a blade it has a box made from laser-cut ply that contains a camera and a vacuum pick-up tool that can collect a component from the tapes and deposit it in the correct point on the board. At the machine’s heart is a Smoothieboard, and the work is done by an assortment of solenoid valves and actuators. A huge amount of attention to detail has been paid to this build, with a holder for all the interchangeable nozzles for different component sizes, laser-cut mountings for all the motorised components, and automatic feeders for the SMD tapes all being carefully designed and built. Several iterations of the design are presented, in particular around the head itself which has passed through more than one form to remove as much vibration as possible. But don’t take it from us, have a look at the video we’ve pasted in below the break.

This isn’t the first pick-and-place machine we’ve brought you here at Hackaday. If you already have a 3D printer, would you consider this upgrade?

Continue reading “A Pick-And-Place That Is A Work Of Art”

MeatBagPnP Makes You The Automatic Pick And Place

It’s amazing how hackers are nowadays building increasingly complex hardware with SMD parts as small as grains of sand. Getting multilayer PCB’s and soldering stencils in small quantities for prototyping is easier than ever before. But Pick-and-Place — the process of taking parts and stuffing them on the PCB in preparation for soldering — is elusive, for several reasons. For one, it makes sense only if you plan to do volume production as the cost and time for just setting up the PnP machine for a small run is prohibitive. And a desktop PnP machine isn’t yet as ubiquitous as a 3D printer. Placing parts on the board is one process that still needs to be done manually. Just make sure you don’t sneeze when you’re doing it.

Of course the human is the slow part of this process. [Colin O’Flynn] wrote a python script that he calls MeatBagPnP to ease this bottleneck. It’s designed to look at a row in a parts position file generated from your EDA program and highlight on a render of the board where that part needs to be placed. The human then does what a robotic PnP would have done.

A bar code scanner is not necessary, but using one does make the process a bit quicker. When you scan a code on the part bag, the script highlights the row on the spreadsheet and puts a marker on the first instance of it on the board. After you’ve placed the part, pressing the space bar puts a marker on the next instance of the same value. The script shows it’s done after all parts of the same value are populated and you can then move on to the next part. If you don’t have a bar code scanner handy, you can highlight a row manually and it’ll tell you where to put that part. Check it out in the video below.

Of course, before you use this tool you need some prior preparation. You need a good PNG image of the board (both sides if it is double-sided) scaled so that it is the same dimensions as the target board. The parts position file generated from your EDA tool must use the lower left corner of the board as the origin. You then tell the tool the board dimensions and it scales up everything so that it can put the red markers at the designated XY positions. The script works for single and double-sided boards. For a board with just a few parts, it may not be worth the trouble of doing this, but if you are trying to manually populate a complex board with a lot of parts, using a script like this could make the process a lot less painful.

The project is still fresh and rough around the edges, so if you have comments or feedback to offer, [Colin] is listening.

[Colin]’s name ought to ring a bell — he’s the hacker who built ChipWhisperer which took 2nd Prize at The Hackaday Prize in 2014. The MeatBagPnP project is a result of having worked at building increasingly complex boards manually and trying to make the process easier. In addition to the walk-through of how the script works after the break we’ve embedded his other video from three years back when he was stuffing parts — including BGA’s — the hard way and then reflowing them in a Chinese oven with hacked firmware.

Continue reading “MeatBagPnP Makes You The Automatic Pick And Place”

Tools Of The Trade – Component Placing

Recently we started a series on the components used to assemble a circuit board. The first issue was on dispensing solder paste. Moving down the assembly line, with the paste already on the board, the next step is getting the components onto the PCB. We’re just going to address SMT components in this issue, because the through hole assembly doesn’t take place until after the SMT components have gone through the process to affix them to the board.

Reels!
Reels!

SMT components will come in reels. These reels are paper or plastic with a clear plastic strip on top, and a reel typically has a few thousand components on it. Economies of scale really kick in with reels, especially passives. If you order SMT resistors in quantities of 1-10, they’re usually $.10 each. If you order a reel of 5000, it’s usually about $5 for the reel. It is cheaper to purchase a reel of 10 kOhm 0603 resistors and never have to order them again in your life than it is to order a few at a time. Plus the reel can be used on many pick-and-place machines, but the cut tape is often too short to use in automated processes.

Continue reading “Tools Of The Trade – Component Placing”

A DIY Pick And Place You Can Build Right Now

There have been quite a few DIY pick and place projects popping up recently, but most of them are limited to conceptual designs or just partially working prototypes. [Juha] wrote in to let us know about his project, LitePlacer, which is a fully functional DIY pick and place machine with working vision that can actually import BOMs and place parts as small as 0402 with pretty good accuracy.

LitePlacer UIWhile some other DIY pick and place setups we’ve featured use fairly exotic setups like delta bots, this machine is built around typical grooved bearings and extruded aluminum. The end effector includes a rotating vacuum tip and a camera mounted alongside the tip. The camera provides feedback for locating fiducials and for finding the position of parts. Instead of using feeders for his machine, [Juha] opted to pick parts directly from pieces of cut tape. While this might be inconvenient if you’re placing large quantities of a single part, it helps keep the design simple.

The software that runs the machine is pretty sophisticated. After a bit of configuration it’s able to import a BOM with X/Y information and start placing within seconds. It also uses the camera to calibrate the needle, measure the PCB  using the fiducials, and pinpoint the location of cut tape sections.

If you want to build your own machine, [Juha] published detailed instructions that walk you through the entire assembly process. He’s also selling a kit of parts if you don’t want to source everything yourself. Check out the video after the break to see the machine import a BOM and place some parts (all the way down to 0402).

Continue reading “A DIY Pick And Place You Can Build Right Now”