A retro-styled briefcase-shaped computer with an e-ink display

2022 Cyberdeck Contest: Steampunk Cyberdeck Is Made From Wood, Leather, Brass And E-Paper

Laptop screens have come a long way ever since the first LCD-equipped portables hit the market back in the 1980s. But even today’s high-resolution, full-color screens are not ideal for use in direct sunlight: limited contrast and annoying reflections can make reading awkward and working nearly impossible. Electronic-paper displays don’t suffer from those problems, but their low update speed and lack of color limit their use for general computing.

A retro briefcase computer, opened
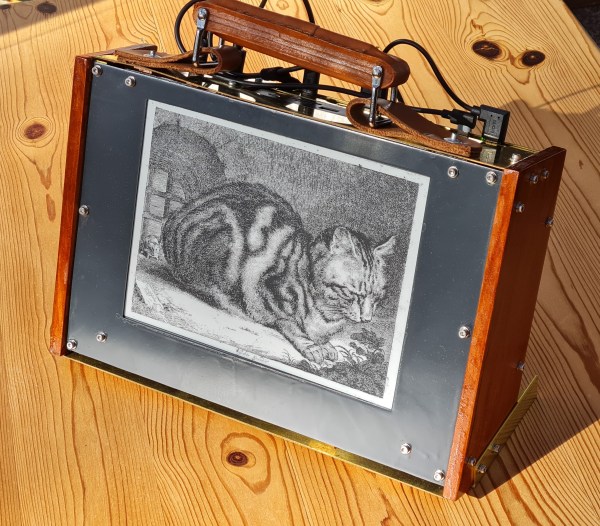
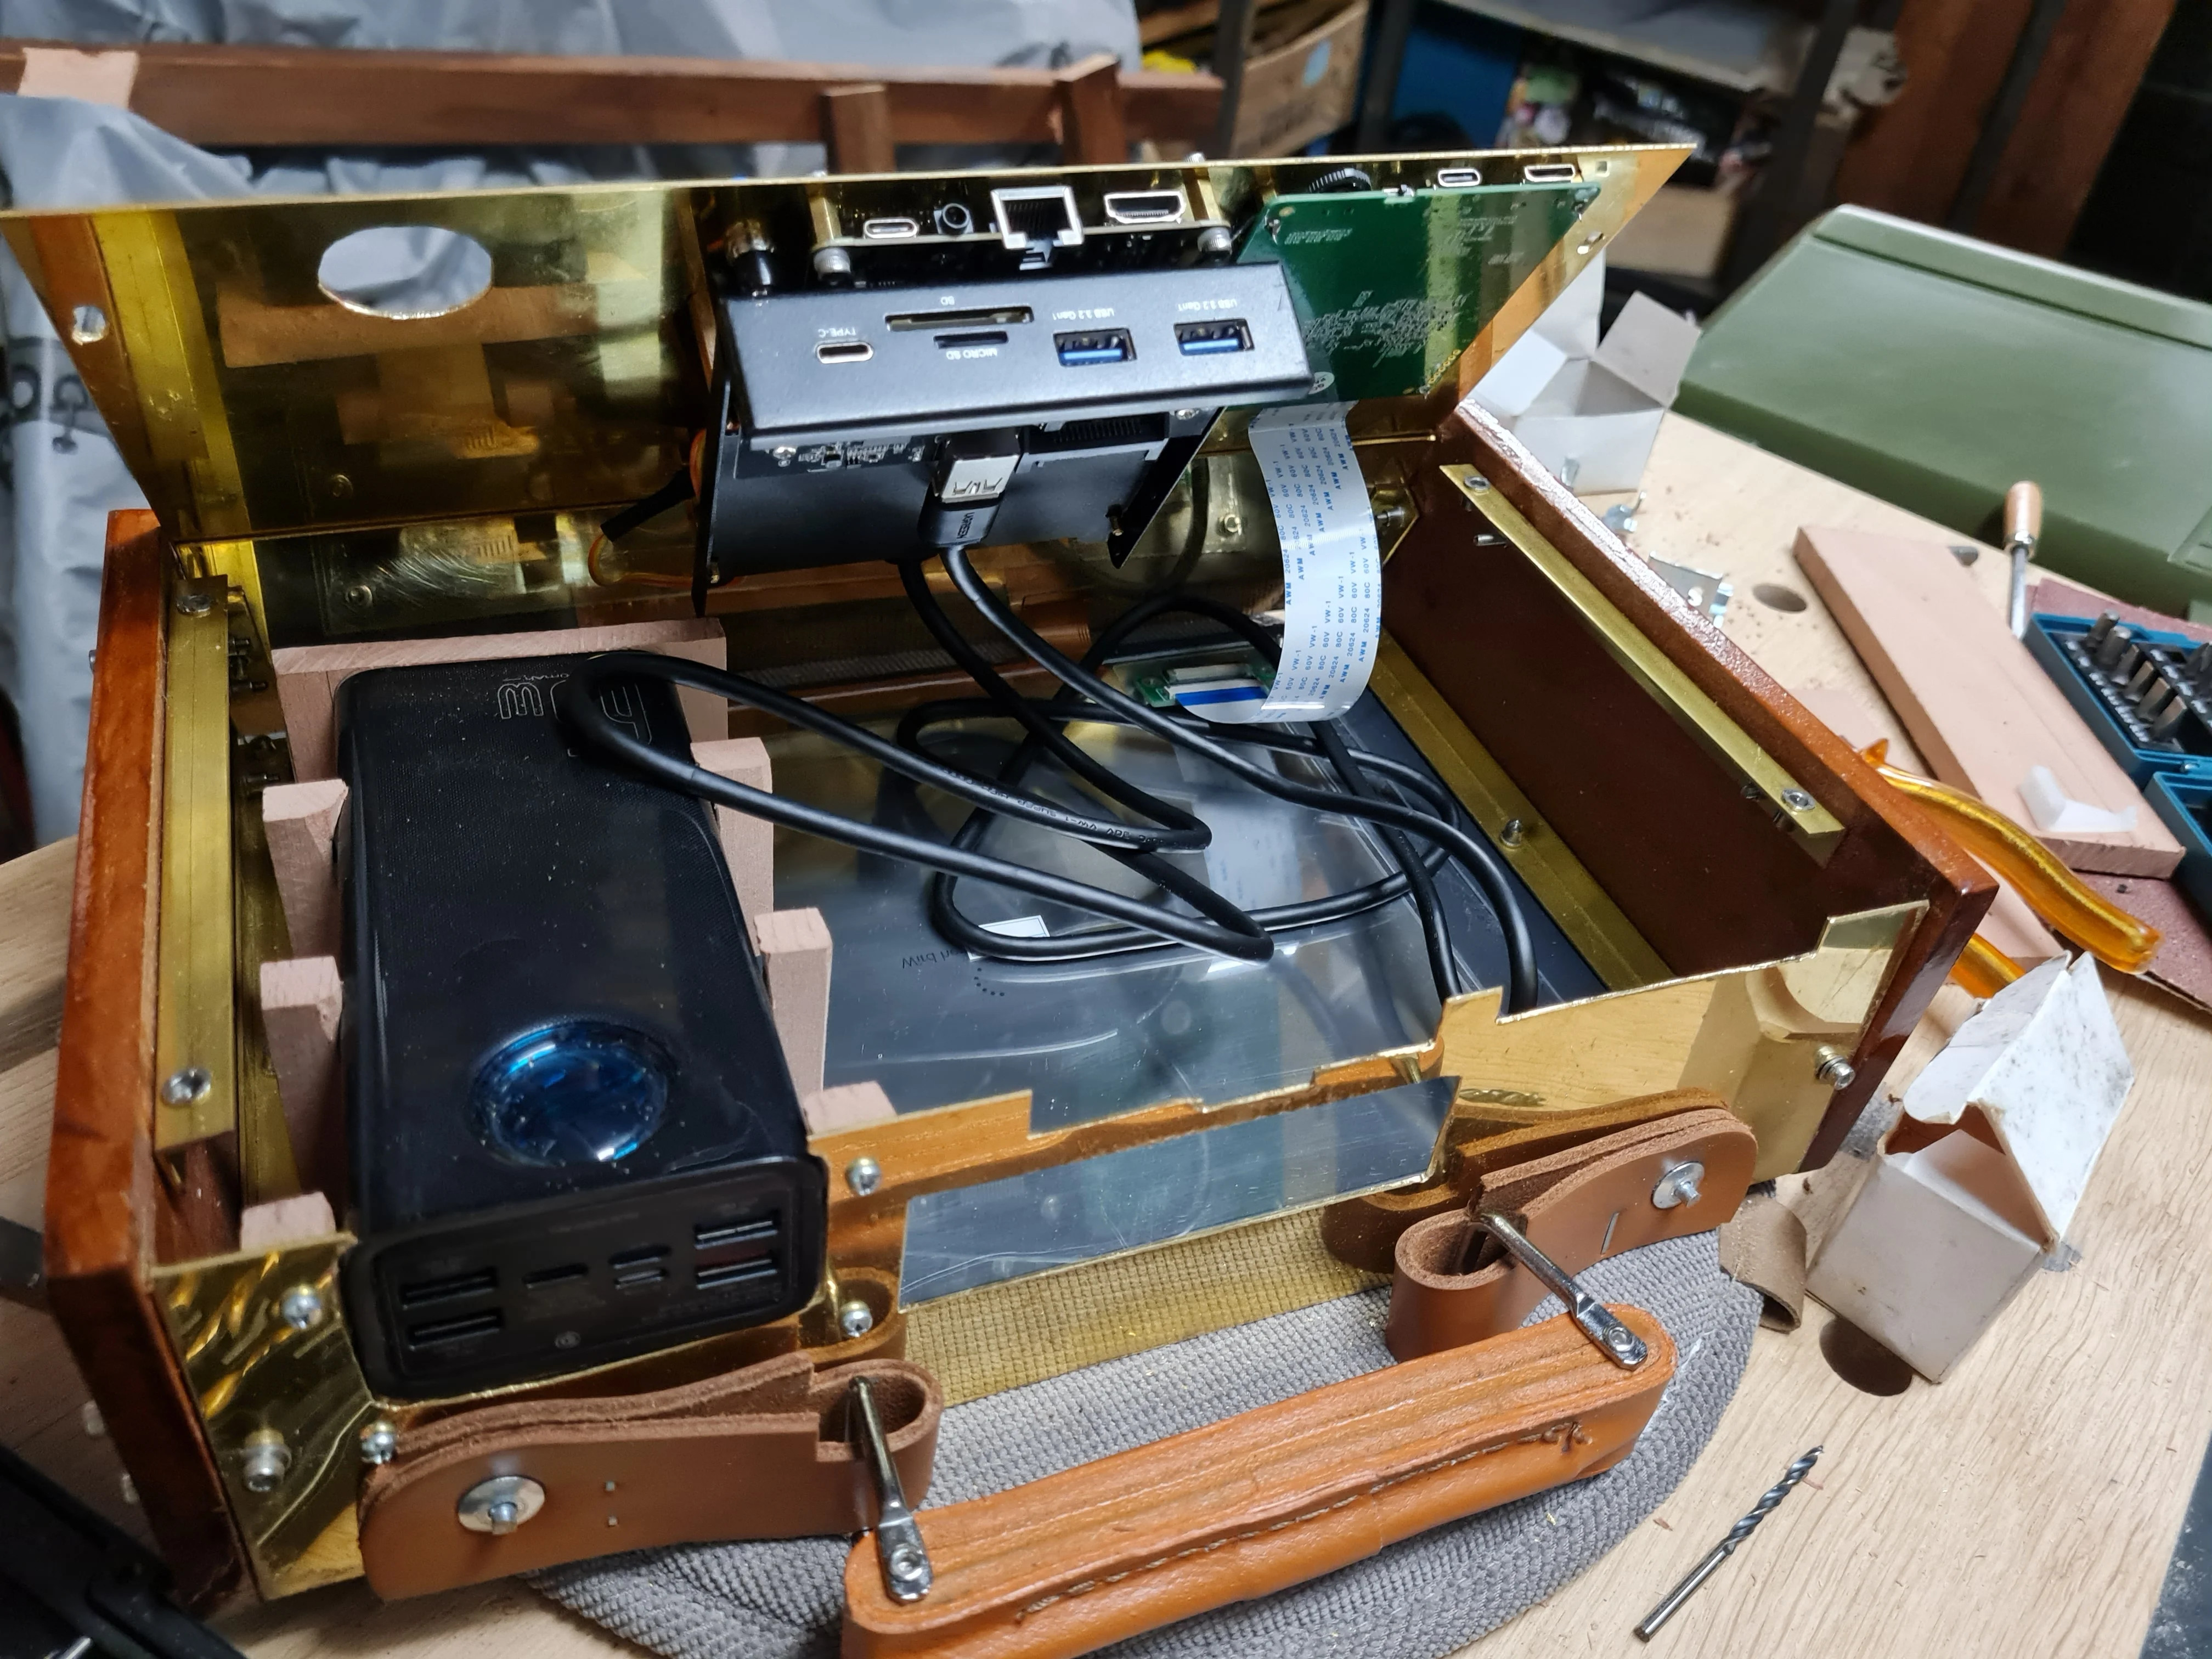
For some people however, the limitations of e-ink are not a deal-breaker. One of them is [Alleycat], who built a portable computer specifically for use in direct sunlight and equipped it with a 10.3″, 1872×1404 resolution e-ink display. It’s powered by a LattePanda Alpha 800s that runs Windows 10, and is mainly used for text-based tasks.

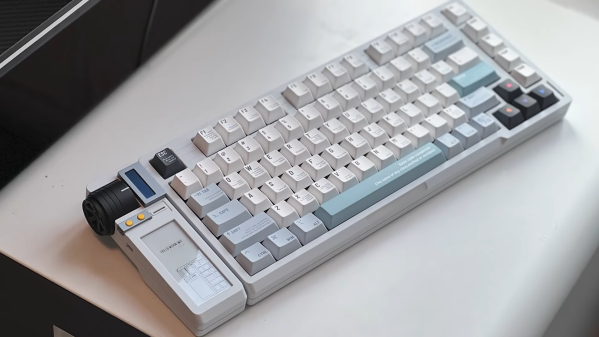
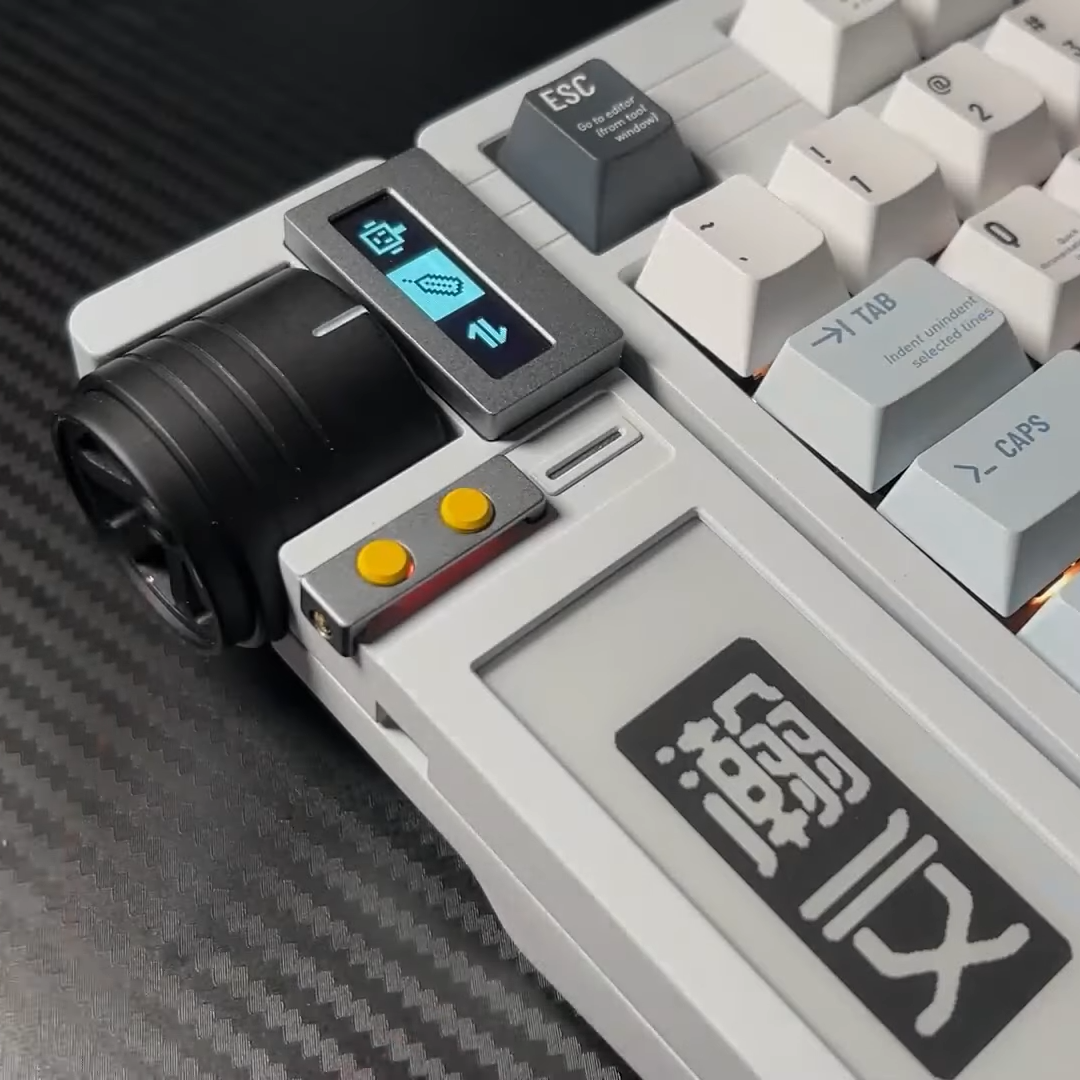
The LattePanda and the display are mounted inside a beautiful hand-made wooden case with a brass cover and leather straps, which makes it look like a kind of steampunk attaché case. A beefy power bank makes it a truly mobile machine, even though it doesn’t come with a built-in keyboard: [Alleycat] is too much of an ErgoDox fan to include anything inferior with the Steampunk Cyberdeck.

With an update rate of 15 Hz the display is nowhere near as fast as a modern TFT screen, but it looks entirely usable when [Alleycat] demonstrates scrolling in a web browser and even the classic DOS game Alley Cat. In fact, it reminds us of those first-generation LCD screens that were fitted on 286-class laptops back in the day, although with a vastly higher resolution.

We’ve seen a few e-ink based computer designs before, such as this Macintosh Classic II and this e-ink laptop project. The steampunk theme would go well with a hand-crafted metal mouse or this tiny display.

Continue reading “2022 Cyberdeck Contest: Steampunk Cyberdeck Is Made From Wood, Leather, Brass And E-Paper”

A clock displaying a micro QR code

LED Clock Uses Micro QR Codes To Show The Time

As you probably know, we love our clocks here at Hackaday. Odd display technologies are always interesting to see, as are unusual encoding techniques such as binary, ternary or higher-radix number systems. Still, clocks are typically meant to be human-readable, even if their encoding might be a little eccentric.

[Kitchi] however built an LED-based clock that is not human-readable, at least not without quite a bit of training. This is because it displays the time by generating a QR code, which only becomes readable to most humans through the use of a smartphone app. Of course, this negates the need for a clock since your smartphone will already have one anyway — but whoever said a clock needs to be useful?

To be fair, the display could conceivably be read by a determined human, since the QR format used is the tiny Micro QR M2 version that measures only 13×13 pixels. It’s capable of storing ten decimal digits, just enough to hold the date and time in mmddhhmmss format. The fixed part of the QR code is made of paper, while the variable part is formed through a grid of 90 white LEDs. The LEDs are mounted on a piece of prototype board along with a PIC 16F1504 microcontroller, two TM1637 LED drivers and a DS1307 real-time clock with battery backup.

If decoding QR codes is not your thing, or you simply haven’t got your smartphone on you, then the QR clock can also be set to a more human-readable format by adding a jumper. The time will then scroll across the LED screen in ordinary decimal format.

The video in the link is in Japanese, with no automatic translation available, but the build process is clearly shown and should be understandable even if you can’t follow the cheerful robotic narrator. We’ve seen a couple of QR-code based clocks before, some with an LCD screen and some with retro styling, but all of those use the larger standard QR code which definitely no human can decode visually. Or can you? Let us know in the comments!

Thanks for the tip, [J. Peterson]!

A tennis racket and a tennis ball with a spinning motor inside

A Self-Spinning Tennis Ball To Surprise Your Opponent

In many ball sports like golf, football and tennis, controlling the ball’s spin is an important skill. Expert players can make golf balls curve around obstacles, launch footballs towards goal posts from impossible angles, or confuse their opponents by making a tennis ball bounce in a completely unexpected direction.

[Luis Marx], by his own admission, is not an expert tennis player at all, so when he found himself humiliated on the court by his roommate he set about finding a different way to win. In other words, to cheat. The basic idea was to make a tennis ball that would start spinning at the push of a button, rather than by skillful wielding of a racket: a spinning ball that flies through the air will follow a curved trajectory, so if you can make a ball spin at will, you can change its direction in mid-air.

Making a ball spin by itself is not as hard as it may sound. All you need is an electric motor that’s small enough to fit inside, along with a power source and some way to turn it on. When the motor inside the ball starts to spin, Newton’s third law ensures that the outside will spin in the opposite direction. [Luis] found a suitable DC motor and mounted it on a small custom-designed PCB along with an ESP8266 controller and powered it with a tiny lithium battery. A pushbutton mounted on his tennis racket operates the wireless interface to turn the motor on and off.

Although getting this setup to work wasn’t as easy as [Luis] had hoped, turning it into a ball that’s good enough to play tennis with was not straightforward either. [Luis] decided to 3D-print the outer shell using flexible filament in order to create something that would have the same amount of bounce as an ordinary rubber tennis ball. It took several rounds of trial and error with various types of filament to end up with something that worked, but the final result, as you can see in the video (in German, embedded below), was quite impressive.

Tests on the tennis court showed that [Luis] could now easily beat his roommate, although this was mostly due to the erratic bouncing caused by the ball’s spin rather than any aerodynamic effects. Still, the magic tennis ball achieved its objective and even survived several games without breaking. If you’re looking for a more brute-force approach to cheating at tennis, this 180 mph tennis ball trebuchet might come in handy.

Continue reading “A Self-Spinning Tennis Ball To Surprise Your Opponent”

An automatic fish feeding system mounted on an aquarium

The FishFeeder Keeps Your Fish Fed While You’re Away

With summer in full swing in the Northern Hemisphere, millions of people are out on vacation leaving millions of homes empty. Thanks to modern technology it’s easier than ever to keep an eye on those empty homes: internet-connected cameras report suspicious activity, and smart-home devices like curtains and light bulbs can be operated from your holiday home. If you’ve got an aquarium and want to keep your fish well-fed during your vacation, then [FoxIS]’s internet-connected automated fish feeder might come in handy too.

The heart of the system is a 3D-printed mechanism that holds a bottle of fish food in a funnel and dispenses a set amount through a servo-operated shutter. The servo is driven by an ESP32 sitting inside an M5StickC IoT development kit. [FoxIS] wanted to use TinyGo for this project, which unfortunately meant that he couldn’t use the ESP32’s built-in WiFi system due to software limitations. He therefore connected the M5StickC to a Raspberry Pi, which he can log into from anywhere in the world to operate the feeding mechanism or to watch his aquatic pets through a USB camera.

A small IoT device with an LCD screen showing aquarium-related informationApart from automating the feeding process, the FishFeeder system also keeps track of the aquarium’s temperature through an IR thermometer and shows reminders for other maintenance tasks, such as changing the water or cleaning the filter. A minor inconvenience is the requirement to have that Raspberry Pi present for internet connectivity, but perhaps a future version of TinyGo will support WiFi on the ESP32 and make the FishFeeder a fully self-contained system.

While 3D-printing is an obvious choice for custom mechanisms like this, you can also make a much simpler system from a Tupperware bin and a drill bit. If metalworking is your thing, you can build really accurate fish feeders too.

The GameTank Is The Latest And Greatest 8-bit Game Console

The NES, Atari 2600, the Apple II, the Commodore 64 and the TurboGrafx-16 are just some of the many game consoles and home computers built around the 6502 CPU. And while the 6502 has been pretty much obsolete since the mid-’90s, that hasn’t stopped hackers from building new systems with it in the 21st century. Today we can even show you an entirely new 6502-based game console: the GameTank, designed and built by [Clyde Shaffer].

The GameTank was designed to be easy to build by anyone, and is therefore largely constructed from DIP chips that can be bought new at any component distributor. The main CPU is a WD65C02 running at 3.5 MHz, assisted by a 6522 I/O controller and 32 kB of RAM. Composite video is generated by a clever circuit made out of discrete logic chips. The video card comes with DMA for fast transfers and even includes a blitter, which enables it to move images around the screen quickly without loading the CPU.

For the controllers, [Clyde] decided to go for the more-or-less industry standard DE-9 connector gamepads as used on the Sega Genesis and various Atari consoles. He also made his own controller, a 3D printed one with four directional buttons, three action buttons and a start button. The buttons are implemented with Cherry MX Clear switches — an unusual choice for a gamepad perhaps, but they’re apparently very comfortable for long gaming sessions.

The console itself is also housed in a printed enclosure with a design reminiscent of the Nintendo 64. Game cartridges are inserted at the top and contain an EEPROM chip that can be written with a special programmer. The cartridge port also brings out several internal signals and can therefore be used as an expansion port, similar to the way Super NES cartridges could accommodate enhancement chips.

Games currently available include Tetris, the office-themed platformer Cubicle Knight, a Zelda-style adventure named Accursed Fiend, and a remake of the classic viral animation Bad Apple. [Clyde] provides a comprehensive stack of tools and example code and invites anyone interested to help develop more software for the platform. There’s also a hardware-accurate emulator, which is not only useful if you’re writing new code for the system but also if you simply want to try out the existing games in your browser.

Rolling your own 6502 system is great fun, and we’ve seen several examples over the years: some are built with huge bundles of wire, some are come with a clever programming language, some are so tiny they fit on your wrist, and some are simply beautifully made.

Continue reading “The GameTank Is The Latest And Greatest 8-bit Game Console”

A TRS-80 with a small PCB attached

Hackaday Prize 2022: Modern Plug-in Gives TRS-80 Its Voice Back

Like artificial intelligence, speech synthesis was one of those applications that promised to revolutionize computing in the 1980s, only to fizzle out after people realized that a robotic voice reading out predefined sentences was not actually that useful. Nevertheless, computer manufacturers didn’t want to miss out on the hype and speech synthesizers became a relatively common add-on for a typical home computer.

Those add-ons were usually built around a custom voice-synthesis chip. If that chip fails, you’re out of luck: many were made in limited quantities by small companies and are impossible to find today. So if you’ve got a Tandy TRS-80 Voice Synthesizer with a dodgy SC-01-A chip, you’ll definitely want to check out [Michael Wessel]’s Talker/80 project. It’s a plug-in module for the TRS-80 that’s software compatible with the original Voice Synthesizer, but built from modern components. Synthesis is still performed by a custom IC, but now it’s using the more common Epson S1V30120 text-to-speech chip.

A speech synthesis PCB for a TRS-80The Talker/80 also has an ATmega644, which connects to the TRS-80’s expansion port on one side and to the Epson chip on the other. It can either emulate the original SC-01-A, in which case it expects text to be split into separate phonemes, or it can be set to an “advanced” mode in which it can directly process normal English text. In either case the voice sounds quite different from what original, although the new voice is arguably a little clearer.

We’ve seen modern speech synthesizers made for several classic computers: you can hook up the same Epson chip to an Amstrad CPC, or an ESP8266 to a VIC-20. If you’ve got an actual working SC-01-A but no vintage computer to use it with, you can also control it with an Arduino.

Continue reading “Hackaday Prize 2022: Modern Plug-in Gives TRS-80 Its Voice Back”