Revisiting The BlackHat Hack: How A Security Conference Was Pwned

Does anyone remember the Black Hat BCard hack in 2018? This hack has been documented extensively, most notoriously by [NinjaStyle] in his original blog post revealing the circumstances around discovering the vulnerability. The breach ended up revealing the names, email addresses, phone numbers, and personal details of every single conference attendee – an embarrassing leak from one of the world’s largest cybersecurity conferences.

To recap: The Black Hat conference badges included an embedded NFC tag storing the participant’s contact details presumably for vendors to scan for marketing purposes. After scanning the tag, [NinjaStyle] realized that his name was readily available, but not his email address and other information. Instead, the NFC reader pointed to the BCard app – an application created for reading business cards.

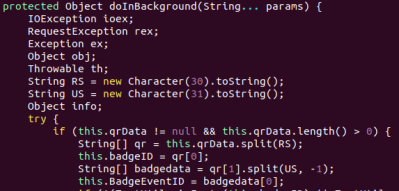
[NinjaStyle] decompiled the APK for the app to search for API endpoints and found that the participants each had a custom URL made using event identification values. After finding data that appeared to correspond to an eventID and badgeID, he sent a request over a web browser and found that his attendee data was returned completely unauthenticated. With this knowledge, it was possible to brute-force the contact details for every Black Hat attendee (the range of valid IDs was between 100000-999999, and there were about 18,000 attendees). Using Burp Suite, the task would take about six hours. 
He was able to get ahold of BCard to reveal the vulnerability, which was fixed in less than a day by disabling the leaky API from their legacy system. Even so, legacy APIs in conference apps aren’t an uncommon occurrence – the 2018 RSA Conference (another cybersecurity conference) also suffered from an unprotected app that allowed 114 attendee records to be accessed without permission.

With the widespread publicity of leaked attendee data, event organizers are hopefully getting smarter about the apps that they use, especially if they come from a third-party vendor. [Yashvier Kosaraju] gave a talk at TROOPERS19 about pen testing several large vendors and discovering that Kitapps (Attendify) and Eventmobi both built apps with unauthenticated access to attendee data. It’s hard to say how many apps from previous years are still around, or whether or not the next event app you use will come with authentication – just remember to stay vigilant and to not give too much of your personal data away.

A Low-Power Solution To Streamlining Sensor Data For IoT

For home use IoT systems, getting sensor data from tons of physical locations centralized to a single Raspberry Pi can be a difficult job, especially when considering the power consumption that’s necessary for doing it all over WiFi. When you’re using an ESP8266, for instance, swapping out batteries and accounting for connectivity issues can be a major hassle for a long-term solution. The NoCAN platform, created by [Alain Pannetrat], solves this problem using a wired approach that improves the use of the CAN bus.

Since SPI and I2C only work for short distances, approaches like RS-485 and CAN bus are a better bet for this type of setup. For systems with one centralized point, RS-485 works best – thus, the CAN bus is the better approach when you’re considering using multiple masters in a single environment.

CAN devices typically need a static address, so messaging involves sending data to the known address of the destination device. With NoCAN, a dynamic address assignment scheme allows nodes to request an address from a node manager on boot-up (similar to DHCP). A command line application also allows users to send and receive message from nodes using a pub/sub implementation – a device sends messages to a channel, and every device subscribed to the channel receives the message.

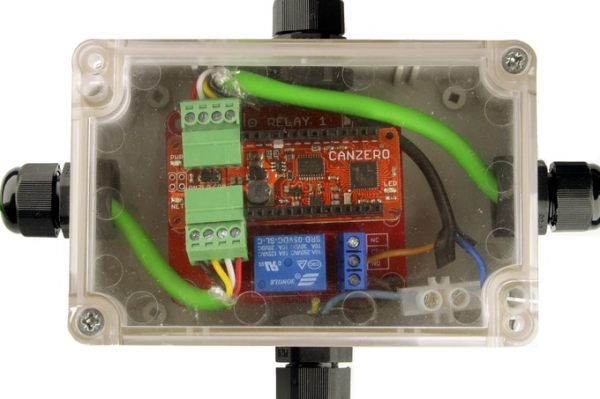
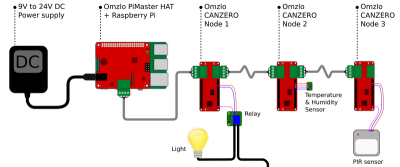
The hardware for the NoCAN platform consists of a Raspberry Pi with a “PiMaster” HAT and an Arduino-compatible CANZERO board. The PiMaster HAT uses an STM32F042 ARM Cortex M0 MCU, acting as an interface between the Pi and the CAN bus as well as preventing over-current events with a software-controlled smart switch. The CANZERO is based on the the SAMD21G18 ARM Cortex M0+ running at 48MHz, similar to the Arduino MKR Zero, with CAN bus networking using the STM32F042 ARM Cortex M0. The double MCU design allows the secondary MCU to reset the primary if it gets stuck due to a programming error, with the messages sent over the CAN bus.

To join the network together, a four-wire cable daisy-chains the nodes in the bus network, providing connectivity for up to 1000 feet. Either 12V or 24V DC power runs through the network, stepping down to 5V or 3.3V at each node. The approach is similar to PoE (power over Ethernet), although it is slower and lower in cost. Overall, it seems like a good solution for environments where wireless connectivity simply doesn’t cut it.

Replacing The 3D Printer And Router: A Tool For Manufacturing Human-Scale Forms

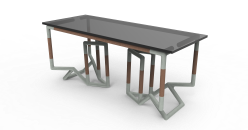
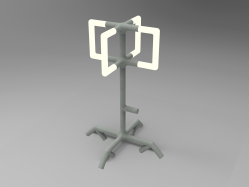
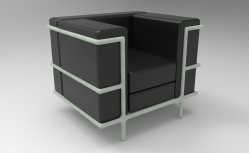
The purpose of Geometer becomes apparent when you realize its simplicity: [David Troetschel]’s project is to create an easily understandable design tool that encourages goal-oriented design. The kit comes with physical components and digital counterparts that can be combined in a modular way. They each have a specific geometry, which provide versatility while keeping manufacturing simple.

For the prototyping phase, small snap-on parts 3D printed on a Formlabs printer mimic the module components on a smaller scale. Once a design is conceived and the Geometer Grasshopper program finalizes the module arrangement necessary for the model, the larger pieces can be used as a mold for a concrete or hydrocal mold casting.

The present set of modules is in its seventh iteration, initially beginning as a senior thesis for [Troetschel]. Since then, the project itself has had an extensive prototyping phase in which the components have gone from being injection-molded to 3D printed.

The overall process for prototyping is faster than 3D printing and more cost-effective than sending to a third-party shop to build, which adds to the project’s goal of making manufacturing design more accessible. This is an interesting initiative to introduce a new way of making to the DIY community, and we’re curious to see this idea take off in makerspaces.

“The Thing”: A Homemade FPGA Board

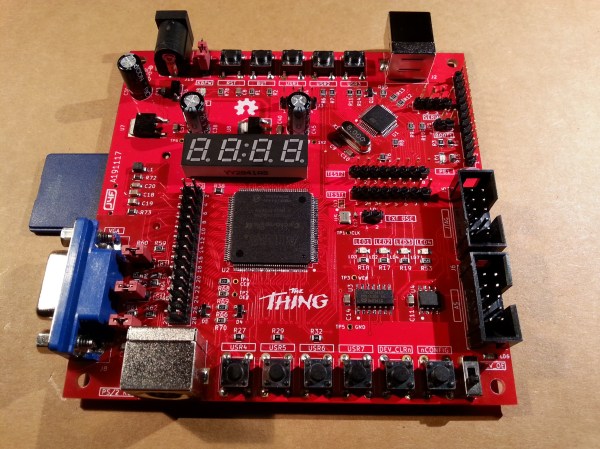
The Thing is an unassuming name for an ambitious project to build an FPGA board from easy to find components.

The project stems from an earlier build submitted to the 2018 Hackaday Prize by [Just4Fun] where two dev boards – an STM32-based Arduino and an Altera MAX II CPLD board – were combined with the Arduino used as a stimulus generator for the CPLD. This way, the Arduino IDE, interfaced through USB, can be used for programming the CPLD.

The Thing similarly uses the STM32 Arduino as a companion processor for the FPGA, with a 512KB SRAM and common I/O for GPIOs and a PS/2 keyboard for running HDL SOCs. It can also run Multicomp VHDL SOCs, a modular design that was made to run some older 8-bit CPUs made by [Grant Searle].

The FPGA (EP2C5T144C8N) uses the Quartus II IDE for configuration with a USB Blaster dongle through the JTAG or AS connector. The FPGA side controls a 4 digit seven segment LED display, four push buttons, 3 LEDs, a push button to clear all internal FFs (sampling rates), a push button to force a reboot (configuration reload), and a switch to force all pins to Hi-Z mode. Both an onboard 50MHz oscillator and connector for an external oscillator are also present on the FPGA side.

In one demo of the MP/M system capability of the board, The Thing was made to handle four concurrent users with one serial port connector to a PC and terminal emulator and the other serial ports connected to terminal emulators on VT100 boards routed through a dual-channel RS232 adapter board.

Both the Arduino and FPGA sides can also be used as standalone boards, but why use one when you can harness both boards together?

Continue reading ““The Thing”: A Homemade FPGA Board”

When Life Gives You Lemons, Make A Rube Goldberg Machine

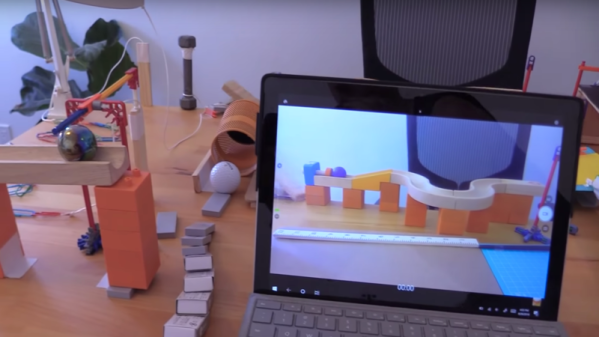
When life gives you lemons, you make lemonade. At least that’s what the [Sprice Machines] thought when they decided to turn a house into the set of a 9-minute long Rube Goldberg machine to make lemonade. (Video embedded below.) The complex chain reactions runs across multiple rooms, using everyday objects like brooms and even a vibrating smartphone to transfer energy across the complex contraption.

While the team professionally builds Rube Goldberg machines for clients, the Lemonade Machine looks surprisingly organic, like something a family might decide to do for fun over a long weekend (although there area few moments that make you question just how they were able to perfectly time every sequence in the chain reaction). Even though the actual lemonade making only takes up a small fraction of the machine, watching marble runs, weights dashing across a clothesline, and random household items repurposed into energy transfer mechanisms is really entertaining.

The [Sprice Machines] have been making Rube Goldberg machines for quite some time, posting the videos of their final runs on YouTube. Other builders for the Lemonade Machine included [Hevesh5], [DrComplicated], [DoodleChaos], [TheInvention11], [5MadMovieMakers], and [SmileyPeaceFun].

If you’re into Rube Goldberg machines, check out some of the other awesome projects that we’ve featured over the years on the blog.

Continue reading “When Life Gives You Lemons, Make A Rube Goldberg Machine”

Long Live Jibo, Our Adorable Robot Companion

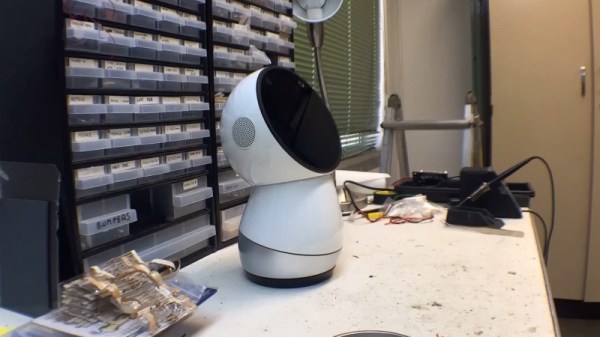
Jibo, the adorable robot made by Jibo, Inc., was getting phased out, but that didn’t stop [Guilherme Martins] from using his robot companion for one last hack.

When he found out that the company would be terminating production of new Jibos and shutting down their servers, he wanted to replace the brain of the robot so that it would continue to live on even after all of its software had become deprecated. By the time the project started, the SDK downloads had already been removed the from developer’s site, so they looked at other options for controlling Jibo.

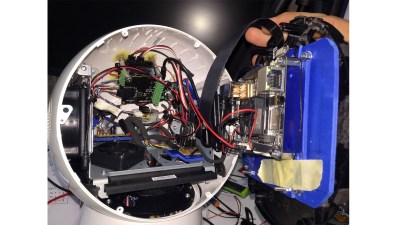
The first challenge was to not break the form factor in order to disassemble Jibo. They only managed to remove the battery from the bottom, realizing that the glass frame held the brain room. From within the robot, they were able to find the endless rotation joint for the head and the heart of the electronics. Jibo uses a DC motor, encoder, and IR sensor at each of three distinct levels to detect reference points.

They decided to use Phidgets modules to interface with these devices. While the DC motor controller handles 2A and has an encoder port, the Phidgets are able to provide software with the encoder and PID built-in. The 4x Digital Input Module was used for detecting the IR switch and connecting the modules to the computer.

[Martins] decided to use LattePanda, a hackable Windows 10 development board, for the brain of the new Jibo. The board was luckily able to fit inside the compartment for Jibo, but since it requires more power the unit is powered with 12V regulated to 5V in order to have less current passing through the wires. The DC motors, meanwhile, run at 12V and the IR switches and encoders at 5V.

A program developed in Unity3D plays the eye animations, and a C# program interfaces with the Phidgets. The final configuration was to fit Jibo onto a robotic arm to augment its behaviors. We previously wrote about Toppi, the robotic arm artist, that was used as the base for Jibo’s new home.

You can check out the result in the video below.

Continue reading “Long Live Jibo, Our Adorable Robot Companion”

Using TL Smoothers For Better 3D Prints

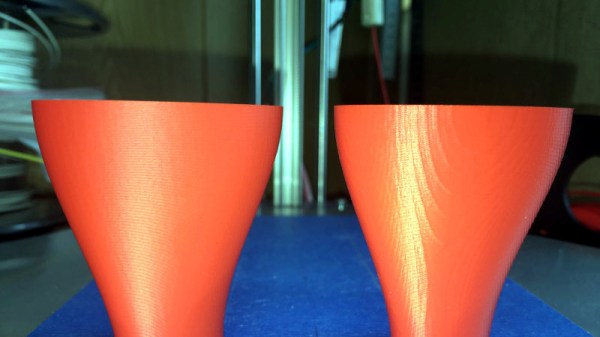
Some 3D printers will give you prints with surfaces resembling salmon skin – not exactly the result you want when you’re looking for a high-quality print job. On bad print jobs, you can usually notice that the surface is shaking – even on the millimeter scale, this is enough to give the print a bumpy finish and ruin the quality of the surface. TL smoothers help with evening out the signal going through stepper motors on a 3D printer, specifically the notoriously noisy DRV8825 motor drivers.

Analyzing the sine wave for the DRV8825 usually shows a stepped signal, rather than a smooth one. Newer chips such as the TMC2100, TMC2208, and TMC2130 do a much better job at providing smooth signals, as do cheaper drivers like the commonly used A4988s.

[Fugatech 3D Printing] demonstrates some prints from a D-Force Mini with an MKS Base 1.4 smoother-based control board, which is easier to use and smarter than Marlin. On the two prints using smoothers, one uses a board with four diodes, while the other was printed with a board with eight diodes. [Mega Making] compares how the different motor drivers work and experimentally shows the stuttering across the different motors before and after connecting to the smoothers.

The yellow and pink traces are the current for each phase of the motor. The blue and green traces are the voltages on each terminal of the phase with the yellow current. [via Schrodinger Z]
A common problem with DRV8825 motors is their voltage rating, which is lower than most supplies. When a 3D printer is moving slower than 100mm/min, the motor is unable to move smoothly.


[Schrodinger Z] does a bit of digging into the reason for the missing microsteps, testing out different decay modes in DRV8825s and why subharmonic oscillations occur in the signals from the motor.

The driver consequently has a “dead zone” where it is unable to produce low currents. Modifying the motor by offsetting the voltage by 1.4V (the point where no current flow) would allow the dead zone to be bridged. This also happens to be the logic behind the design for smoothers, although it is certainly possible to use different diodes to customize the power losses depending on your particular goal for the motor.

Debugging signal problems in a 3D printer can be a huge headache, but it’s also gratifying to understand why microstepping occurs from current analysis.

Continue reading “Using TL Smoothers For Better 3D Prints”