Robot Allows Remote Colleagues To Enjoy Office Shenanigans

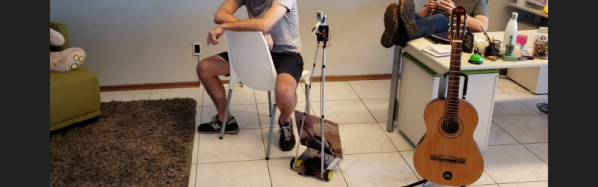
[Esther Rietmann] and colleagues built a Telepresence Robot to allow work at home teammates to have a virtual, but physical presence in the office. A telepresence robot is like a tablet mounted on a Roomba, providing motion capability in addition to an audio/video connection. Built during a 48 hour hackathon, it is a bit crude under the hood and misses out on some features, such as a bidirectional video feed. But overall, it pretty much does what is expected from such a device.

The main structure is build from cheap aluminium profiles and sheets. A Raspberry Pi is at the heart of the electronics hardware, with a servo mounted Pi-camera and speaker-microphone pair taking care of video and audio. The two DC motors are driven by H-bridges controlled from the Pi and an idle swivel caster is attached as the third wheel. The whole thing is powered by a power bank. The one important thing missing is an HDMI display which can show a video feed from the remote laptop camera. That may have been due to time constraints, but this feature should not be too difficult to add as a future upgrade. It’s important for both sides to be able to see each other.

The software is built around WebRTC protocol, with the WebRTC Extension from UV4L doing most of the heavy lifting. The UV4L Streaming Server not only provides its own built-in set of web applications and services, but also embeds a general-purpose web server on another port, allowing the user to run and deploy their own custom web apps. This allowed [Esther Rietmann]’s team to build a basic but functional front-end to transmit data from the remote interface for controlling the robot. The remote computer runs a Python control script, running as a system service, to control the drive motors and camera servo.

The team also played with adding basic object, gesture and action recognition features. This was done using PoseNet – a machine learning model, which allows for real-time human pose estimation in the browser using TensorFlowJS – allowing them to demonstrate some pose detection capability. This could be useful as a “follow me” feature for the robot.

Another missing feature, which most other commercial telepresence robots have, is a sensor suite for collusion avoidance, object detection and awareness such as micro switches, IR / ultrasonic detectors, time of flight cameras or LiDAR’s. It would be relatively easy to add one or several sensors to the robot.

If you’d like to build one for yourself, check out their code repository on Github and the videos below.

Continue reading “Robot Allows Remote Colleagues To Enjoy Office Shenanigans”

Bluetooth Control With Chrome

All the cool projects now can connect to a computer or phone for control, right? But it is a pain to create an app to run on different platforms to talk to your project. [Kevin Darrah] says no and shows how you can use Google Chrome to do the dirty work. He takes a garden-variety Arduino and a cheap Bluetooth interface board and then controls it from Chrome. You can see the video below.

The HM-10 board is cheap and could connect to nearly anything. The control application uses Processing, which is the software the Arduino system derives from. So how do you get to Chrome from Processing? Easy. The p5.js library allows Processing to work from within Chrome. There’s also a Bluetooth BLE library for P5.

Continue reading “Bluetooth Control With Chrome”

Open-Source Arm Puts Robotics Within Reach

In November 2017, we showed you [Chris Annin]’s open-source 6-DOF robot arm. Since then he’s been improving the arm and making it more accessible for anyone who doesn’t get to play with industrial robots all day at work. The biggest improvement is that AR2 had a closed-loop control system, and AR3 is open-loop. If something bumps the arm or it crashes, the bot will recover its previous position automatically. It also auto-calibrates itself using limit switches.

AR3 is designed to be milled from aluminium or entirely 3D printed. The motors and encoders are controlled with a Teensy 3.5, while an Arduino Mega handles I/O, the grippers, and the servos. In the demo video after the break, [Chris] shows off AR3’s impressive control after a brief robotic ballet in which two AR3s move in hypnotizing unison.

[Chris] set up a site with the code, his control software, and all the STL files. He also has tutorial videos for programming and calibrating, and wrote an extremely detailed assembly manual. Between the site and the community already in place from AR2, anyone with enough time, money and determination could probably build one. Check out [Chris]’ playlist of AR2 builds — people are using them for photography, welding, and serving ice cream. Did you build an AR2? The good news is that AR3 is completely backward-compatible.

The AR3’s grippers work well, as you’ll see in the video. If you need a softer touch, try emulating an octopus tentacle.

Continue reading “Open-Source Arm Puts Robotics Within Reach”

Balance Box Game Requires A Steady Hand

In the distant past, engineers used exotic devices to measure orientation, such as large mechanical gyros and mercury tilt switches. These are all still useful methods, but for many applications MEMS motions devices have become the gold standard. When [g199] set out to build their Balance Box game, it was no exception.

The game consists of a plastic box, upon which a spirit level is fitted, along with a series of LEDs. The aim of the game is to keep the box level while carrying it to a set goal. Inside, an Arduino Uno monitors the output of a MPU 6050, a combined accelerometer and gyroscope chip. If the Arduino detects the box is tilting, it warns the user with the LEDs. Tilt it too far, and a life is lost. When all three lives are gone, the game is over.

It’s a cheap and simple build that would have been inordinately more expensive only 10 to 20 years ago. It goes to show the applications enabled by ubiquitous cheap electronics like MEMS sensors. The technology has other fun applications, too – for example the Stecchino game, or this giant balance board joystick. We’re certainly lucky to have such powerful technology at our fingertips!

“The Thing”: A Homemade FPGA Board

The Thing is an unassuming name for an ambitious project to build an FPGA board from easy to find components.

The project stems from an earlier build submitted to the 2018 Hackaday Prize by [Just4Fun] where two dev boards – an STM32-based Arduino and an Altera MAX II CPLD board – were combined with the Arduino used as a stimulus generator for the CPLD. This way, the Arduino IDE, interfaced through USB, can be used for programming the CPLD.

The Thing similarly uses the STM32 Arduino as a companion processor for the FPGA, with a 512KB SRAM and common I/O for GPIOs and a PS/2 keyboard for running HDL SOCs. It can also run Multicomp VHDL SOCs, a modular design that was made to run some older 8-bit CPUs made by [Grant Searle].

The FPGA (EP2C5T144C8N) uses the Quartus II IDE for configuration with a USB Blaster dongle through the JTAG or AS connector. The FPGA side controls a 4 digit seven segment LED display, four push buttons, 3 LEDs, a push button to clear all internal FFs (sampling rates), a push button to force a reboot (configuration reload), and a switch to force all pins to Hi-Z mode. Both an onboard 50MHz oscillator and connector for an external oscillator are also present on the FPGA side.

In one demo of the MP/M system capability of the board, The Thing was made to handle four concurrent users with one serial port connector to a PC and terminal emulator and the other serial ports connected to terminal emulators on VT100 boards routed through a dual-channel RS232 adapter board.

Both the Arduino and FPGA sides can also be used as standalone boards, but why use one when you can harness both boards together?

Continue reading ““The Thing”: A Homemade FPGA Board”

Worried About Bats In Your Belfry? A Tale Of Two Bat Detectors

As somebody who loves technology and wildlife and also needs to develop an old farmhouse, going down the bat detector rabbit hole was a journey hard to resist. Bats are ideal animals for hackers to monitor as they emit ultrasonic frequencies from their mouths and noses to communicate with each other, detect their prey and navigate their way around obstacles such as trees — all done in pitch black darkness. On a slight downside, many species just love to make their homes in derelict buildings and, being protected here in the EU, developers need to make a rigorous survey to ensure as best as possible that there are no bats roosting in the site.

Perfect habitat for bats.

Obviously, the authorities require a professional independent survey, but there’s still plenty of opportunity for hacker participation by performing a ‘pre-survey’. Finding bat roosts with DIY detectors will tell us immediately if there is a problem, and give us a head start on rethinking our plans.

As can be expected, bat detectors come in all shapes and sizes, using various electrickery techniques to make them cheaper to build or easier to use. There are four different techniques most popularly used in bat detectors.


  1. Heterodyne: rather like tuning a radio, pitch is reduced without slowing the call down.
  2. Time expansion: chunks of data are slowed down to human audible frequencies.
  3. Frequency division: uses a digital counter IC to divide the frequency down in real time.
  4. Full spectrum: the full acoustic spectrum is recorded as a wav file.

Fortunately, recent advances in technology have now enabled manufacturers to produce relatively cheap full spectrum devices, which give the best resolution and the best chances of identifying the actual bat species.

DIY bat detectors tend to be of the frequency division type and are great for helping spot bats emerging from buildings. An audible noise from a speaker or headphones can prompt us to confirm that the fleeting black shape that we glimpsed was actually a bat and not a moth in the foreground. I used one of these detectors in conjunction with a video recorder to confirm that a bat was indeed NOT exiting from an old chimney pot. Phew!

Continue reading “Worried About Bats In Your Belfry? A Tale Of Two Bat Detectors”

Coandă Effect Makes A Better Hovercraft Than A Quadcopter

Leaving no stone unturned in his quest for alternative and improbable ways to generate lift, [Tom Stanton] has come up with some interesting aircraft over the years. But this time he isn’t exactly flying, with this unusual Coandă effect hovercraft.

If you’re not familiar with the Coandă effect, neither were we until [Tom] tried to harness it for a quadcopter. The idea is that air moving at high speed across a curved surface will tend to follow it, meaning that lift can be generated. [Tom]’s original Coandă-copter was a bit of a bust – yes, there was lift, but it wasn’t much and wasn’t easy to control. He did notice that there was a strong ground effect, though, and that led him to design the hovercraft. Traditional hovercraft use fans to pressurize a plenum under the craft, lifting it on a low-friction cushion of air. The Coandă hovercraft uses the airflow over the curved hull to generate lift, which it does surprisingly well. The hovercraft proved to be pretty peppy once [Tom] got the hang of controlling it, although it seemed prone to lifting off as it maneuvered over bumps in his backyard. We wonder if a control algorithm could be devised to reduce the throttle if an accelerometer detects lift-off; that might make keeping the craft on the ground a bit easier.

As always, we appreciate [Tom]’s builds as well as his high-quality presentation. But if oddball quadcopters or hovercraft aren’t quite your thing, you can always put the Coandă effect to use levitating screwdrivers and the like.

Continue reading “Coandă Effect Makes A Better Hovercraft Than A Quadcopter”