Tie-Dyed Filament Sings With Color

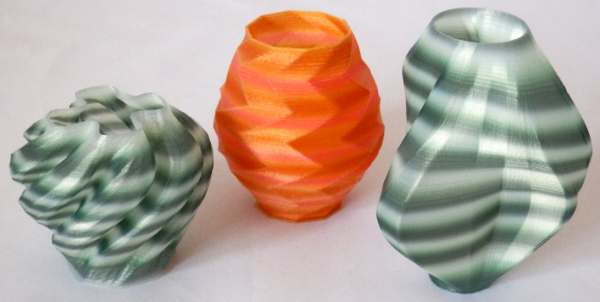
Manufacturers dye all sorts of 3D printer filaments on their factory lines; why can’t we? [Richard] takes this idea one step further by creating his own custom multicolored reels of nylon. Printing with these reels produces a vibrant pattern that simply demands our attention and  begs us to ask: how on earth..?

[Richard’s] tie-dye adventure is cleanly documented on the blog.  He simply spools a reel of nylon together and dyes subsections of the spool with a different color. With the filament “paletted” to taste, parts pop of the printer with an eye-catching rib pattern of color.

It’s worth mentioning that nylon is extremely hygroscopic, and dyeing filament in a bath full of colored liquid is sure to get it full of moisture. Then again, nylon’s capacity to absorb water might be why it dyes so well. Nevertheless, filament must be oven-dried (or equivalent) for a successful print. Post-drying, [Richard] doesn’t seem to be having any printing problems, and the results speak for themselves.

3D printers might be frequent fliers on these pages, but we still love seeing small modifications that enhance the visual appeal. What’s more, this trick delivers spectacular results with no modifications to the printer itself. Then again, if this job sounds like just too much work for you, we’d suggest using a sharpie.

Continue reading “Tie-Dyed Filament Sings With Color”

Budget Dehydrator Gives Your Damp Filament A Second Chance

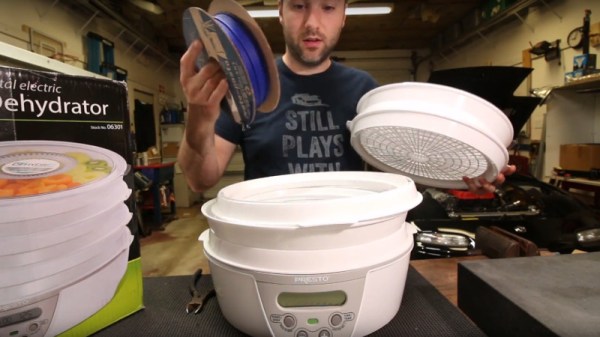
If you’ve had the misfortune of leaving your 3D printer filament out on a muggy day or, heaven forbid: showering with it, it’s probably soaked up quite a bit of moisture. Moisture will do more than just make your printer sound like Rice Crispies, it’ll ruin surface finishes and cause the filament to string into thin wisps between separate geometries on the same layer. Luckily for us, though, both [SafetyGlassesRequired] and [Joe Mike Terranella] give us the breakdown on taking a pair of snippers and about $40 in cash to start drying out our filament far away from the possibility of ruining any nearby kitchen ovens.

If you’ve been circling the 3D printer community for a while, you might have already heard about this trick. But with the arrival of a curiously-culinary-looking contraption called PrintDry, we can’t let the elephant in the room keep silent for much longer. Rather than risk our own pennies and leave ourselves stranded with a device that only makes the jerky on the box cover, [SafetlyGlassesRequired] and [Joe Mike Terranella] kindly prove our suspicions for us once and for all: a food dehydrator works perfectly for drying all that filament that we left out in the rain!

Clumsiness aside, a dehydrator isn’t a bad investment in the long run. Not only can we keep our supply dry, we might just be able to give all that freebie filament (that we dug out of the trash) a second life by resetting it to a clean, dry state.

These dehyrdators will toast all that moisture out of your filament, but it wont keep them dry whilst printing. For that problem, you’ll need to summon a heated drybox like this one.

[Joe Mike’s] solution will run us about $40. If you can do better, let us know in the comments.

Continue reading “Budget Dehydrator Gives Your Damp Filament A Second Chance”

Prestretched Fabric Prints Pop Into The Third Dimension

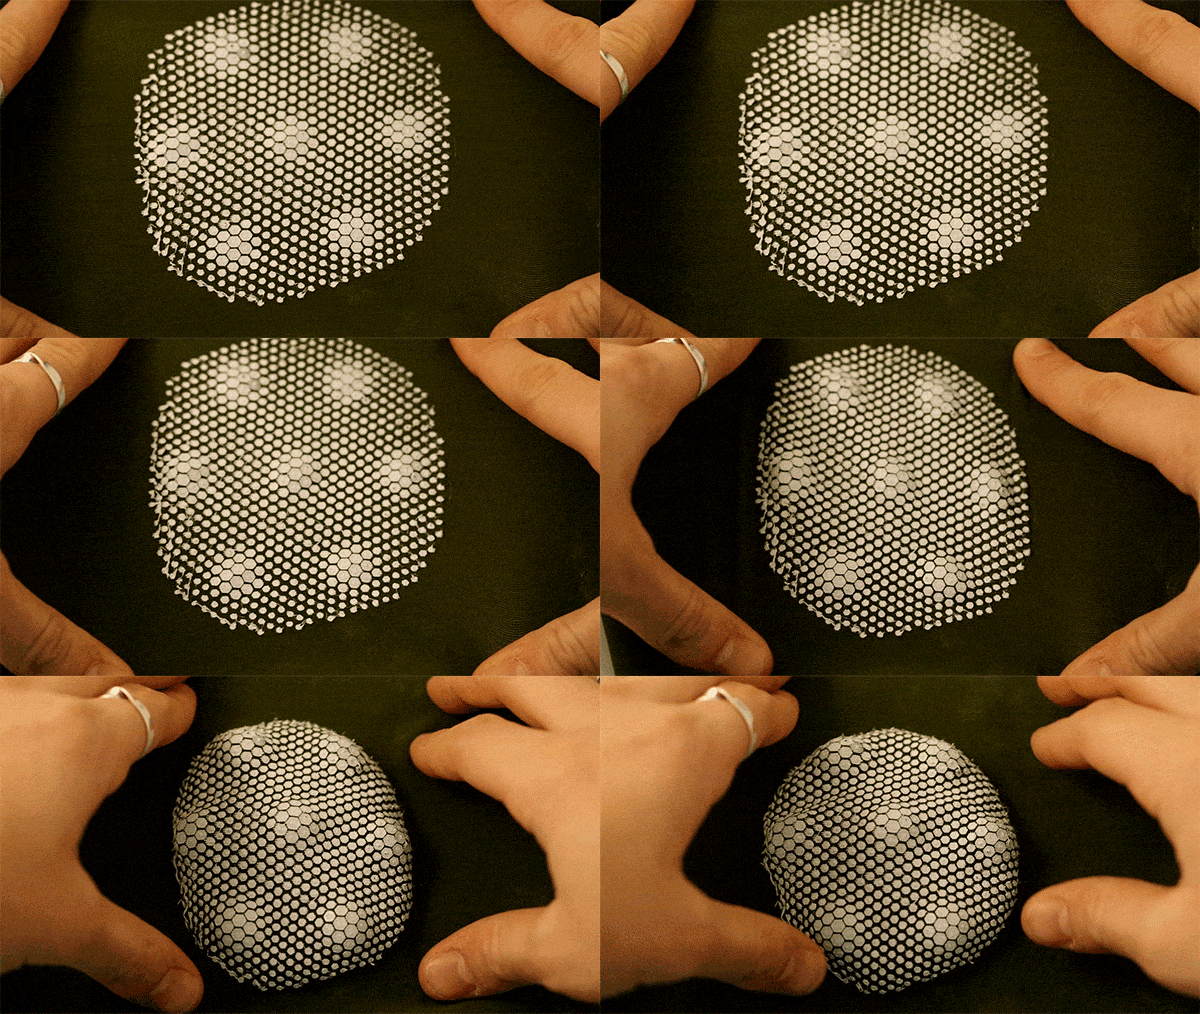
Printing on fabric might be a familiar trick, but adding stretch into the equation gives our fabric prints the ability to reconstitute themselves back into 3D. That’s exactly what [Gabe] has accomplished; he’s developed a script that takes open 3d meshes and converts them to a hexagonal pattern that, when 3D-printed on a stretched fabric, lets them pop into 3D upon relaxing the fabric.

[Gabe’s] algorithm first runs an open 3D surface through the “Boundary-First Flattening Algorithm,” which gives [Gabe] a 2D mesh of triangles. Triangles are then mapped to hexagons based on size, which produces a landscape of 2D hexagons. Simply printing this hexagonal pattern onto prestretched fabric defines the shape of the object that will surface when the fabric is allowed to relax. As for how to wrap our heads around the mapping algorithm, as [Gabe] explains it, “The areas that experienced the most shrinkage in the flattening process should experience the least shrinkage when the fabric contracts after printing, and the regions that experienced little to no shrinkage in the flattening process should contract as much as possible in the fabric representation.”

If that seems tricky to visualize, just imagine taking a cheap halloween mask and trying to crush it flat onto a table. To smush it perfectly flat, some sections need to stretch while others need to shrink. Once flat though, we can simply keep stretching to remove all the sections that needed to shrink. At this point, if our material were extremely elastic, we could simply let go and watch our rubber mask jump back into 3D. That’s the secret behind [Gabe’s] hexagonal pattern. The size and spacing of these hexagons limit the degree to which local regions of the fabric are allowed to contract. In our rubber mask example, the sections that we stretched out the furthest have the most to travel, so they should contract as much as possible, while the sections that shrank in the initial flattening (although we kept stretching until they too needed to stretch) should shrink the least.

We’ve seen some classy fabric-printing tricks in the past. If you’re hungry for more 3D printing on fabric, have a look at [David Shorey’s] flexible fabric designs.

Thanks for the tip, [Amy]!

Digikey Tips Its Hat To Kicad With Its Own Library

Digikey might wow us with their expansive stock, but now they’re wowing us with a personal gesture. The US-based electronics vendor is nodding its head in approval to KiCad users with its very own parts library. What’s more, [Chris Gammell] walks us through the main features and thought process behind its inception.

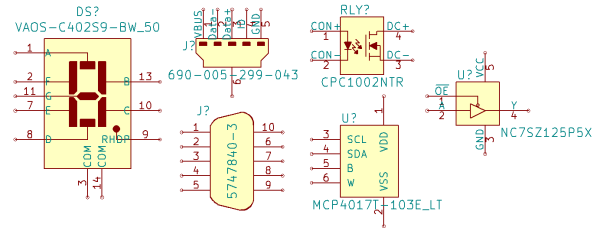
With all the work that’s going into this library, it’s nice to see features showing that Digikey took a thorough look at KiCad and how it fits into the current state of open-source PCBA design. First off, this library follows a slightly different design pattern from most other KiCad libraries in that it’s an atomic parts library. What that means is that every symbol is linked to a specific manufacturer part number and, hence, gets linked to a specific footprint. While this style mirrors EagleCad’s; KiCad libraries usually separate symbols from footprints so that symbols can be reused and parts can be more easily swapped in BOMs. There’s no “best” practice here, so the folks at Digikey thought they’d expose the second option.

Next off, the library is already almost 1000 parts strong and set to grow. These aren’t just the complete line of Yageo’s resistor inventory though. They actually started cultivating their library from the parts in Seeed Studio’s open parts library. These are components that hobbyists might actually use since some assembly services have a workflow that moves faster with designs that use these parts. Lastly, since all parts have specific vendor part numbers, BOM upload to an online cart is more convenient, making it slightly easier for Digikey to cha-ching us for parts.

Yes, naysayers might still cry “profit” or “capitalism” at the root of this new library, but from the effort that’s gone into this project, it’s a warm gesture from Digikey that hits plenty of positive personal notes for hobbyists. Finally, we can still benefit from plenty of the work that’s gone into this project — even if we don’t use it as intended. The permissive license lets us snag the symbols and reuse them however we like. (In fact, for the sharp-eyed legal specialists, they actually explicitly nullified the clause stating that derivative projects need not be licensed with a creative-commons license.)

With maturing community support from big vendors like Digikey, we’re even hungrier to get our hands on KiCad V.

Continue reading “Digikey Tips Its Hat To Kicad With Its Own Library”

Papercraft-Inspired Snake-bot Slithers Like A Real One

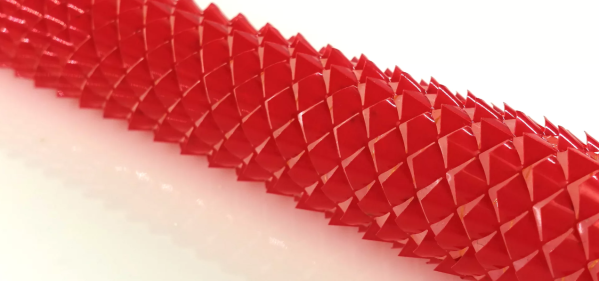
Blend the Japanese folding technique of Kirigami with an elastomer actuator, and what have you got? A locomoting snake robot that can huff around its own girth with no strings attached! That’s exactly what researchers at the Wyss Institute and Harvard School of Applied Sciences did to build their Kirigami Crawler.

Expanding and contracting propel this crawler forward. As the actuator expands, the hatched pattern on the plastic skin flares out; and when it contracts, the skin retracts to a smoother form. The flared hatch pattern acts like a cluster of little hooks, snagging multiple contact points into the ground. When the skin retracts, these hooks fold back inside while giving the body a slight push forward in the process. It’s a clever tactic, and almost identical to the way real-world snakes propel themselves. In fact, after iterating on a few skin patterns, they found that a trapezoidal pattern, which most closely resembles that of snakeskin, can cover ground fastest.

We’re thrilled to see such authentic biomimicry come to us without any extreme tooling or special molds. Still not satisfied with your share of crawling robots for one day? Have a peek into the past, and indulge yourself with a sine-wave locomotion.

Thanks for the tip, [Olivia]!

Continue reading “Papercraft-Inspired Snake-bot Slithers Like A Real One”

Laser-Cut Mecanum Wheel For The Budget Roboticist

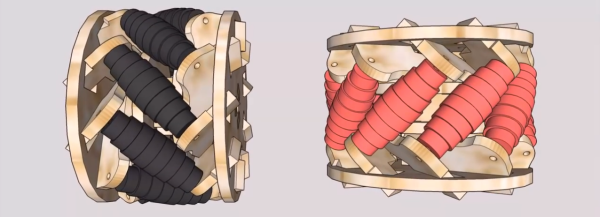
For the budding roboticist, omniwheels might be the next step in design patterns from your everyday “getting-started” robot kits. These wheels consist of tiny rollers that sit on the perimeter of the wheel and enable the wheel to freely slide laterally. With independent motor control of each wheel, a platform can freely locomote sideways by sliding on the rollers. You might think: “a wheel made of wheels? That sounds pricey…”–and you’d be right! Fear not, though; the folks at [Incubhacker] in Belgium have you covered with a laser-cut design that’s one-click away from landing on your workbench.

For anyone who’s tried to reliably mate flat laser-cut parts at an angle, we can tell you it’s no easy feat. The design here triumphs as both simple and reliable. Not only do they solve this problem elegantly, they also manage to create a design that will bear the load of a robot chassis that will travel with it. Laser-cut designs also usually suffer from a poor range of material options. Here the actual rollers need a bit more grip than what the plywood can provide. They also solve this problem effectively as well too, relying on heat-shrink tubing to provide the traction expected from a conventional wheel.

In the video below, [Incubhacker] takes you through the step-by process of making your own come to life. We’ve certainly seen some impressive laser-cut omniwheels in the past, but we like the simplicity of design combined with the composition of parts that probably already live on our workbenches.

Continue reading “Laser-Cut Mecanum Wheel For The Budget Roboticist”

Emboss Your Own Seals With A Laser Cutter

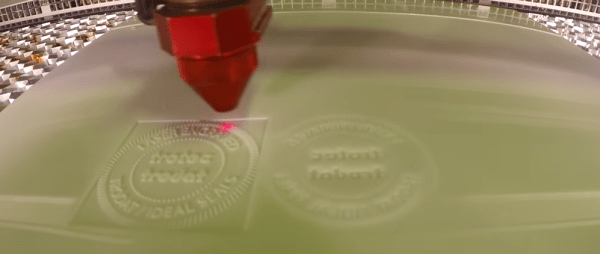
Parchment might be a thing of the past, but for those of us who still use paper an embossed seal can give everything from your official documents to your love letters a bold new feeling of authenticity. As far as getting your own seals made, plenty of folks will settle for having a 3rd party make them a seal, but not us. [Jason] shows us just how simple it is to raster our own seals with a laser cutter.

As far as the process goes, there are no tricks outside the typical workflow for raster engraving. Here, [Jason] simply creates a positive and (mirrored) negative seal pattern for each side of the seal embosser. The pattern is set for raster engraving, and the notched outline will be vector cut. From here, he simply exports the design, and the laser handles the rest.

This hack turned out so cleanly it almost seems like it could got into professional use–and it already is! Some extra Google-fu told us that it’s actually a fairly standard technique across the embossing industry for making embossing seals. Nevertheless, we couldn’t share our excitement for just how accessible this technique can be to anyone within reach of some time on a laser cutter.

[Jason] is using Delrin as his material to capture the design, which cuts cleanly and nicely handles the stress of being squished against your legal documents a couple hundred times. We’ve had our fair share of love on these pages for this engineering plastic. If you’re looking to get a closer look at this material, have a go at our materials-to-know debrief and then get yourself equipped with some design principles so that you’re ready to throw dozens of designs at it.

It’s not the first time the crafting and hacking communities intermingle and start sharing tools. In fact, if you’ve got yourself a vinyl cutter kicking around, why not have a go at churning out a few pcb stencils?

Thanks for the tip, [Doug]!

Continue reading “Emboss Your Own Seals With A Laser Cutter”