Toolpath Painting Brings Out That First Layer Sparkle

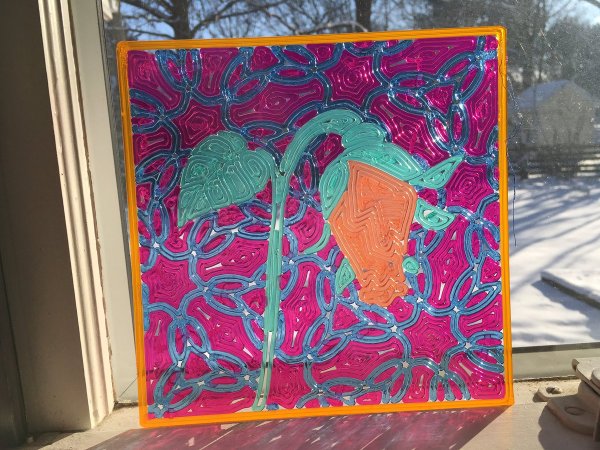
In the 3D-printing community, [Mark Peeters] may be known-and-loved for his drooloop printing, but that’s not enough to stop him from pushing the spectrum of printing tricks even further. Dubbed Toolpath Painting, [Mark] is taking that glorious sheen from the bottom layer of a 3D print and putting it to work to make eye-catching deliberate visual displays.

[Mark’s] work comes in two flavors. The first capitalizes on a fairly wide 2mm nozzle and translucent filaments to create vibrant sun catchers. The second relies on the reflective patterns of an opaque filament where the angle of the extrusion lines determine the type of sheen. [Mark’s] progress is beautifully captured on his twitter feed where he rolls out variations of this style.

Photographs simply don’t do justice to this technique, but you need not be left unsatisfied. Mark has left us with a thorough introduction to creating these patterns on your own printer in the video after the break.

Eager to put that printer to work on other avant-garde styles? Have a look at some other inspirational techniques from a prior MRRF, or have a go at texturing your prints with some velocity painting.

Continue reading “Toolpath Painting Brings Out That First Layer Sparkle”

The 3D Printing Dream Is Still Alive At 2019’s Midwest RepRap Festival

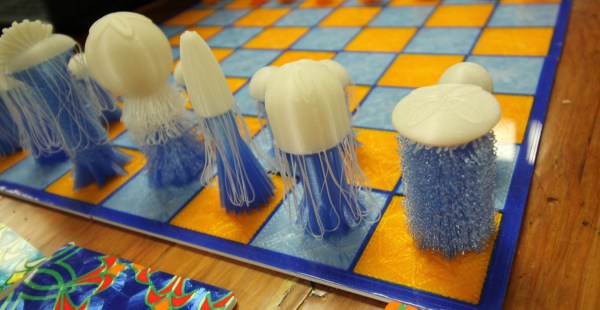
3D Printers have been in the hands of hackers for well over ten years, but the dream is far from over and certainly not overslept. This year’s Midwest RepRap Festival is a testament to the still-growing excitement, and world where 3D printing is alive and kicking on the next level.

This past weekend, I took up my friend [Eric’s] advice to come down and participate firsthand, and I was simply blown away. Not only did we witness the largest number of attendees to date, MRRF 2019 spilled into not one but two conference halls at the Goshen Fairgrounds.

In what follows, I tell my tale of the times. Continue reading “The 3D Printing Dream Is Still Alive At 2019’s Midwest RepRap Festival”

Threading 3D Printed Parts: How To Use Heat-Set Inserts

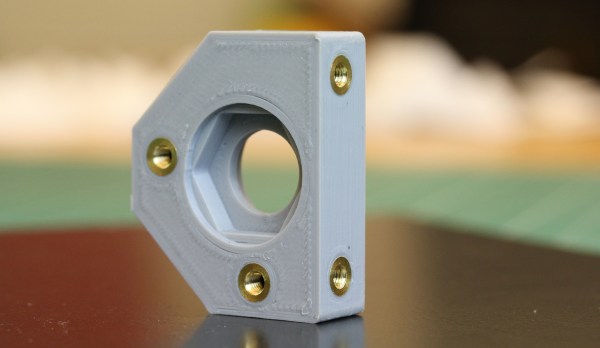
We can make our 3D-printed parts even more capable when we start mixing them with some essential “mechanical vitamins.” By combining prints with screws, nuts, fasteners, and pins, we get a rich ecosystem for mechanism-making with capabilities beyond what we could simply print alone.

Today I’d like to share some tips on one of my favorite functional 3D-printing techniques: adding heat-set inserts. As someone who’s been installing them into plastic parts for years manually, I think many guides overlook some process details crucial to getting consistent results.

Make no mistake; there are a handful of insert guides already out there [1, 2]. (In fact, I encourage you to look there first for a good jump-start.) Over the years though, I’ve added my own finishing move (nothing exotic or difficult) which I call the Plate-Press Technique that gives me a major boost in consistency.

Join me below as I fill in the knowledge gaps (and some literal ones too) to send you back to the lab equipped with a technique that will give you perfectly-seated inserts every time.

Continue reading “Threading 3D Printed Parts: How To Use Heat-Set Inserts”

Eight Years Of Partmaking: A Love Story For Parts

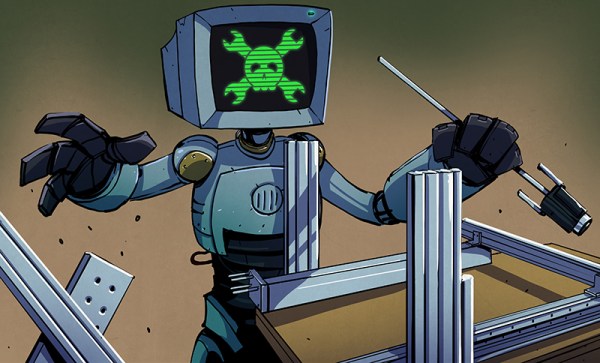
Over my many years of many side-projects, getting mechanical parts has always been a creative misadventure. Sure, I’d shop for them. But I’d also turn them up from dumpsters, turn them down from aluminum, cut them with lasers, or ooze them out of plastic. My adventures making parts first took root when I jumped into college. Back-in-the-day, I wanted to learn how to build robots. I quickly learned that “robot building” meant learning how to make their constituent parts.

Today I want to take you on a personal journey in my own mechanical “partmaking.” It’s a story told in schools, machine shops, and garages of a young adulthood spent making parts. It’s a story of learning how to run by crawling through e-waste dumps. Throughout my journey, my venues would change, and so would the tools at-hand. But that hunger to make projects and, by extension, parts, was always there.

Dear partmakers, this is my love letter to you.

Continue reading “Eight Years Of Partmaking: A Love Story For Parts”

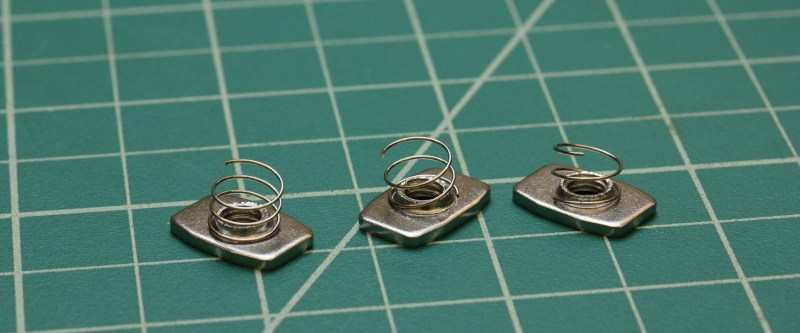
How To Make Your Own Springs For Extruded Rail T-Nuts

Open-Source Extruded Profile systems are a mature breed these days. With Openbuilds, Makerslide, and Openbeam, we’ve got plenty of systems to choose from; and Amazon and Alibaba are coming in strong with lots of generic interchangeable parts. These open-source framing systems have borrowed tricks from some decades-old industry players like Rexroth and 80/20. But from all they’ve gleaned, there’s still one trick they haven’t snagged yet: affordable springloaded T-nuts.

I’ve discussed a few tricks when working with these systems before, and Roger Cheng came up with a 3D printed technique for working with T-nuts. But today I’ll take another step and show you how to make our own springs for VSlot rail nuts.

Continue reading “How To Make Your Own Springs For Extruded Rail T-Nuts”

Expanding 3D Printer Bed Stays True Under Fire

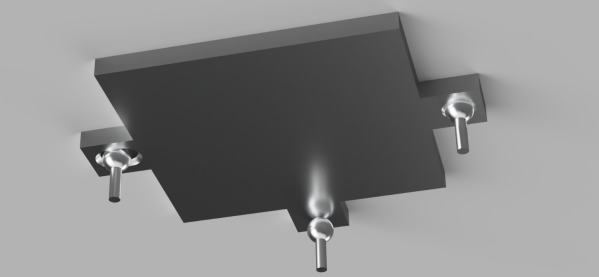
It’s hard to pass up another lesson in good machine design brought to us by [Mark Rehorst]. This time, [Mark] combats the relentless forces of bed deformation due to thermal expansion.

Did you think your printer stayed the same size when it heated up? Well, think again! According to [Mark’s] calculations, when heated, the bed can expand by as much as half a millimeter in the x/y direction. While x/y deformation seems like something we can ignore, that’s not always true. If our bed is rigidly fixed in place, then that change in dimension will only result in a warped bed as it tries to make space for itself.

Don’t give up yet though. As sinister as this problem may seem, [Mark] introduces a classic-but-well-implemented solution: and adjustable kinematic coupling. The kinematic coupling holds the bed at the minimum number of points to keep it rigid while exposing thumbscrews to dial in a level bed. What’s special about this technique is that the coupling holds the bed perfectly rigid whilst allowing it to thermally expand!

This is the beauty of “exact constraint” design. Parts are held together only by the minimum number of points needed to guarantee a specific relationship. Here that relationship is coplanarity between the the nozzle’s x/y plane and the bed. Even when the bed expands this relationship holds. Now that is magic.

With such a flood of 3D printed parts on the market, building a printer has never been easier! Nevertheless, it’s easy to pin ourselves into a corner re-tuning a poor design that skips a foundation on the base principles. If you’re curious about more of these principles behind 3D printer design, check out [Mark’s] thorough walkthrough on the CoreXY design.

Hotend Becomes The Z Probe With A Kinematic Coupling

3D Printer tool changers are bedazzling to watch, but even failed attempts at tool changers can yield something marvelous. Such is the case for [Raymond] who transformed a tool changer attempt into a perfectly capable z-level probe that uses the hotend itself as a limit switch.

The secret sauce behind this mechanism: a kinematic coupling. This coupling takes two planar surfaces and perfectly constrains them relative to each other by mating them together at exactly 6 points of contact. The result is that repeatedly separating and joining the two surfaces will always land them in the same spot within a few microns. To transform these surfaces into a switch, we need only run a small current between the points of contact. That was easy since there were all-metal balls and pins making the connection. Both surfaces are held together with magnets with the upper surface holding the hotend. To trip the limit switch, the printer simply lowers the z-height until the hotend “probes” the bed, defeating the magnets and breaking the current. Presto! No switches or P.I.N.D.A. probes. Just good old fashioned electricity and steel pins.

With so much focus on pricey probes and repeatable switches, it’s great to see some good old-fashioned geometry guiding the precision behind this printer’s sensing. It’s also heartwarming hear that the whole project was actually inspired by another coupling-equipped 3D printer that landed here a few years ago! Finally, if you’re curious to see some other folks getting some more mileage out of kinematic couplings, have a look at this homebrew CNC touch probe.