Hackaday Meetup At Electronica: Thursday

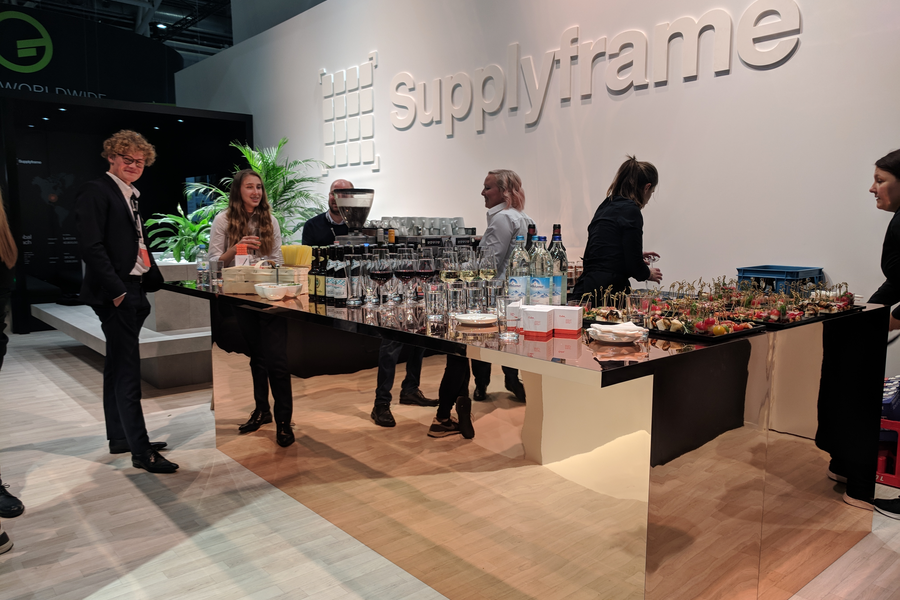
Hackaday’s parent company Supplyframe is at Electronica in Munich this week — booth C5-223. On Thursday from 16:00 – 18:00, they’ll be hosting a Hackaday Happy Hour, with a beer and coffee bar, for everyone in the Hackaday community. They’d love to see you and hear what you’re working on, be it for your day job or your night job.

If you missed the #badgelife exhibit at Supercon, it’s here at Electronica. There will also be some of those mysterious cubes you may have heard about. Richard Hogben and Bogdan Rosu will be DJing fresh beats. Stop by and say hi to [Sophi Kravitz], [Majenta Strongheart], [Alek Bradic], and everyone else from the Supplyframe team.

Hackaday’s own [Elliot Williams] will also be wandering around Electronica Wednesday afternoon. He can’t promise free beer, but if you want to crawl around Electronica with [Elliot], meet up at the Supplyframe booth at 14:30 on Wednesday.

What’s The Difference? Ask An Op Amp

If you’ve ever wondered why an op amp has the little plus and minus symbols on it, its because at the heart of it, the device is a differential amplifier. The problem is that — ideally, at least — it has infinite gain so it works like a comparator and that’s not what you usually want. So we put resistors around the thing to constrain it and get useful amplification out of it. [Stephen Mendes] does the analysis for you about how the standard configuration for a differential amplifier works. He assumes you know the stock formulae for the inverting and non-inverting amplifier configurations and uses superposition.

[Stephen] mentions that’s the easiest way to do it and then goes on to do it sort of how we would do it as a check. We think that’s the easier method, but maybe its a matter of preference. Either way, you get the right answer.

Continue reading “What’s The Difference? Ask An Op Amp”

Non-Nefarious Raspberry Pi Only Looks Like A Hack

We’re going to warn you right up front that this is not a hack. Or at least that’s how it turned out after [LiveOverflow] did some digital forensics on a mysterious device found lurking in a college library. The path he took to come to the conclusion that nothing untoward was going on was interesting and informative, though, as is the ultimate purpose of the unknown artifacts.

As [LiveOverflow] tells us in the video below, he came upon a Reddit thread – of which we can now find no trace – describing a bunch of odd-looking devices stashed behind garbage cans, vending machines, and desks in a college library. [LiveOverflow] recognized the posted pictures as Raspberry Pi Zeroes with USB WiFi dongles attached; curiosity piqued, he reached out to the OP and offered to help solve the mystery.

The video below tells the tale of the forensic fun that ensued, including some questionable practices like sticking the device’s SD card into the finder’s PC. What looked very “hackerish” to the finder turned out to be quite innocuous after [LiveOverflow] went down a remote-diagnosis rabbit hole to discern the purpose of these devices. We won’t spoil the reveal, but suffice it to say they’re part of a pretty clever system with an entirely non-nefarious purpose.

We thought this was a fun infosec romp, and instructive on a couple of levels, not least of which is keeping in mind how “civilians” might see gear like this in the wild. Hardware and software that we deal with every day might look threatening to the general public. Maybe the university should spring for some labels describing the gear next time.

Continue reading “Non-Nefarious Raspberry Pi Only Looks Like A Hack”

The Mighty D Battery Becomes A USB Powerbank

[Jan] is one of those people who’s always playing around with synthesizers, and in this day and age, that means a lot of USB cables supplying power. If you want to make a synth setup portable, your best option is looking at USB powerbanks with their fancy lithium cells. These will work just fine, but remember: you can buy D cells just about anywhere, and they actually hold a ridiculous amount of energy. They’re cheap albeit one-use and disposable, so why not build a USB power bank out of a massive pair of batteries?

The build started off, naturally, with a pair of Energizer D cells that hold 20,000mAh. A battery holder for these cells is cheap and easy to source, leaving the only other needed component a cheap 5V boost converter. This was simply hot glued to the back of the battery holder in parallel, a simple switch was added, and the entire thing was fitted in a neat little 3D printed case that looks like a car (motorcycle?) battery.

Testing the with a phone revealed this thing will charge at 570mA from 3V, which is more than sufficient for [Jan]’s needs. Sure, using disposable batteries in 2018 is more than a little wasteful, but a project like this is meant to be a simple solution to the problem of providing power to USB devices anywhere. You can get D cell batteries everywhere, and what this build produces in damage to the environment is more than made up for in its convenience.

Apple 1 Emulator Is A Perfect Fit For Supercon Badge

Supercon badge hackers had to be ready to present their show-and-tell by 6 pm Sunday evening. This ruthless unmoving deadline meant every badge hack on stage represents an accomplishment in time management, and some luck, in addition to their own technical merits. But that deadline also meant a few fantastic projects lost their race against the clock. We were rooting for [Jac Goudsmit] to build an Apple I emulator as his badge expansion, but he wasn’t quite done when our badge hack ceremony began. After Supercon he went home, finished the project, and documented everything in a detailed writeup.

Our 2018 Supercon badge is built on a retro-computing theme, and the default firmware came with a BASIC interpreter as well as a Z80 emulator running CP/M. So an Apple 1 emulator should feel right home with its contemporaries. Mechanically speaking, all the parts were a tight fit on the badge expansion board given out to every attendee at Supercon. So tightly that [Jac] had to file down the two main chips in order to fit them side by side. The breadboard-like pattern of connected holes on the expansion board, intended to help ease in beginners for their badge hack soldering, proved to be an inconvenience in tightly packed arrangements such as this.

With all the work [Jac] had invested, it was heartbreaking to know he was only five minutes of soldering and 30 minutes of coding away when time ran out. Time pressure was part of the challenge faced by every Supercon badge hacker, and while we’re sad [Jac] missed the deadline for stage time we’re happy to see him finish and write it all up. We hope every badge hacker would write up their stories of frantic weekend projects. Those who do so on hackaday.io are encouraged to tag their project with “Supercon” and get them added to our list of badge hacks for everyone to admire.

ESP8266 Wi-Fi Instant Camera Is A Simple Shooter

If a camera that combines the immediate gratification of a Polaroid with cloud hosting sounds like something that tickles your fancy, look no farther than this ESP-powered point and shoot camera created by [Martin Fasani]. There’s no screen or complicated configuration on this camera; just press the button and the raw picture pops up on the online gallery. Somehow it’s simultaneously one of the most simplistic and complex implementations of the classic “instant camera” concept, and we love it.

The electronics in the camera itself, which [Martin] calls the FS2, is quite simple. At the core, it’s nothing more than the ESP board, an ArduCAM camera module, and a momentary button for the shutter. To make it portable he added a 2000 mAh Li-ion battery and an Adafruit Micro Micro USB charger. [Martin] added support for an optional 128×64 OLED display for user feedback. Everything is housed in a relatively spacious 3D printed enclosure, leaving some room for possible future hardware.

There are firmware versions for both the ESP8266 and ESP32, so fans of either generation of the popular microcontroller are invited to the party. Processing images is obviously a bit faster if you go with the more powerful 32-bit chip, but on the flip side the ESP8266 uses 3MB of SPI flash as a local buffer for the images during upload, which helps prevent lost images if there’s a problem pushing them to the cloud. The camera is intended to be as simple as possible so right now the only option other than taking still images is a time-lapse mode. [Martin] hopes to implement some additional filters and effects in the future. He’s also hoping others might lend a hand with his firmware. He’s specifically looking for assistance getting autofocus working and implementing more robust error correction for image uploads.

We’ve seen some impressive DIY camera builds using everything from a salvaged thermal sensor to film and molten aluminum. But the quaint simplicity of what [Martin] has put together here really puts his project in a whole new category.

Continue reading “ESP8266 Wi-Fi Instant Camera Is A Simple Shooter”

Hotend Becomes The Z Probe With A Kinematic Coupling

3D Printer tool changers are bedazzling to watch, but even failed attempts at tool changers can yield something marvelous. Such is the case for [Raymond] who transformed a tool changer attempt into a perfectly capable z-level probe that uses the hotend itself as a limit switch.

The secret sauce behind this mechanism: a kinematic coupling. This coupling takes two planar surfaces and perfectly constrains them relative to each other by mating them together at exactly 6 points of contact. The result is that repeatedly separating and joining the two surfaces will always land them in the same spot within a few microns. To transform these surfaces into a switch, we need only run a small current between the points of contact. That was easy since there were all-metal balls and pins making the connection. Both surfaces are held together with magnets with the upper surface holding the hotend. To trip the limit switch, the printer simply lowers the z-height until the hotend “probes” the bed, defeating the magnets and breaking the current. Presto! No switches or P.I.N.D.A. probes. Just good old fashioned electricity and steel pins.

With so much focus on pricey probes and repeatable switches, it’s great to see some good old-fashioned geometry guiding the precision behind this printer’s sensing. It’s also heartwarming hear that the whole project was actually inspired by another coupling-equipped 3D printer that landed here a few years ago! Finally, if you’re curious to see some other folks getting some more mileage out of kinematic couplings, have a look at this homebrew CNC touch probe.