One of the most annoying things about bicycles is that they don’t stay up on their own, especially when they’re stationary. That’s why they come with stands, after all. That said, if you had plenty of advanced electronic and mechanical equipment fitted to one, you could do something about that, and that’s just what [稚晖君] did.
The video of the project comes without subtitles or any translation, but the gist of it is this. A reaction wheel is fitted to the seat tube, along with a motor which can turn the handlebars via a linkage attached to the head stem. There’s also a motor to drive the bicycle forward via a friction drive to the rear wheel. Combine these with an inertial measurement unit and suitable control system, and you have a bike that can balance while standing perfectly still.
The performance of the system is impressive, and is even able to hold the bike perfectly upright while balanced on a fence rail. Thanks to an onboard camera and LIDAR system, the bike can also drive itself around with no rider on board, which is quite a spooky image. Find a way to do the same while hiding the extra mechanics and you’d have one hell of a Halloween display.
Similar projects have been attempted in the past; we featured a self-balancing bike built as a university project back in the distant past of 2012. Video after the break.
Continue reading “A Self-Driving Bicycle Is Something To Marvel At”
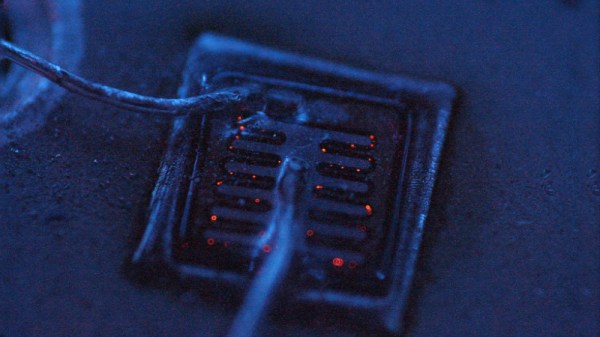
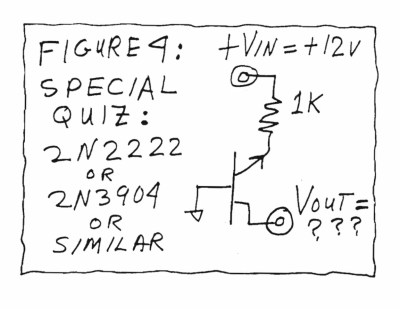 The key to the trick is the breakdown voltage of the transistor; normally somewhere around 7-8 volts for a typical small NPN transistor. At this point, where the base-emitter junction enters the breakdown regime, it begins to emit light. This light actually travels through the silicon lattice, where it reaches the base-collector junction, which acts like a photodiode under the right conditions. This generates the negative voltage seen at the collector under these conditions.