Simple Pen Plotter

Simple DIY Pen Plotter, Great First CNC Project

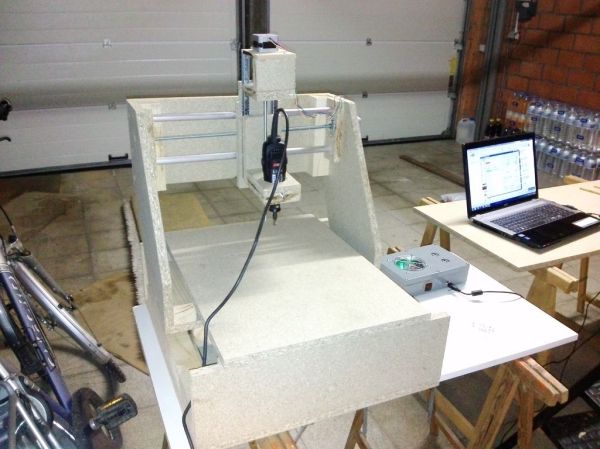
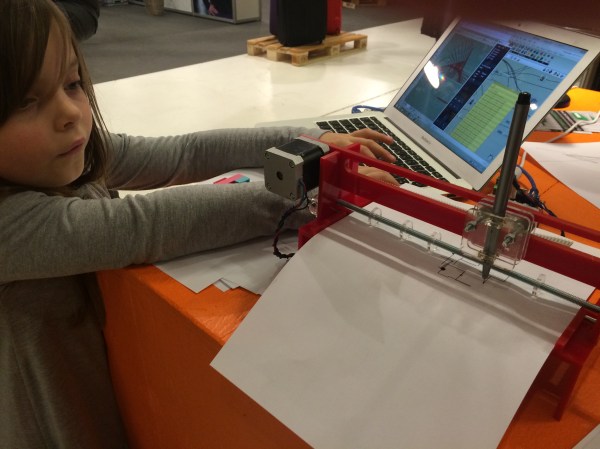
[Morten] has been busy recently making a pen plotter. It is a simple and elegant build that he completely designed from the ground up. There are no extra frivolous parts here. The frame is made from laser-cut plexiglass which makes fabrication easy if you have access to a laser cutter. Two NEMA17 motors are responsible for the machine’s movement. One moves the pen carriage back and forth by way of a belt. The other is connected by laser-cut gears to a roller bar, scavenged from an ink jet printer, that moves the paper media forward and aft underneath the pen.

The software chain used here is sort of uncommon compared to other inexpensive DIY CNC machines we see here on Hackaday. [Morten] creates his geometry with Rhino, then uses a plugin called Grasshopper to generate the g-code that controls the machine. That g-code is sent using gRemote to an Arduino flashed with the contraptor.org g-code interpreter. A RAMPS board takes the step and direction signals generated by the Arduino and moves the two stepper motors appropriately.

In typical open-supporting fashion, [Morten] has made his design files freely available for anyone to download. His plotter moves the pen side to side and the paper front to back in order to draw shapes but that’s not the only way a plotter can work. Check out this polar plotter and this one that hangs.

Check out the video after the break…

Continue reading “Simple DIY Pen Plotter, Great First CNC Project”

resourceful cnc router

Resourceful CNC Router Built From Hardware Store Parts

[siemen] has entered the wonderful world of Hobby CNC with his low-buck build of this gantry-style router. It embodies everything we here at HaD love: resourcefulness, perseverance and results. [siemen] has designed his frame using ideas he has found while surfing around the ‘net and is made entirely out of particle board. For linear movement, the Y and Z axes rely on ball bearing drawer slides while the X axis use a pipe and skate bearing arrangement. NEMA 17 stepper motors coupled to threaded rod move each axis.

The electronics are packaged in a nice little project box which houses an Arduino and 3 Sparkfun EasyStepper stepper motor drivers. [siemen] also cut a hole in the project box and installed a fan in order to keep those motor drivers cool. The Arduino is flashed with the CNC machine controller called GRBL. GRBL takes g-code sent from a PC to the Arduino and then in turn sends the required step and direction signals to the stepper motor drivers.

Overall, [siemen] did a great job with his first CNC project which came in at 200 Euro ($240). He’s currently working on version 2 and we are looking forward to covering it when it’s done. If you dig this project, you may also like this wooden wood router or this bolt-together one.

Continue reading “Resourceful CNC Router Built From Hardware Store Parts”

Tumblemill

The Tumblemill: Homemade CNC Milling

[Jens] aka [Tumblebeer] has compiled an impressive overview of the Tumblemill, his homemade CNC mill. It warms our hearts to learn that [Tumblebeer] was inspired to pursue electronics by projects featured here on Hackaday, even if it means he dropped out of med school to pursue electrical engineering. We’re glad he’s following his passion, though, and reading through his blog reveals just how far he’s come: from fiery disaster in his first projects to a gradual obsession with making a CNC device, [Tumblebeer] has made plenty of mistakes along the way, but that’s how it should be.

His first iteration was a CNC router that used rubber wheels as linear bearings. It worked…barely. His latest build grew out of meticulous Solidworks modelling, with a moving gantry design constructed largely from aluminum, and upgraded linear motion: this time a bit overkill, using HIWIN HGH20CA blocks. Rather than sourcing a traditional spindle mount, [Tumblebeer] opted for the housing from a LM50UU bearing, which provided both the perfect fit and a sturdier housing for his 2.2kw spindle.

Visit his project blog for the details behind the mill’s construction, including a lengthy installment of upgrades, and hang around for a demo video below, along with the obligatory (and always appreciated) inclusion of the Jolly Wrencher via defacing an Arduino.

Continue reading “The Tumblemill: Homemade CNC Milling”

USB-Parallel-GRBL

USB To DB25 Adapter Uses GRBL For Parallel Port CNC Communication

With the continuing manufacture of new computers, there is a clear and obvious trend of the parallel port becoming less and less common. For our younger readers; the parallel port is an interface standard used for bi-directional communication between a computer and a variety of peripherals. The parallel port’s demise is partially due to the invention of the USB standard.

If tinkering with CNC Machines is one of your hobbies then you are familiar with the parallel port interface being fairly popular for CNC control board connections. So what do you do if your new fancy computer doesn’t have a parallel port but you still want to run your CNC Machine? Well, you are certainly not stuck as [Bray] has come up with a USB to Parallel Port Adapter solution specifically for CNC use.

A cheap off-the-shelf USB to DB25 adapter may look like a good idea at first glance but they won’t work for a CNC application. [Bray’s] adapter is Arduino-based and runs GRBL. The GRBL code is responsible for taking the g-code commands sent from the computer, storing them in a buffer until they are ready to be converted to step and direction signals and sent to the CNC controller by way of the parallel port DB25 connector. This is a great solution for people needing to control a CNC Machine but do not have a parallel port available.

[Bray] is using a Raspberry Pi running GRBLweb to control his adapter board. However, there are other programs you can use to communicate with GRBL such as Universal G-Code Sender and GRBL Controller.

The board has been created in Eagle PCB Software and milled out using [Bray’s] CNC Router. The design is single-sided which is great for home-brew PCBs. He’s even made a daughter board for Start, Hold and Reset input buttons. As all great DIYers, [Bray] has made his board and schematic files available for others to download.

Baby’s Room Gets A Palace With This CNC Castle Decoration

castle decoration

[Vegard] and his wife were expecting a baby girl, and decided to build a castle for their new daughter. As a prototyping geek with his own CNC machine in his apartment, he decided to take to Google Sketchup to design this well-crafted castle decoration for his daughter’s room.

The first challenge was figuring out what the castle would look like. [Vegard] had never been to Disney Land or World, and so had never actually seen any of the fairy-tale castles in real life. After experimenting with some paper versions, he settled on a design which incorporates multiple layers and can house lights within them.

The next step was to cut the final version on the CNC machine, then sand and paint the parts. After figuring out a way to mount the castle to the wall, some LEDs were added for effect, driven by an Arduino. The final version looks pretty good!

Hacking your kids’ room is great fun, and you get to keep making new stuff to remain age appropriate. We bet [Vegard] can’t wait until she’s old enough to enjoy a marble-run that wraps the entire room. In the mean time he can work on a classic robot stroller.

Fischertechnik CNC Machine Looks Innocent Whilst Cutting Your Face

FischerTechnik + Arduino CNC Milling Machine

Hallo iedereen! All the way from the Netherlands comes this fairly unique CNC milling machine built by a handful of Mechanical Engineering students over at the Delft University of Technology. These guys only had one week to build the mill in order to fulfill a requirement of their Mechtronics class. Unfortunately, directly after showing the machine worked, it had to be disassembled.

If the frame looks a little toy-ish, it’s because it is. This particular system is called Fischertechnik and the main support beams are similar to that of aluminum extrusion (ex 80/20, Misumi) except that it is made from nylon. Notice the extremely long cutting bit and comparatively abnormal large Z axis travel capability. What this system lacks in rigidity is made up by being able to carve a very 3D shape with steep sides without the machine hitting the work piece. The loss of rigidity was totally acceptable since the team was only planning on cutting foam and the project’s purpose was to learn mechanics and automation.

Continue reading “Fischertechnik CNC Machine Looks Innocent Whilst Cutting Your Face”

Handheld Game System Powered By Arduino

DIY Handheld Game System

These days, it’s easy enough to play games on the go. If you have a smart phone, you are pretty much set. That doesn’t mean you can’t still have fun designing and building your own portable gaming system, though.

[randrews] did just that. He started out by purchasing a small memory LCD display from Adafruit. The screen he chose is low power as far as screens go, so it would be a good fit for this project. After testing the screen with a quick demo program, it was time to start designing the circuit board.

[randrews] used Eagle to design the circuit. He hand routed all of the traces to avoid any weird issues that the auto router can sometimes cause. He made an efficient use of the space on the board by mounting the screen over top of the ATMega chip and the other supporting components. The screen is designed to plug in and out of the socket, this way it can be removed to get to the chip. [randrews] needs to be able to reach the chip in order to reprogram it for different games.

Once the board design was finished, [randrews] used his Shapeoko CNC mill to cut it out of a copper clad board. He warns that you need to be careful doing this, since breathing fiberglass dust is detrimental to living a long and healthy life. Once the board was milled out, [randrews] used a small Dremel drill press to drill all of the holes.

The final piece of the puzzle was to figure out the power situation. [randrews] designed a second smaller PCB for this. The power board holds two 3V coin cell batteries. The Arduino expects 5V, so [randrews] had to use a voltage regulator. This power board also contains the power switch for the whole system.

The power board was milled and populated. Then it was time to do some measurements. [randrews] measured the current draw and calculates that he should be able to get around 15 hours of play time using the two 3V coin cell batteries. Not bad considering the size.

[via Reddit]