Rotary Valve Engine Gets A Second Chance, Smokes The Competition

It’s a dedicated hacker who has the patience to build an engine from scratch. And it’s a borderline obsessed hacker who does it twice. [Meanwhile In the Garage] is of the second ilk, and in the video below the break, he takes a failed engine design and musters up the oomph to get it running.

The whole build began with an idea for a different kind of intake and exhaust valve. [Meanwhile In the Garage] dreamed up a design that does away with the traditional poppet valve. Instead of valves that open by being pushed away from their seat by a camshaft, this design uses a cylinder that is scooped so that as it rotates, its ports are exposed to either the intake or the exhaust.

Four Stroke Cycle with Poppet valves. Courtesy Wikipedia, CC BY-SA 3.0

During the compression stroke, the valve cylinder becomes part of the combustion chamber, with both ports facing away from the piston. If you read the comments, you’ll find that multiple people have come up with the idea through the years. With his mill, lathe, and know-how, [Meanwhile In the Garage] made it happen. But not without some trouble.

The first iteration resisted all valiant attempts at getting it started. The hour-long video preceding this one ended up in a no-start. Despite his beautiful machine work and a well thought out design, it wasn’t to be. Fire came from the engine either through the exhaust or the carburetor, but it never ran. In this version, several parts have been re-worked and the effect is immediate! The engine fired up nicely and even seems to rev up pretty well. Being a first-generation prototype, it lacks seals and other fancy parts to keep oil out of the combustion chamber. Normal engine oil has been added to the fuel as a precaution as well. The fact that it smokes quite badly isn’t a surprise and only proves that the design will benefit from another iteration. Isn’t that true for most prototypes, though?

Home-grown engines aren’t a new thing at Hackaday, and one of This Author’s favorite jet turbines used a toilet paper holder. Yes, really.  Thanks to [Keith] for the Tip!

Continue reading “Rotary Valve Engine Gets A Second Chance, Smokes The Competition”

Pre-exploded PSU close-up: shown is inductor with the heatsink it shorted against.

The Little Replacement PSU That Could: Kill A Microsoft Surface And Monitor

Recently [Big Clive], everyone’s favorite purveyor of anything electronic that’s dodgy, cheap, cheerful, decidedly crispy or any combination thereof, got sent a very dead external power supply unit. Being clearly a third-party PSU with poorly written and many (likely not truthful) safety approval markings on its label, this PSU had the dubious honor of having destroyed a Microsoft Surface computer as well as the monitor that was connected at the time.

In [Clive]’s video (also embedded after the break) the black and very crispy board is examined, showing a wealth of vaporized traces and plenty of soot. What’s however most fascinating is the failure mode: instead of something obvious like e.g. the main transformer between the primary and secondary side failing, here it would seem that an inductor (see heading image) on the secondary side had its insulation rubbed off and shorted on a nearby heatsink. A heatsink that just happened to be also electrically connected on the primary (mains-level) side.

Judging by the former owner’s report and aftermath, this led to a very sudden and violent demise of the PSU, with mains power very likely making its way into the unsuspecting Surface system and connected monitor. The number of ‘very nope’ design decisions made in this PSU are astounding, and a lesson for both aspiring EEs and anyone considering getting a ‘cheap’ third-party replacement PSU.

(Thanks to [Helge] for the tip)

Continue reading “The Little Replacement PSU That Could: Kill A Microsoft Surface And Monitor”

A Ball Lens For Optical Fiber Coupling On The Cheap

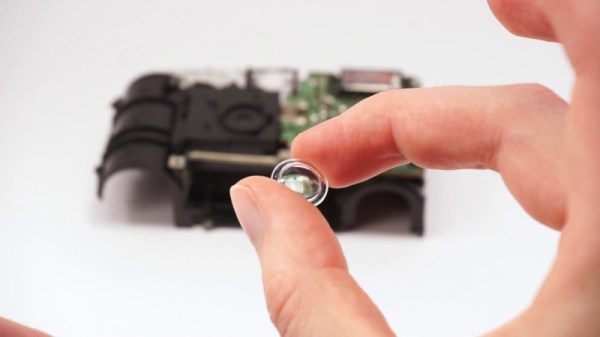
It’s fair to say that for most of us, using a fiber optic cable for digital audio or maybe networking will involve the use of an off-the-shelf termination. We snap the cable into the receptacle, and off we go. We know that inside there will be an LED and some lenses, but that’s it. [TedYapo] though has gone a little further into the realm of fibers, by building his own termination. Faced with the relatively high cost of the ball lenses used to focus light from an LED into the end of the fiber he started looking outside the box. He discovered that spherical glass anti-bumping balls used when boiling fluids in laboratories make an acceptable and much cheaper alternative.

A ball lens has an extremely short focal length, meaning that this same property which allowed Antonie van Leeuwenhoek to use them in his microscopes is ideal for LED focusing in a small space at the end of a fiber. Chromatic aberrations are of no consequence for light of a single wavelength. It seems that the glass balls are uniformly spherical enough to do the job. Fitted with the LED and fiber termination in a 3D-printed block, the relative position of the ball can be controlled for optimum light transfer. It’s a relatively simple hack mentioned in passing in a Twitter thread, but we like it because of its cheapness and also for an insight into the world of optical fiber termination.

Curious to know more about optical fibers? We covered just the video for you back in 2011.

On the left, four through-hole USB-C connectors laid out on a purple cutting mat. On the right, a teardown picture shows that there's neither resistors nor CC connections inside such a connector, resulting in consequences described in the article.

The USB-C Connectors You Never Knew You Wanted To Avoid

On Tech Twitter, some people are known for Their Thing – for example, [A13 (@sad_electronics)], (when they’re not busy designing electronics), searches the net to find outstanding parts to marvel at. A good portion of the parts that they find are outstanding for all the wrong reasons. Today, that’s a through-hole two-pin USB Type-C socket. Observing the cheap tech we get from China (or the UK!), you might conclude that two 5.1K pulldown resistors are very hard to add to a product – this socket makes it literally impossible.

We’ve seen two-pin THT MicroUSB sockets before, sometimes used for hobbyist kits. This one, however, goes against the main requirement of Type-C connectors – sink (Type-C-powered) devices having pulldowns on CC pins, and source devices (PSUs and host ports) having pull up resistors to VBUS. As disassembly shows, this connector has neither of these nor the capability for you to add anything, as the CC pins are physically not present. If you use this port to make a USB-C-powered device, a Type-C-compliant PSU will not give it power. If you try to make a Type-C PSU with it, a compliant device shall (rightfully!) refuse to charge from it. The only thing this port is good for is when a device using it is bundled with a USB-A to USB-C cable – actively setting back whatever progress Type-C connectors managed to make.

As much as USB Type-C basics are straightforward, manufacturers get it wrong on the regular – back in 2016, a wrong cable could kill your $1.5k MacBook. Nowadays, we might only need to mod a device with a pair of 5.1K resistors every now and then. We can only hope that the new EU laws will force devices to get it right and stop ruining the convenience for everyone, so we can finally enjoy what was promised to us. Hackers have been making more and more devices with USB-C ports, and even retrofitting iPhones here and there. If you wanted to get into mischief territory and abuse the extended capabilities of new tech, you could even make a device that enumerates in different ways if you flip the cable, or make a “BGA on an FPC” dongle that is fully hidden inside a Type-C cable end!

Immersive Stereo Sound Recording With This Binaural Microphone

Sound recording has been a consumer technology for so long now that it is ubiquitous, reaching for a mobile device and firing up an app takes only an instant. Anyone who takes an interest in audio recording further will find that while it’s relatively straightforward to make simple recordings. But, as those among you who have fashioned a pair of Shure SM58s into an X configuration with gaffer tape will know, it can be challenging to create a stereo image when recording outside the studio. In the quest to perfect this, [Kevin Loughin] has created a binaural microphone, which simulates a human head with microphones placed as ears to produce ambient recordings with an almost-immersive stereo image.

Commercial binaural microphones can cost thousands of dollars, but this one opts for a more budget design using an off-the-shelf mannequin head sold for hairdressers. It’s filled with high-density foam, and in its ears [Kevin] placed 3D-printed ear canals with electret microphone capsules. On the back goes a battery and a box for the bias circuitry.

The results as you can hear in the video below the break are impressive, certainly so for the cost. It’s not the first such microphone we’ve shown you, compare it with one using a foam-only head.

Continue reading “Immersive Stereo Sound Recording With This Binaural Microphone”

Hackaday Links Column Banner

Hackaday Links: February 20, 2022

Sounds like somebody had a really bad day at work, as Western Digital reports that “factory contamination” caused a batch of flash memory chips to be spoiled. How much, you ask? Oh, only about 7 billion gigabytes! For those of you fond of SI prefixes, that’s 7 exabytes of storage; to put that into perspective, it’s seven times what Google used for Gmail storage in 2012, and enough to store approximately 1.69 trillion copies of Project Gutenberg’s ASCII King James Version Bible. Very few details were available other than the unspecified contamination of two factories, but this stands poised to cause problems with everything from flash drives to phones to SSDs, and will probably only worsen the ongoing chip shortage. And while we hate to be cynical, it’ll probably be prudent to watch out for any “too good to be true” deals on memory that pop up on eBay and Ali in the coming months.

Continue reading “Hackaday Links: February 20, 2022”

An RF remote control with a LoRa receiver next to it

Reverse Engineering A 900 MHz RC Transmitter And Receiver

For those building their own remote controlled devices like RC boats and quadcopter drones, having a good transmitter-receiver setup is a significant factor in the eventual usability of their build. Many transmitters are available in the 2.4 GHz band, but some operate at different frequencies, like the 868/915 MHz band. The TBS Crossfire is one such transmitter, and it’s become a popular model thanks to its long-range performance.

The channel hopping sequence of a TBS Crossfire transmitter
The channel hopping sequence

When [g3gg0] bought a Crossfire set for his drone, he discovered that the receiver module consisted of not much more than a PIC32 microcontroller and an SX1272 LoRa modem. This led him to ponder if the RF protocol would be easy to decode. As it turns out, it was not trivial, but not impossible either. First, he built his own SPI sniffer using a CYC1000 FPGA board to reveal the exact register settings that the PIC32 sent to the SX1272. The Crossfire uses channel hopping, and by simply looking at the register settings it was easy to figure out the hopping sequence.

Once that was out of the way, the next step was to figure out what data was flowing through those channels. The data packets appeared to be built up in a straightforward way, but they included an unknown CRC checksum. Luckily, brute-forcing it was not hard; the checksum is most likely used to keep receivers from picking up signals that come from a different transmitter than their own.

[g3gg0]’s blog post goes into intricate detail on both the Crossfire’s protocol as well as the reverse engineering process needed to obtain this information. The eventual conclusion is that while the protocol is efficient and robust, it provides no security against eavesdropping or deliberate interference. Of course, that’s perfectly fine for most RC applications, as long as the user is aware of this fact.

If you’re into decoding RF protocols, you might also want to try using a logic analyzer. But if you merely want to replicate an existing transmitter’s signals, it might be easier to simply spoof a few button presses.

Continue reading “Reverse Engineering A 900 MHz RC Transmitter And Receiver”