Op-Amp Challenge: A Low Noise Amplifier For Those Truly Low Noise Measurements

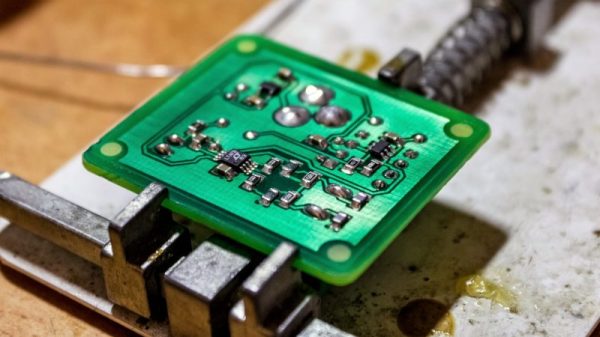
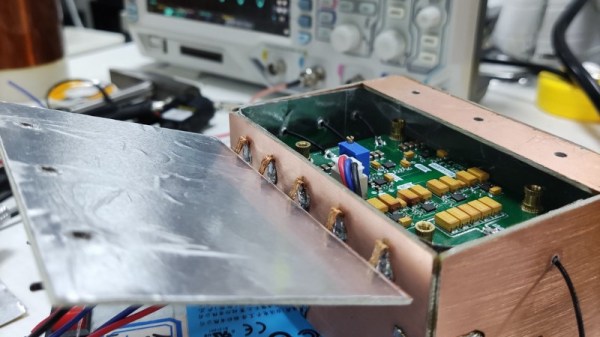
When something is described as “Low Noise”, it is by the nature of the language a relative phrase. The higest quality magnetic tape is low noise compared to its cheaper sibling for example, but still has noise many would consider unacceptable. In instrumentation however, “Low Noise” has to really mean just that, with a range of specialist techniques to produce circuitry with a truly low noise level for the most demanding of signal applications. As an example [Floydfish] has created a low noise instrumentation amplifier that should serve as a learning exercise for anyone interested in pushing low noise circuitry to the limit.

Anyone who can dredge the hazy recesses of their mind for barely-remembered electronics lectures will know that the overall noise figure of a system is dictated by that of its first component. Thus perhaps the most interesting part of the schematic is at the input, where a row of low-noise op-amps are presented in parallel. We have to admit having to look this one up, to find that it’s a technique whereby the signal outputs of each chip are the same and thus sum, while the noise output of each is different and thus the summed noise output is proportionally lower. This stage is then followed by a buffer and a set of filters for different output frequency ranges.

Our op-amp competition of which this is a part is certainly delivering the goods when it comes to the amny techniques with which these versatile parts can be used. Few of us may need to make such a low noise amplifier, but at least now we’ve learned how.

Op Amp Challenge: An Ultra-Cheap PH Sensor Amplifier

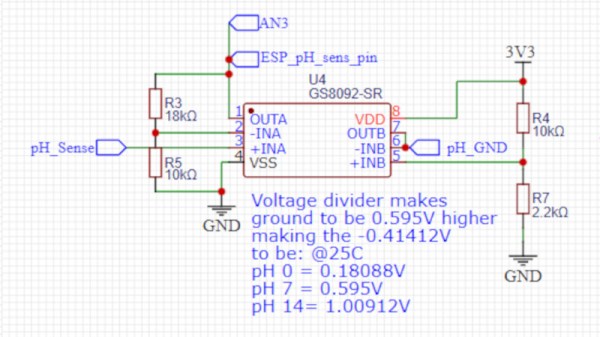
It’s rare in 2023 for an instrument to be entirely analog, instead it’s more normal for a front-end to feed the analog-to-digital converter (ADC) in a microcontroller. Typically the front-end will do the job of transforming whatever the output range of the sensor is, and present it to the microcontroller in whatever range it accepts. [David] had exactly this problem with a pH sensor, and rather than buy an expensive module to do the job he designed his own.

The sensor in question produces a relatively tiny voltage of -0.414 to +0.414 volts, and requires a very high input impedance. A FET input op-amp is selected, with the ground of the sensor shifted upwards into the positive range by a voltage divider. This then feeds a second op-amp that amplifies the resulting DC voltage for the microcontroller input.

This circuit is an especially simple op-amp application, and is a typical one for a sensor interface where a DC voltage needs to be brought into range of a microcontroller. If you’re not used to op-amp circuits then take a look, this type of analogue circuit is not difficult and might just save your butt some time.

Want to know more about simple op-amp circuits? Have we got the video for you!

PsyLink An Open Source Neural Interface For Non-Invasive EMG

We don’t see many EMG (electromyography) projects, despite how cool the applications can be. This may be because of technical difficulties with seeing the tiny muscular electrical signals amongst the noise, it could be the difficulty of interpreting any signal you do find. Regardless, [hut] has been striving forwards with a stream of prototypes, culminating in the aptly named ‘Prototype 8’

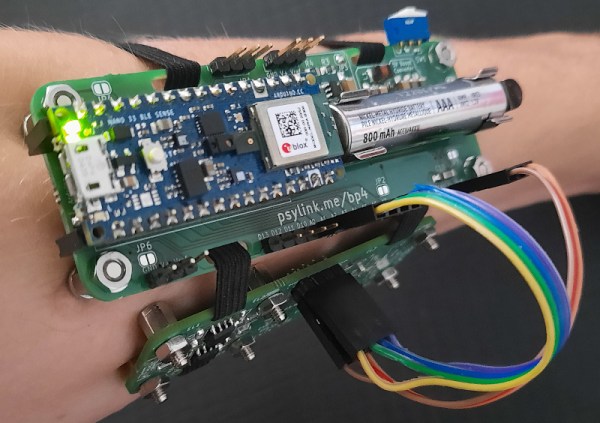
The current prototype uses a main power board hosting an Arduino Nano 33 BLE Sense, as well as a boost converter to pump up the AAA battery to provide 5 volts for the Arduino and a selection of connected EMG amplifier units. The EMG sensor is based around the INA128 instrumentation amplifier, in a pretty straightforward configuration. The EMG samples along with data from the IMU on the Nano 33 BLE Sense, are passed along to a connected PC via Bluetooth, running the PsyLink software stack. This is based on Python, using the BLE-GATT library for BT comms, PynPut handing the PC input devices (to emit keyboard and mouse events) and tensorflow for the machine learning side of things. The idea is to use machine learning from the EMG data to associate with a specific user interface event (such as a keypress) and with a little training, be able to play games on the PC with just hand/arm gestures. IMU data are used to augment this, but in this demo, that’s not totally clear.

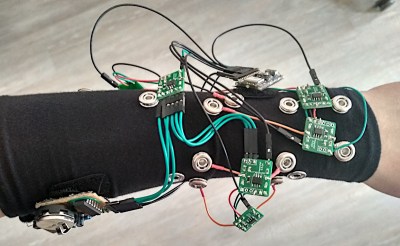
An earlier prototype of the PsyLink.

All hardware and software can be found on the project codeberg page, which did make us double-take as to why GnuRadio was being used, but thinking about it, it’s really good for signal processing and visualization. What a good idea!

Obviously there are many other use cases for such a EMG controlled input device, but who doesn’t want to play Mario Kart, you know, for science?

Checkout the demo video (embedded below) and you can see for yourself, just be aware that this is streaming from peertube, so the video might be a little choppy depending on your local peers. Finally, if Mastodon is your cup of tea, here’s the link for that. Earlier projects have attempted to dip into EMG before, like this Bioamp board from Upside Down Labs. Also we dug out an earlier tutorial on the subject by our own [Bil Herd.]

Continue reading “PsyLink An Open Source Neural Interface For Non-Invasive EMG”

A Compensated Thermocouple Amp, Ready For Arduino

When you want to measure temperature with an Arduino or other microcontrollers, there are a ton of options for sensors. Temperature chips and sensor modules abound, some with humidity sensors built-in and all with easy interfacing and an expansive supporting code library. But dip one of those sensors into, say, molten aluminum, and you’ve got a problem.

If you’re measuring something hot, you need a thermocouple. Trouble is, the signal from a thermocouple is pretty small, and needs amplification and compensation before being fed into the ADC of a typical microcontroller. Unable to find a commercial amp to meet his needs, [MonkHelios] built his own thermocouple amp for microcontrollers. The design is centered around an LTC2053 instrumentation amp, which does the job of converting the K-type thermocouple’s 40.6μV/°C output to a nicely scaled 10mV/°C range, just right for ADC consumption. He also thoughtfully included an LT1025 cold-junction compensator; thermocouple amps are referenced to 0°C, so the compensator measures the actual temperature of the cold end of the junction and scales the output accordingly. The whole amp is nicely laid out on a DIY single-sided PCB with meticulously applied solder mask — this is one of the nicest home-etched boards we’ve seen in a long time.

[Bil Herd] designed a similar thermocouple amp not too long ago himself, so you might check that out too.  Or maybe you need the basics of instrumentation amps? Our “Beyond Measure” series will get you started.

Hackaday Prize Entry: A Complete Suite Of Biomedical Sensors

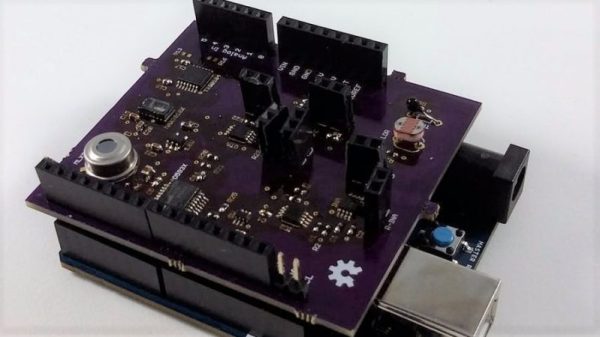
The human body has a lot to tell us if we only have the instruments to listen. Unfortunately, most of the diagnostic gear used by practitioners is pricey stuff that’s out of range if you just want to take a casual look under the hood. For that task, this full-featured biomedical sensor suite might come in handy.

More of an enabling platform than a complete project, [Orlando Hoilett]’s shield design incorporates a lot of the sensors we’ve seen before. The two main modalities are photoplethysmography, which uses the MAX30101 to sense changes in blood volume and oxygen saturation by differential absorption and reflection of light, and biopotential measurements using an instrumentation amplifier built around an AD8227 to provide all the “electro-whatever-grams” you could need: electrocardiogram, electromyogram, and even an electrooculogram to record eye movements. [Orlando] has even thrown on temperature and light sensors for environmental monitoring.

[Orlando] is quick to point out that this is an educational project and not a medical instrument, and that it should only ever be used completely untethered from mains — battery power and Bluetooth only, please. Want to know why? Check out the shocking truth about transformerless power supplies.

Thanks to [fustini] for the tip.

Simple ECG Proves You Aren’t Heartless After All

We don’t think of the human body as a piece of electronics, but a surprising amount of our bodies work on electricity. The heart is certainly one of these. When you think about it, it is pretty amazing. A pump the size of your fist that has an expected service life of nearly 100 years.

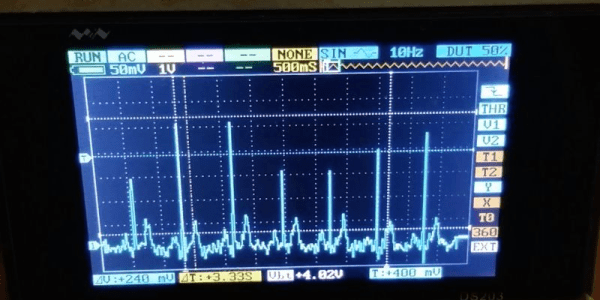
All that electrical activity is something you can monitor and–if you know what to look for–irregular patterns can tell you if everything is OK in there. [Ohoilett] is a graduate student in the biomedical field and he shares some simple circuits for reading electrocardiogram (ECG) data. You can see a video fo the results, below.

Continue reading “Simple ECG Proves You Aren’t Heartless After All”

Cheap Torque Sensor Goes Back To Basics On Strain Gauges

Sooner or later, we’ve all got to deal with torque measurement. Most of us will never need to go beyond the satisfying click of a micrometer-style torque wrench or the grating buzz of a cordless drill-driver as the clutch releases. But at some point you may actually need to measure torque, in which case this guide to torque sensors might be just the thing.

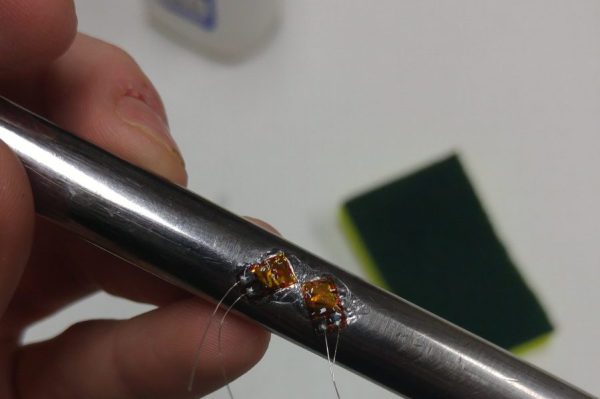
[Taylor Schweizer]’s four-part series on torque is pretty comprehensive. The link above is to the actual build of his DIY torque transducer, but the preceding three installments are well worth the read too. [Taylor] describes himself as an e-waste connoisseur and tantalizes us with the possibility that his build will be with salvaged parts, but in the end a $20 bag of strain gauges and an LM358 were the quickest way to his proof of concept. The strain gauges were super-glued to a socket extension, hot glue was liberally applied for insulation and strain relief, and the whole thing wired up to a Teensy for data capture. A quick script and dump of the data to Excel and you’ve got a way to visualize torque.

An LCD display for real-time measurements is in the works, as are improvements to the instrumentation amp – for which [Taylor] might want to refer to [Bil Herd]’s or [Brandon Dunson]’s recent posts on the subject.

[via r/arduino]