Wii Nunchuck On An 80s Computer

For a computer that debuted in the early 80s the MSX was a very respectable machine. Of course  these were the days that superimposing graphics over a video was an amazing feat, but  [Danjovic] and [Igor] are still having fun with their boxen. They designed a software interface for the Wii Nunchuck (translation) on their trusty MSX computer.

The plug coming out the back of a standard Wiimote is just a simple I2C bus. Many things can be done with this port from plugging in ancient controllers to controlling robots. [Danjovic] and [Igor] managed to write a routine in Basic that converts the I2C data coming out of the Nunchuck to data the MSX can understand without any modification of the hardware whatsoever.

All the guys needed to plug the Nunchuck into the MSX was a voltage divider and a few pull-up resistors between the computer and controller. They got data from both buttons, the joystick and the accelerometer in the Nunchuck and made a small program to display some sprites on the screen to demonstrate this. Check that out after the break.

Continue reading “Wii Nunchuck On An 80s Computer”

Easy Camera Tracking With A Quadrocopter

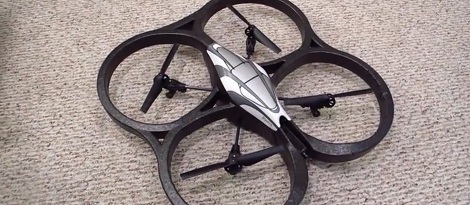
[DJ Sures] has been pulling all-nighters lately to get his AR Drone Parrot build off the ground. Now that it’s up and flying around, he managed to get it to follow objects around the room using on board cameras.

For the build, [DJ Sures] used the AR Drone ‘flying video game’ quadrocopter. This toy has two on board cameras that can viewed over wifi. All that’s needed is some interesting software to make things fun. The camera tracking of EZ-Builder software was brought into the mix so the AR Drone can be controlled via object or speech recognition, wiimotes, tablets, or terminals.

[DJ Sures] has come up with some slightly terrifying awesome builds like a Bluetooth Teddy Ruxpin, realistic Wall-E, and an awesome Omnibot 2000 refurb. This is his first flying hack, and the first to fully exploit the camera tracking of the EZ-Builder software. Check out [Sures]’ copter following him around a room after the break.

Continue reading “Easy Camera Tracking With A Quadrocopter”

[DJ Sures] Digs Up Another 80s Robot Toy, Makes It Awesome

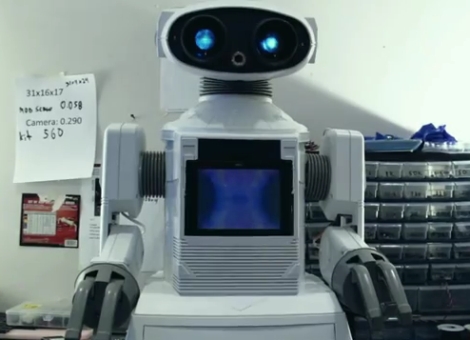
omnibot-2000

[DJ Sures] just can’t help himself from tinkering with robot toys built in the 80s. This time, he got his hands on an Omnibot-2000 (not to be confused with his other Omnibot hack), and updated it for the 21st century.

After its obligatory run through the dishwasher, the robot was fitted with two heavy duty servos in each arm – one for the shoulder and one at the elbow joint. He added another pair of servos and a head-mounted camera to the robot as well, giving it the ability to look around and navigate through his house.

While these physical modifications are nothing new to [DJ Sures], he wanted the robot’s control scheme to be different than what he has done in the past. Along with the standard autonomous/joystick/Wiimote/voice/iPhone controls that he built into his other projects, he added “visual glyph” control capabilities to the Omnibot. This means that the robot can recognize specific objects and surroundings, giving it the ability to perform context-related tasks.

He’s working on getting the robot to recognize both the refrigerator and living room, in hopes of eventually having the Omnibot to fetch him drinks from the kitchen – that’s something we can totally get behind!

Continue reading to see a pair of videos of the Omnibot-2000 in action, and be sure to visit his site if you’re interested in seeing more.

Continue reading “[DJ Sures] Digs Up Another 80s Robot Toy, Makes It Awesome”

For The Trade Show Booth That Has Everything, A Blimp!

Trade shows are all about attracting attention and getting people to learn about your product, so what could be better than a custom-built RC blimp? Sure, you could just buy one, but what’s the fun in that? After several design iterations, [Tretton37] came up with a blimp known as the [LeetZeppelin] controlled by an Arduino, an XBee module, as well as a Wiimote controller connected to a computer.

The hack itself is a great example of repurposing off-the-shelf materials into something more interesting and unique. In addition to the components listed above, hobby servos were modded to allow for thrust motor control in conjunction with Legos for the gearing and “pillow-block bearings.” A list of the “important” parts used in this hack is furnished on their site as well as a video of it in action, which is also after the break.

As for the results of this hack as a trade-show attention grabber, Fredrik Leijon had this to say: “We think that all the gazing at the sky and half opened mouths proves that it was a huge success!”

[youtube http://www.youtube.com/watch?v=geMrAmBJsls&w=470&h=315%5D

Single-column Rubens’ Tube

Here’s a fiery project which [Patrick] calls his Pyro Jam Can. It’s the simplest Rubens’ Tube build that we can think of. For the uninformed, a Rubens’ tube uses flammable gas to reveal wave forms passing through the supply vessel. In the past we’ve seen projects with multiple columns, which very clearly show a standing wave. But this version lacks the resolution for that, so the wave is seen as a modulated flame height.

You can see the propane feed tube coming into the can from the right. This keeps the gas flowing steadily, but a diaphram on the bottom of the can made of a latex balloon allows for modulations in flame height by pushing the gas through the aperture a bit faster than it is flowing. A speaker in the base bounces sound waves off of the diaphragm for the effect seen in the video clip after the break.

We wonder if the can will ever heat up enough to melt the balloon on the other end?

Continue reading “Single-column Rubens’ Tube”

8-pin Micro Plays Pong On Your Widescreen

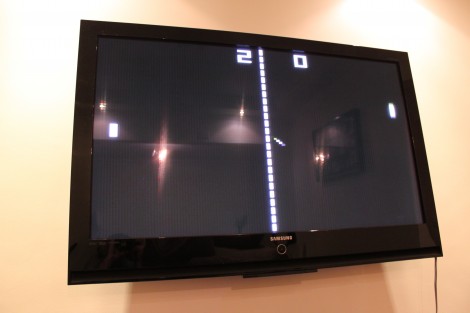
[Fernando] sent in a tangential project update that uses an ATtiny45 to play Pong on his television. Last time we looked in on his work he had just finished getting the eight-pin chip to display a big number on the TV via the VGA port. This expands on the idea while he continues to wait for parts.

Right now the chip plays against itself, but he’s got one input pin left and we’d love to see a button added for a simple one-player game. We’re thinking the paddle would always be moving in one direction or the other, with a click of the button to reverse that direction. The part that he’s waiting for is a Bluetooth module, which we’d love to see used for 2-player games via a pair of Wiimotes (we’re just wishing at this point and don’t know if that would even be possible). The end goal for the hardware is a Bluetooth connected scoreboard for Android devices.

The code is written in Assembly, and we found it relatively easy to follow what [Fernando] is doing with the game logic. On the graphics side of things he gets away with a 120×96 resolution because Pong is supposed to look pixelated. We love the result, which you can see for yourself after the break.

Continue reading “8-pin Micro Plays Pong On Your Widescreen”

Using Classic Game Controllers With A Wii

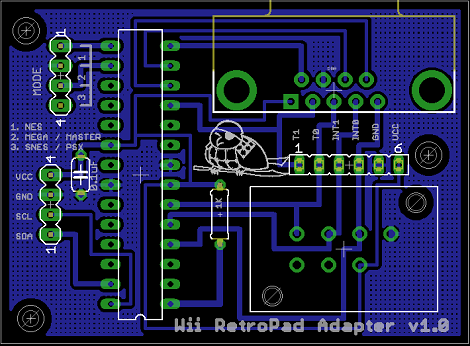
[Bruno]’s Wii RetroPad Adapter was sent into the tip line, and we’re loving the possibility of using Playstation 2, Genesis, NES and SNES controllers with our Wii.

While there are commercial solutions that connect an NES or SNES controller to a Wii, everything connects to the GameCube port and there is no adapter for Sega or Playstation controllers. For his build, [Bruno] used an ATmega168 to read data from the classic controllers and translate that to the Wiimote I2C bus. Think of it as a new classic controller with the same form factor your 8-year-old self knew and loved.

The schematic for the build is very simple and [Bruno] has all the software out in the open. Even the PCB is single sided and looks like it would be a great candidate for a homebrew PCB. There’s no indication [Bruno] is trying to monetize his creation, so he’s either doing right, or so very wrong. Check out the Dualshock 2/Mario 3 demo of this board after the break.

Continue reading “Using Classic Game Controllers With A Wii”