Ask Hackaday MRRF Edition: 3D Printers Can Catch Fire

[Jay] out of the River City Labs Hackerspace in Peoria, IL cleared out a jam in his printer. It’s an operation most of us who own a 3D printer have performed. He reassembled the nozzle, and in a moment forgot to tighten down the grub nut that holds the heater cartridge in place. He started a print, saw the first layer go down right, and left the house at 8:30 for work. When he came back from work at 10:30 he didn’t see the print he expected, but was instead greeted by acrid smoke and a burnt out printer.
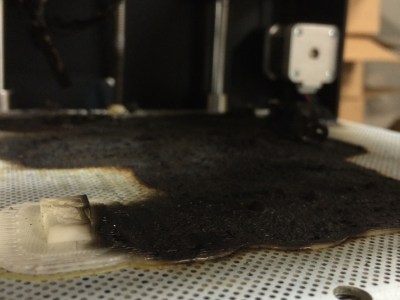
The approximate start time of the fire can be guessed by the height of the print before failure.

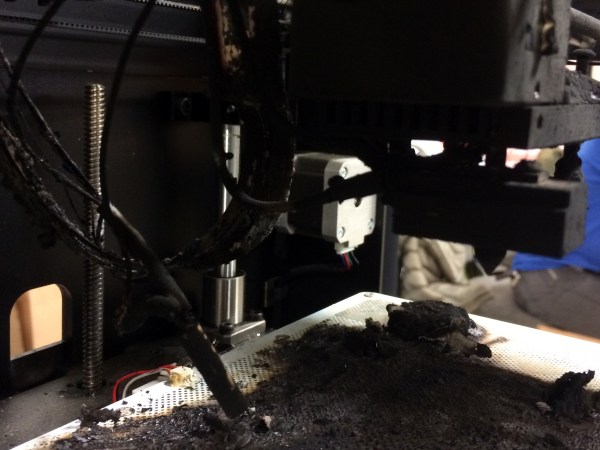
As far as he can figure, some time at around the thirty minute mark the heater cartridge vibrated out of the block. The printer saw a drop in temperature and increased the power to the cartridge. Since the cartridge was now hanging in air and the thermistor that reads the temperature was still attached to the block, the printer kept sending power. Eventually the cartridge, without a place to dump the energy being fed to it, burst into flame. This resulted in the carnage pictured. Luckily the Zortrax is a solidly built full metal printer, so there wasn’t much fuel for the fire, but the damage is total and the fire could easily have spread.

Which brings us to the topics of discussion.

How much can we trust our own work? We all have our home-builds and once you’ve put a lot of work into a printer you want to see it print a lot of things. I regularly leave the house with a print running and have a few other home projects going 24/7. Am I being arrogant? Should I treat my home work with a lesser degree of trust than something built by a larger organization? Or is the chance about the same? Continue reading “Ask Hackaday MRRF Edition: 3D Printers Can Catch Fire”

Silencing A 3D Printer With Acoustic Foam Isn’t That Easy

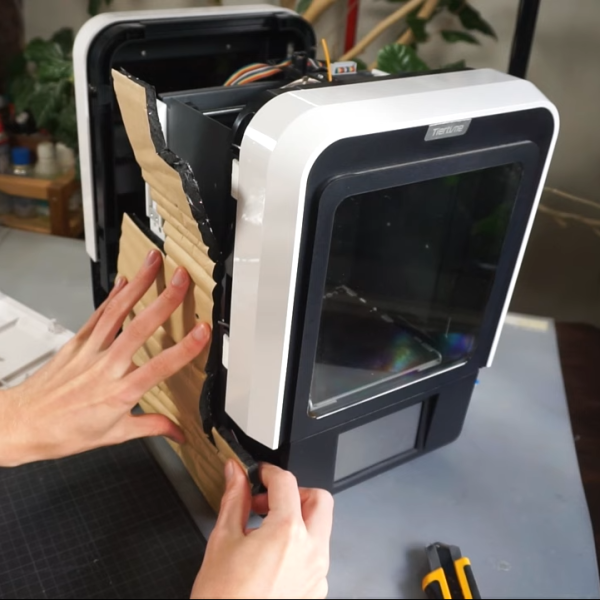
3D printers are supremely useful tools, but their incessant whining and droning can be distracting and tiresome. [Handy Bear] decided to try some simple ways to quieten down their printer using acoustic foam, with mixed results.

The video starts by exploring two different acoustic foams; one black, one white. The latter was found to hold a flame when ignited, making it a poor choice for a 3D printer with many hot components. The black foam, advertised for use in automotive installations, was reluctant to burn at all, and so made a safer choice.

The UP Mini 3 printer is then disassembled to receive its soundproofing treatment. The printer’s various panels all got a healthy lashing of thick sticky insulating foam. This took some work, thanks to the need to cut around various ribs and screw bosses on the panels. Cut appropriately, though, the printed was able to be reassembled neatly with its foam hidden inside.

Unfortunately, the work didn’t have a great effect on the printer’s sound output. That’s perhaps unsurprising, given it still has uninsulated panels like the front window which are still free to radiate sound. The foam did help cut down on fan noise and high-pitch sounds from the printer, but the annoying medium and low pitched noises from the printer’s motors were still very audible.

Using an enclosure or a quieter stepper driver are probably more effective DIY methods to quiet a noisy printer; share your own ideas in the comments. Video after the break.

Continue reading “Silencing A 3D Printer With Acoustic Foam Isn’t That Easy”

Hackaday Podcast 234: Machines On Fire, Old Kinect New Kinect, And Birth Of The Breadboard

It might sound like a joke, but this week, Elliot Williams and Tom Nardi start things off by asking how you keep a Polish train from running. Like always, the answer appears to be a properly modulated radio signal. After a fiery tale about Elliot’s burned beans, the discussion moves over to the adventure that is home CNC ownership, the final chapter in the saga of the Arecibo Telescope, and the unexpected longevity of Microsoft’s Kinect. Then it’s on to the proper way to cook a PCB, FFmpeg in the browser, and a wooden cyberdeck that’s worth carrying around. Finally, they’ll go over the next generation of diode laser engravers, and take a look back at the origins of the lowly breadboard.

Check out the links below if you want to follow along, and as always, tell us what you think about this episode in the comments!

Download it yourself. You don’t need the cloud!

Continue reading “Hackaday Podcast 234: Machines On Fire, Old Kinect New Kinect, And Birth Of The Breadboard”

Hackaday Podcast 174: Breaking Into The Nest, The Cheapest 3D Printer, A Spy In Your HDMI, And AI All Over The Place

Fresh from vacation, Editor-in-Chief Elliot Williams makes his triumphant return to the Hackaday Podcast! He’s joined this week by Managing Editor Tom Nardi, who’s just happy he didn’t have to do the whole thing by himself again. In this episode we’ll talk about tackling BGA components in your custom PCBs, a particularly well executed hack against Google’s Nest Hub, and why you probably don’t really want the world’s cheapest 3D printer. We’ll also take a look at an incredible project to turn the Nokia 1680 into a Linux-powered handheld computer, a first of its kind HDMI firewall, and a robot that’s pretty good at making tacos. Listeners who are into artificial intelligence will be in for quite a treat as well, as is anyone who dreams of elevating the lowly automotive alternator to a more prominent position in the hacker world.

By the way, it seems nobody has figured out the hidden message in last week’s podcast yet. What are you waiting for? One of you out there has to be bored enough to give it a shot.

Direct download, and play it offline. You don’t need no stinkin’ cloud.

Check out the links below if you want to follow along, and as always, tell us what you think about this episode in the comments!

Continue reading “Hackaday Podcast 174: Breaking Into The Nest, The Cheapest 3D Printer, A Spy In Your HDMI, And AI All Over The Place”

3D Printing A Carburetor Is Easier Than You Probably Think

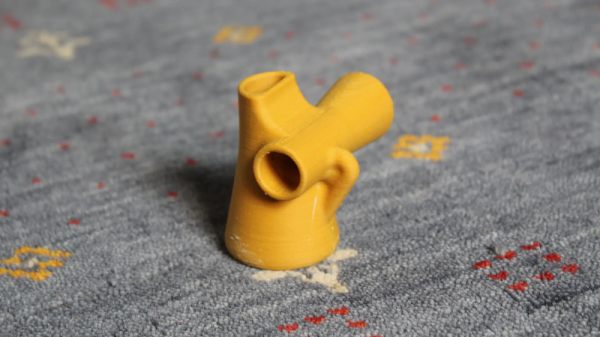
We’ve all been there. You see a cool gadget on the Internet to 3D print and you can’t wait to fire up the old printer. Then you realize it will take 8 different prints over a span of 60 hours, chemical post-processing, drilling, exotic hardware, and paint to get the final result. [Peter Holderith’s] carburetor design, however, looks super easy.

If you have experience with real-world carbs, you might wonder how that would work, but as [Peter] points out, carburetors are very simple at the core — nothing more than a venturi. All the extra pieces you think of are for special cases and not necessary for basic operation. We doubt, though, that you could really use the thing in its current form in your car. There are no mounts and since he printed it in PLA, it seems like a hot engine would be a bad idea. However, it does work well with water and an electric blower.

[Peter] mentions that with some more work and the right material, he has no doubt he could create a working practical carb. We think he’s right. But even in this form, it is a great educational project for a budding car enthusiast — like the old transparent V8 engine models, maybe.

Speaking of transparent, we’ve seen — or maybe not seen is a better phrase — a see-through carburetor that is also a good demonstrator. If you could perfect a 3D printed carb, it would make conversion projects a lot easier.

3D Print Finishing By Spraying Glazing Putty

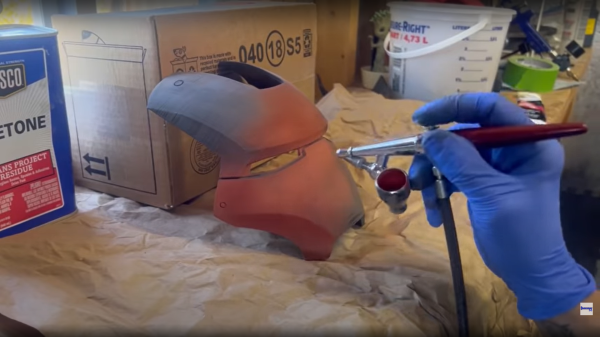
Finishing off 3D prints is a labour-intensive process, and getting a good looking, smooth surface suitable for painting takes a lot of time and plenty of practice. Deeper printing layer lines or minor surface defects can be smoother over with a variety of materials, from putties to resins, but the deeper the defect, the thicker the filler and that takes it toll on the surface details – smoothing those out and making fine details less distinct. [Darkwing dad] has another solution that looks pretty easy to achieve, by mixing acetone with glazing putty it can be airbrushed over the print surface in one go. After a little experimentation with the ratio of putty to acetone, a wide open nozzle and a low pressure, it was found that a nice even spray could be achieved. Importantly it dries in just a few minutes, enabling multiple coats to be applied in a short space of time.

Once sufficient thickness has been applied, the coating can easily sanded to get a smooth result with the worst of the gaps filled, and the layer lines nicely hidden. The final part of the filling process is more typical, with a few coats of filler primer applied straight from a rattle can, followed by a light sand and you’re good for painting.

We’ve covered smoothing 3D prints practically as long as we’ve been covering 3D printing itself, and there are multiple ways to do this, depending on the filament material, your budget and you tolerance for noxious fumes. Here’s a guide for smoothing using UV curable resins, using a special smoothable filament with IPA, and finally if this is just too fancy, smelly or expensive, just whip out the old butane torch and smooth those prints with good old fashioned fire.

Continue reading “3D Print Finishing By Spraying Glazing Putty”

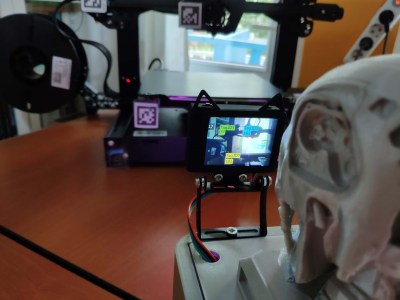
a 3D printed box with a Terminator head watching a camera

Machine Vision Helps You Terminate Failing 3D Print Jobs

If you’re a 3D printer user you’re probably familiar with that dreaded feeling of returning to your printer a few hours after submitting a big job, only to find that it threw an error and stopped printing, or worse, turned half a spool of filament into a useless heap of twisted plastic. While some printers come with remote monitoring facilities, [Kutluhan Aktar]’s doesn’t, so he built a device that keeps a watchful eye on his 3D printer and notifies him if anything’s amiss.

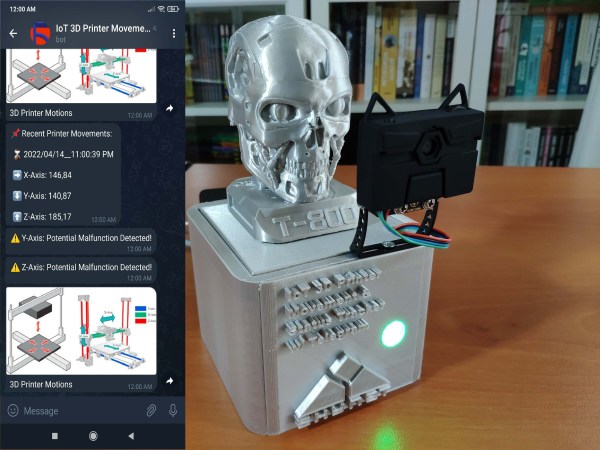
a 3D printed box with a Terminator head watching a cameraThe device does this by tracking the movement of the print head using a camera and looking for any significant changes in motion. If, for example, the Y-axis suddenly stops moving and doesn’t resume within a reasonable amount of time, it will generate a warning message and send it to its owner through Telegram. If all three axes stop moving, then either the print is finished or some serious error occurred, both of which require user intervention.

The camera [Kutluhan] used is a HuskyLens AI camera that can detect objects and output a set of 3D coordinates describing their motion. A set of QR-like AprilTags attached to the moving parts of the 3D printer help the camera to identify the relevant components. The software runs on a Raspberry Pi housed in a 3D-printed enclosure with a T-800 Terminator head on top to give it a bit of extra presence.

[Kutluhan]’s description of the project covers lots of detail on how to set up the camera and hook it up to a Telegram bot that enables it to send automated messages, so it’s an interesting read even if you’re not planning to 3D print something to check on your 3D printer. After all, software like Octoprint has many similar features, but having an independent observer can still be a good safety feature to prevent some types of catastrophic failure.

Continue reading “Machine Vision Helps You Terminate Failing 3D Print Jobs”