Over the weekend, Sanjay Mortimer passed away. This is a tremendous blow to the many people who he touched directly and indirectly throughout his life. We will remember Sanjay as pioneer, hacker, and beloved spokesperson for the 3D printing community.
If you’ve dabbled in 3D printing, you might recall Sanjay as the charismatic director and co-founder of the extrusion company E3D. He was always brimming with enthusiasm to showcase something that he and his company had been developing to push 3D printing further and further. But he was also thoughtful and a friend to many in the community.
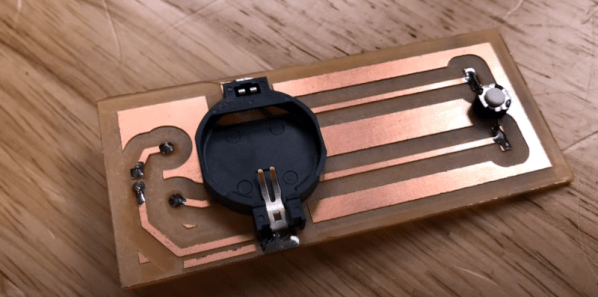
Inspired by his CNC’s leveling system, [Chuck] built a small PCB to help level his 3D printer and he shares the details in the video you can see below. The idea is simple, the nozzle pushes down on the PCB which has a tact switch underneath. When the switch closes, an LED lights.
In practice, you measure the height of the board and use that for your Z offset, and you are done. Our only concern would be how repeatable the switch is. Granted, most people use a piece of paper and that’s probably not totally repeatable or accurate either. Proper feeler gauges are the “right” way to do it, but we know only a few people who do that.
If you ever look into the repeatability of various Z probes like the proximity sensors or the little pins that drop out of a 3D Touch probe, they aren’t that repeatable. Some people use microswitches, too, which is pretty similar to this approach and is apparently good enough.
The board is available, but it is simple enough that you could create it — or an equivalent — with just about any method you use for your PCBs. [Chuck’s] prototype board was milled. We are always surprised more people don’t use the nozzle itself to sense the bed. Some people go to a lot more trouble than just electrical contact even for CNC.
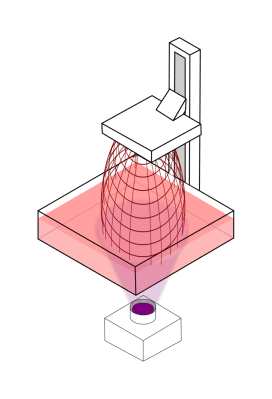
The usual resin 3D printer you may be familiar with is quite a simple machine. The machine has only one axis, which is the vertically moving build platform. A light exposes a photosensitive resin that cures on and is then pulled up off of a transparent window, before the next layer is exposed.
Typical resin printer setup
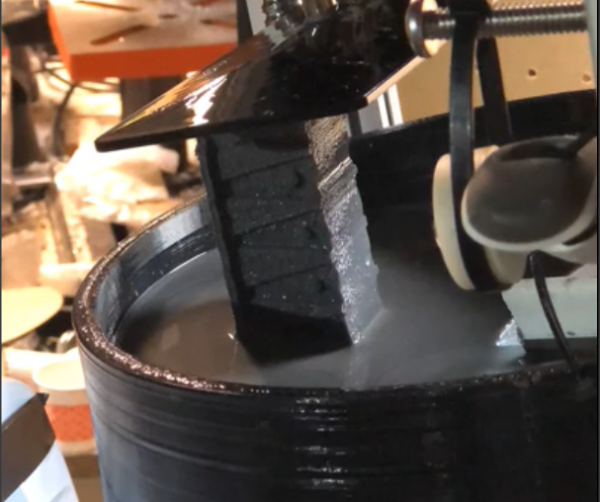
CLIP is a continuous resin printing process that speeds up printing by removing this peeling process. It utilises a bottom membrane that is permeable to oxygen. This tiny amount of oxygen right at the boundary prevents the solidified resin from sticking to the bottom, allowing the Z axis to be moved up continuously, speeding up printing significantly.
The method [Eric] is using is based around a continuously rotating bath to keep the resin moving, replenishing the resin in the active polymerisation zone. The bottom of the bath is made from a rigid PDMS surface, which is continuously wiped with a squeegee to replenish the oxygen layer. He notes the issues Carbon are still having with getting enough oxygen into the build layer, which he reckons is why they only show prints of smaller or latticed structures. His method should fix that issue. The build platform is moved up slowly, with the part appearing in one long, continuous movement. He reports the printing speed as 280 mm/hour which is quite rapid to say the least. More details are very scarce, and the embedded video a little unclear, but as one commentator said “I think we just saw resin printing evolve!” the next snarky comment changed the “evolve” to “revolve” which made us giggle.
Now, we all know that 3D printing is not at all new, and only the expiration of patents and the timely work by [Adrian Bowyer] and the reprap team kickstarted the current explosion of FDM printers. Resin printers will likely be hampered by the same issues until something completely new kickstarts the next evolution. Maybe this is that evolution? We really hope that [Eric] decides to write up his project with some details, and we will be sitting tight waiting to pore over all the gory details. Fingers crossed!
Tooling around downtown on a personal electric vehicle is a lot of fun, but it is even better when you do like [James Dietz] and ride on your own 3D-printed electric scooter. As one of the entries for the Hackaday Prize, RepRaTS (Replicable Rapid prototyper Transportation System) has a goal of doing for scooters what the original RepRap project did for 3D printing: provide a user-friendly design base that you can extend, modify, and maintain. It doesn’t even require power tools to build, other than, of course, your 3D printer.
The design uses threaded rods and special plastic spacers made to hold a large load. The prototype is deliberately oversized with large hub motors, with the understanding that most builds will probably be smaller. As you can see in the video below, the scooter seems to go pretty fast and handles well.
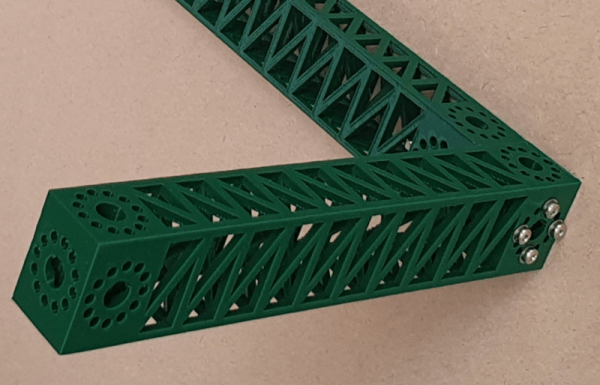
Need a steel beam? You can 3D print PLA beams that are as strong as a steel beam of equivalent weight according to [RepRap]. The Python code for FreeCAD generates a repeating structure especially well suited for belt printers that can print a beam of any length. Keep in mind, of course, given two things that weigh the same, if one is made of steel and the other PLA, the steel one will be physically smaller.
The beams are repeating tetrahedrons which are quite strong with a lot of material on the outer faces to resist bending. Each beam end has a neat block with a wiring hole and a ring of small holes that allow you to mount the beams to things or each other with 30 degree increments of rotation.
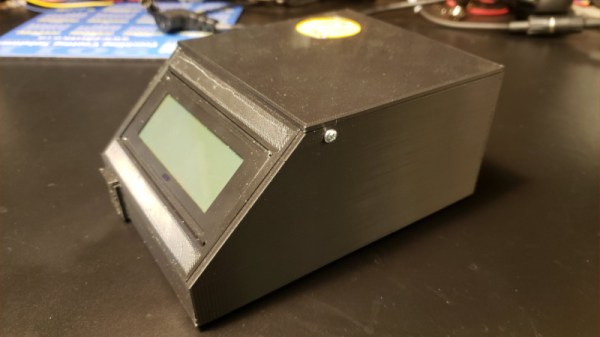
3D printers are capable of creating complex geometries with a minimum of fuss, but one of the tradeoffs is the long period of time it takes to print a part. Often, printers are left to run for many hours with a minimum of supervision to complete their tasks. This can leave printers idling for long periods of time after their work is finished. Noting this, [TheGrim] put together the Advanced Printer Control.
The aim of the APC is to monitor 3D printers, and shut them off when their work is complete. The aim is to avoid leaving printers running for hours after their prints are finished, which causes needless wear on fans and screens which can have a limited life. This is achieved by putting an ESP8266 in charge of the printer’s AC power supply, via a triac. It measures the current drawn by the printer when idling and in use to set a baseline. Then, whenever the printer drops back to idle levels, a timer begins. When the timer runs out, the printer is switched off. There’s also an option to automatically trigger shutdown with an I/O pin, too.
Despite the impressive variety of thermoplastics that can be printed on consumer-level desktop 3D printers, the most commonly used filament is polylactic acid (PLA). That’s because it’s not only the cheapest material available, but also the easiest to work with. PLA can be extruded at temperatures as low as 180 °C, and it’s possible to get good results even without a heated bed. The downside is that objects printed in PLA tend to be somewhat brittle and have a low heat tolerance. It’s a fine plastic for prototyping and light duty projects, but it won’t take long for many users to outgrow its capabilities.
The next step up is usually polyethylene terephthalate glycol (PETG). This material isn’t much more difficult to work with than PLA, but is more durable, can handle higher temperatures, and in general is better suited for mechanical parts. If you need greater durability or higher heat tolerance than PETG offers, you could move on to something like acrylonitrile butadiene styrene (ABS), polycarbonate (PC), or nylon. But this is where things start to get tricky. Not only are the extrusion temperatures of these materials greater than 250 °C, but an enclosed print chamber is generally recommended for best results. That puts them on the upper end of what the hobbyist community is generally capable of working with.
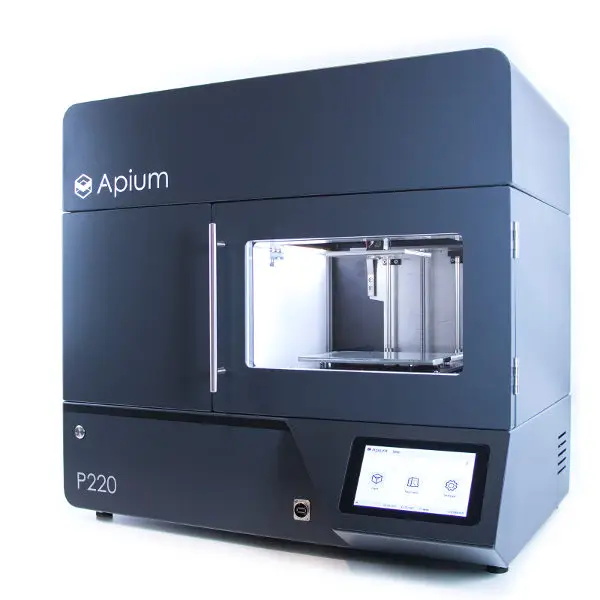
Industrial 3D printers like the Apium P220 start at $30,000.
But high-end industrial 3D printers can use even stronger plastics such as polyetherimide (PEI) or members of the polyaryletherketone family (PAEK, PEEK, PEKK). Parts made from these materials are especially desirable for aerospace applications, as they can replace metal components while being substantially lighter.
These plastics must be extruded at temperatures approaching 400 °C, and a sealed build chamber kept at >100 °C for the duration of the print is an absolute necessity. The purchase price for a commercial printer with these capabilities is in the tens of thousands even on the low end, with some models priced well into the six figure range.
Of course there was a time, not quite so long ago, where the same could have been said of 3D printers in general. Machines that were once the sole domain of exceptionally well funded R&D labs now sit on the workbenches of hackers and makers all over the world. While it’s hard to say if we’ll see the same race to the bottom for high temperature 3D printers, the first steps towards democratizing the technology are already being made.