Connecting DECT Phones Through Sound Cards For Asterisk

board

I couldn’t think of a better title. Here’s how it goes: [onno] wanted to convert a DECT phone for VOIP use. First he tried using transformers for the audio, but was unhappy with the noise and echo. He describes how to do a direct tap like [Christoffer]’s Skype phone, but includes all of the necessary measures to keep from frying your sound card. The main piece of this project is his hacked “chan_oss” driver for Asterisk. Using the driver, Asterisk is able to ring the DECT phone. It also detects whether the phone is off-hook by comparing the sound input to the known line noise level. The phone can dial using DTMF just like any standard phone.

Continue reading “Connecting DECT Phones Through Sound Cards For Asterisk”

The STM32 Makes For A Cheap DIY USB Soundcard

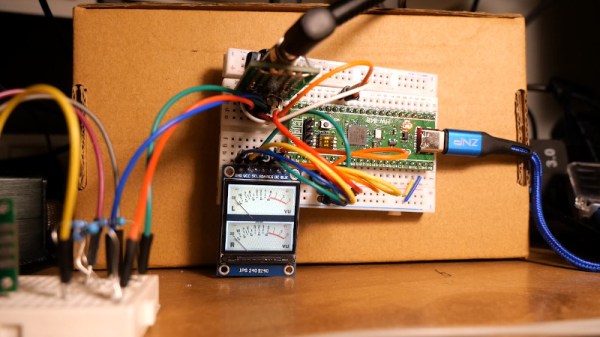
Soundcards used to be giant long 8-bit ISA things that would take up a huge amount of real estate inside a desktop computer. These days, for most of us, they’re baked into the motherboard and we barely give them a second thought. [Samsonov Dima] decided to whip up a cheap little sound card of their own, however, built around the STM32.

The soundcard is based specifically on the STM32F401. readily available on the “Green Pill” devboards. A digital-to-analog converter is implemented on the board based on two PWM timers providing high-quality output. There’s also a simulated software sigma delta ADC implemented between the audio streaming in via USB and the actual PWM output, with some fancy tricks used to improve the sound output. [Samsonov] even found time to add a display with twin VU meters that shows the audio pumping through the left and right channels.

Without test gear on hand, we can’t readily quantify the performance of the sound card. However, as per the Youtube videos posted, it appears more than capable of recreating music with good fidelity and plenty of fine detail.

If you need a cheap, simple USB sound card that you can hack away on, this might be the one for you. If you need something more suitable for a vintage PC, however, consider this instead. Video after the break.

Continue reading “The STM32 Makes For A Cheap DIY USB Soundcard”

PiSound, The Audio Card For The Raspberry Pi

Kids today are being loud with their ‘drum machines’ and ‘EDM’. Throw some Raspberry Pis at them, and there’s a need for a low-latency sound card with MIDI and all the other accouterments of the modern, Skrillex-haired rocker. That’s where PiSound comes in.

Of course, the Pi already comes with audio out, but that’s not enough if you want to do some real audio processing. You need audio in as well, and while you’re messing around with that, adding some high-quality opamps, ADCs, DACs, and some MIDI would be a good idea. This is what the PiSound is all about.

[Pranciskus], the guy who has been working on the PiSound for a while now, developed this multitool for audio on a tiny Linux system. One of the killer features on the PiSound is ‘The Button’, a simple tact switch that runs a script if the button is pressed, another script if the button is held down, and two more if the button is pressed two or three times. This is actually a pretty nifty UI, and we wouldn’t mind seeing this on a few more Pi accessories.

If you’d like to see some example projects using the PiSound, there example MIDI controllers, networked audio players, and some goofing around with LV2 plugins over here.

DreamBlaster X2 on a Sound Blaster Sound Card

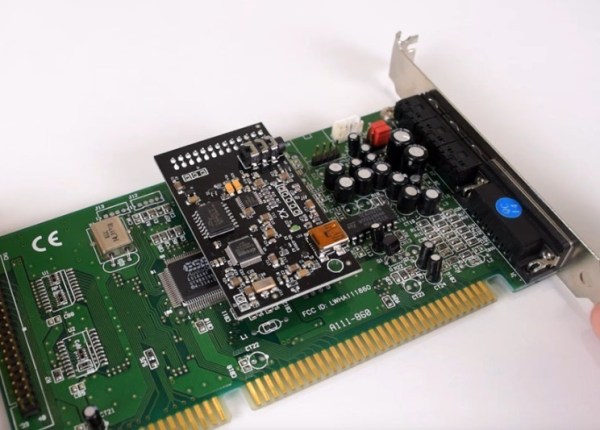
DreamBlaster X2: A Modern MIDI Synth For Your Sound Blaster Card

Back in the 90s, gamers loaded out their PCs with Creative’s Sound Blaster family of sound cards. Those who were really serious about audio could connect a daughterboard called the Creative Wave Blaster. This card used wavetable synthesis to provide more realistic instrument sounds than the Sound Blaster’s on board Yamaha FM synthesis chip.

The DreamBlaster X2 is a modern daughterboard for Sound Blaster sound cards. Using the connector on the sound card, it has stereo audio input and MIDI input and output. If you’re not using a Sound Blaster, a 3.5 mm jack and USB MIDI are provided. Since the MIDI uses TTL voltages, it can be directly connected to an Arduino or Raspberry Pi.

This card uses a Dream SAM5000 series DSP chip, which can perform wavetable synthesis with up to 81 polyphonic voices. It also performs reverb, chorus, and equalizer effects. This chip sends audio data to a 24 bit DAC, which outputs audio into the sound card or out the 3.5 mm jack.

The DreamBlaster X2 also comes with software to load wavetables, and wavetables to try out. We believe it will be the best upgrade for your 486 released in 2017. If you’re interested, you can order an assembled DreamBlaster. After the break, a review with audio demos.

Continue reading “DreamBlaster X2: A Modern MIDI Synth For Your Sound Blaster Card”

Decoding RF Link Using A PC Soundcard

[Ray] wanted to use a microcontroller to send signals to some wireless power outlets. Instead of tapping into the buttons on the remote control he is using an RF board to mimic the signals. There are two hurdles to overcome with this method. The first is to make sure your RF module operates on the proper frequency. The second is to get your hands on the codes that are being sent from the remote control unit.

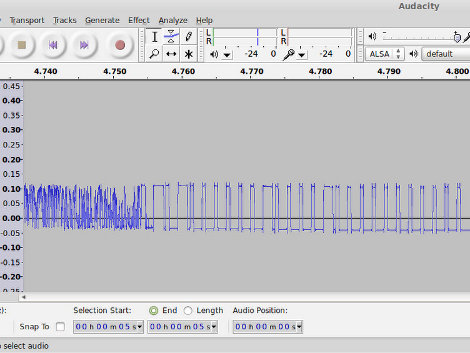
Now you could just hook your oscilloscope up to the transmitter and take a look at the timing of the signals. But most hobbyists don’t have that kind of high-end test equipment in their basement or garage shops. [Ray’s] approach uses something we all have available to us: a sound card and some open source software. He connected the data pin from his RF receiver to an audio plug and inserted it in the line-in jack of his computer. Using Audacity he recorded the signal as he pressed buttons on the transmitter.  This method not only captures the data, but the time stamps native to the audio editing program let him easily work out the timing for each signal.

It’s kind of amazing what you can do with this audio analyation technique. Earlier this year we saw it used to measure response time for DSLR cameras.

Continue reading “Decoding RF Link Using A PC Soundcard”

Rotary Encoding With Your Soundcard

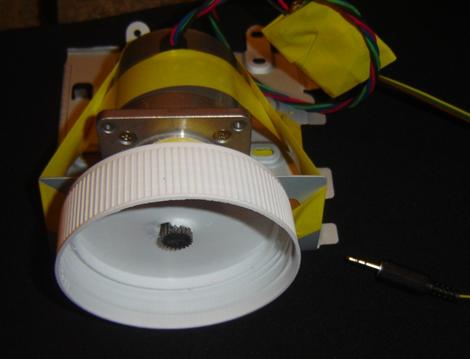
[Stefan] sent in this project writeup to show us how he used a stepper motor as a rotary encoder. Using a stepper motor as an encoder isn’t really that new, as [Stefan] points out, we’ve seen it several times before. He wanted to use this in the quickest simplest way with his computer though. Instead of doing any decoding on a separate microprocessor, he’s connected the stepper directly to his sound card and written code to do the rest. You can download that code and see a video of some practical applications on his site.

Recreating The Quadrophonic Sound Of The 70s

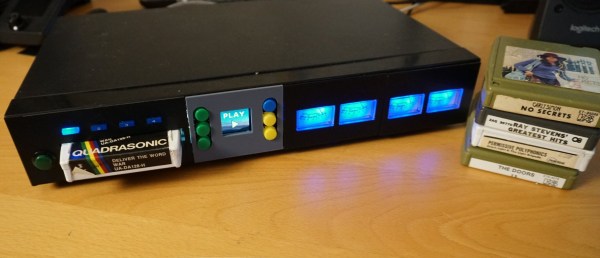
For plenty of media center PCs, home theaters, and people with a simple TV and a decent audio system, the standard speaker setup now is 5.1 surround sound. Left and right speakers in the front and back, with a center speaker and a subwoofer. But the 5.1 setup wasn’t always the standard (and still isn’t the only standard); after stereo was adopted mid-century, audio engineers wanted more than just two channels and briefly attempted a four-channel system called quadrophonic sound. There’s still some media from the 70s that can be found that is built for this system, such as [Alan]’s collection of 8-track tapes. These tapes are getting along in years, so he built a quadrophonic 8-track replica to keep the experience alive.

The first thing needed for a replica system like this is digital quadrophonic audio files themselves. Since the format died in the late 70s, there’s not a lot available in modern times so [Alan] has a dedicated 8-track player connected to a four-channel audio-to-USB device to digitize his own collection of quadrophonic 8-track tapes. This process is destructive for the decades-old tapes so it is very much necessary.

With the audio files captured, he now needs something to play them back with. A Raspberry Pi is put to the task, but it needs a special sound card in order to play back the four channels simultaneously. To preserve the feel of an antique 8-track player he’s cannibalized parts from three broken players to keep the cassette loading mechanism and track indicator display along with four VU meters for each of the channels. A QR code reader inside the device reads a QR code on the replica 8-track cassettes when they are inserted which prompts the Pi to play the correct audio file, and a series of buttons along with a screen on the front can be used to fast forward, rewind and pause. A solenoid inside the device preserves the “clunk” sound typical of real 8-track players.

As a replica, this player goes to great lengths to preserve the essence of not only the 8-track era, but the brief quadrophonic frenzy of the early and mid 70s. There’s not a lot of activity around quadrophonic sound anymore, but 8-tracks are popular targets for builds and restorations, and a few that go beyond audio including this project that uses one for computer memory instead.

Continue reading “Recreating The Quadrophonic Sound Of The 70s”