When the time comes to add an object recognizer to your hack, all you need do is choose from many of the available ones and retrain it for your particular objects of interest. To help with that, [Edje Electronics] has put together a step-by-step guide to using TensorFlow to retrain Google’s Inception object recognizer. He does it for Windows 10 since there’s already plenty of documentation out there for Linux OSes.
You’re not limited to just Inception though. Inception is one of a few which are very accurate but it can take a few seconds to process each image and so is more suited to a fast laptop or desktop machine. MobileNet is an example of one which is less accurate but recognizes faster and so is better for a Raspberry Pi or mobile phone.
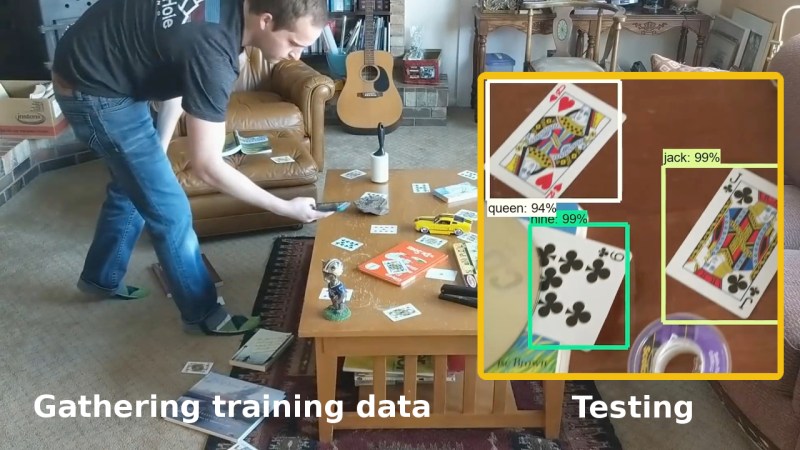
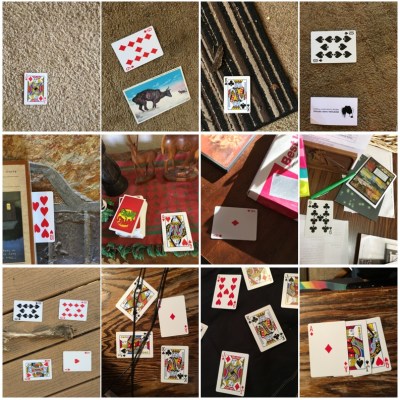 You’ll need a few hundred images of your objects. These can either be scraped from an online source like Google’s images or you get take your own photos. If you use the latter approach, make sure to shoot from various angles, rotations, and with different lighting conditions. Fill your background with various other things and even have some things partially obscuring your objects. This may sound like a long, tedious task, but it can be done efficiently. [Edje Electronics] is working on recognizing playing cards so he first sprinkled them around his living room, added some clutter, and walked around, taking pictures using his phone. Once uploaded, some easy-to-use software helped him to label them all in around an hour. Note that he trained on 24 different objects, which are the number of different cards you get in a pinochle deck.
You’ll need to install a lot of software and do some configuration, but he walks you through that too. Ideally, you’d use a computer with a GPU but that’s optional, the difference being between three or twenty-four hours of training. Be sure to both watch his video below and follow the steps on his Github page. The Github page is kept most up-to-date but his video does a more thorough job of walking you through using the software, such as how to use the image labeling program.
Why is he training an object recognizer on playing cards? This is just one more step in making a blackjack playing robot. Previously he’d done an impressive job using OpenCV, even though the algorithm handled non-overlapping cards only. Google’s Inception, however, recognizes partially obscured cards. This is a very interesting project, one which we’ll be keeping an eye on. If you have any ideas for him, leave them in the comments below.
Continue reading “Using TensorFlow To Recognize Your Own Objects”
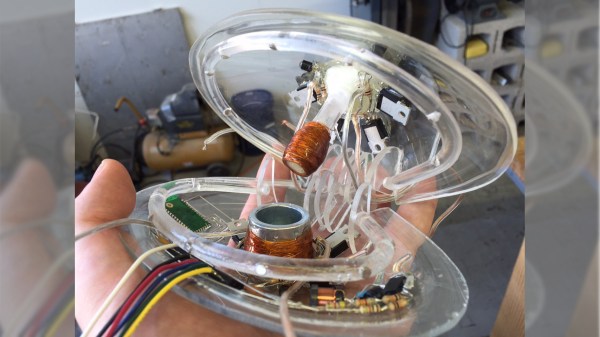
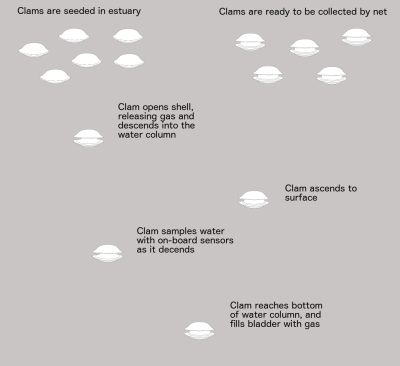 The clams contain the electronics, sensors, and means of descending and ascending within their shells. A bunch of them are dropped overboard on the surface. Their shells open, allowing the gas within to escape and they sink. As they descend they sample the water. When they reach the bottom, gas fills a bladder and they ascend back to the surface with their data where they’re collected in a net.