When Sticks Fly

When it comes to hobby rotorcraft, it almost seems like the more rotors, the better. Quadcopters, hexacopters, and octocopters we’ve seen, and there’s probably a dodecacopter buzzing around out there somewhere. But what about going the other way? What about a rotorcraft with the minimum complement of rotors?

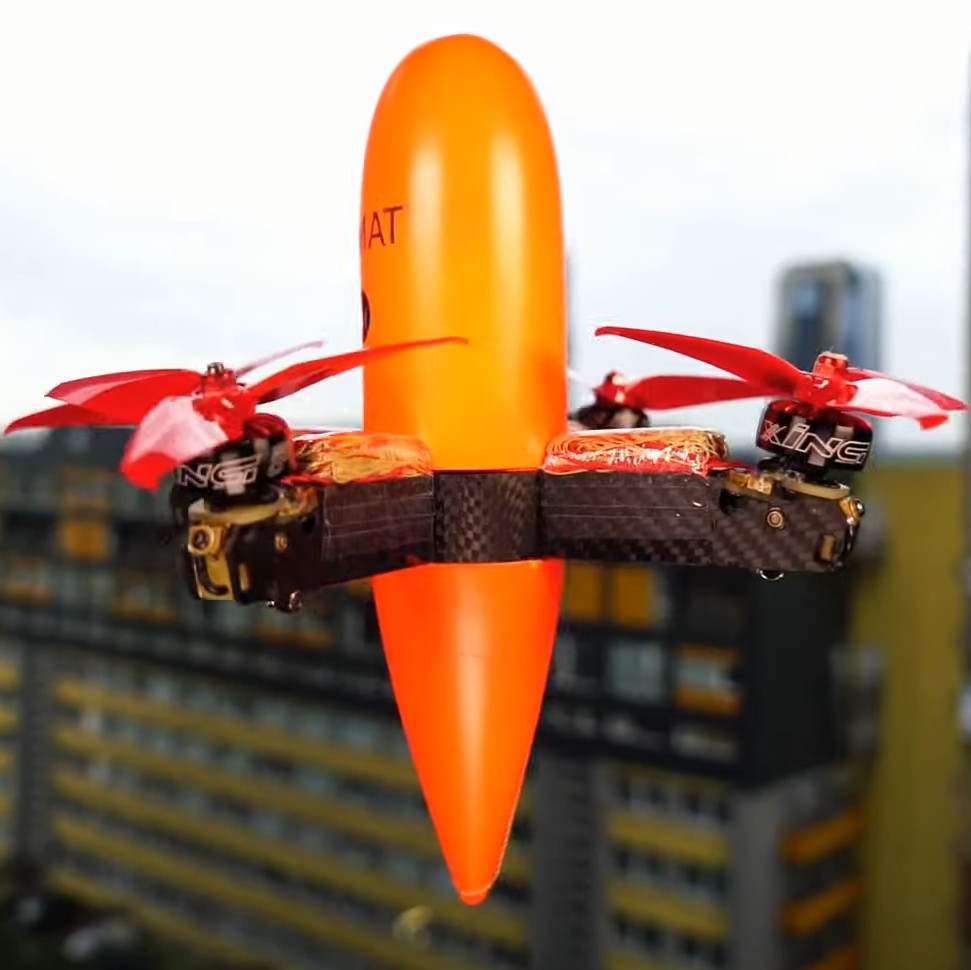
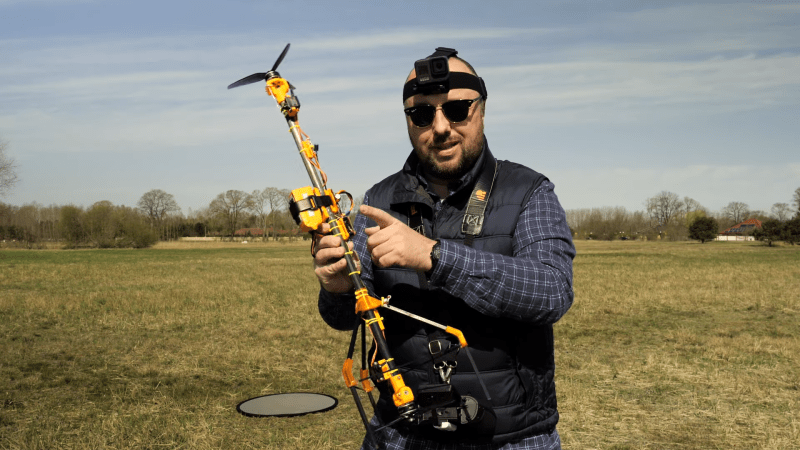
And thus we have this unique “flying stick” bicopter.  [Paweł Spychalski]’s creation reminds us a little of a miniature version of the “Flying Bedstead” that NASA used to train the Apollo LM pilots to touch down on the Moon, and which [Neil Armstrong] famously ejected from after getting the craft into some of the attitudes this little machine found itself in. The bicopter is unique thanks to its fuselage of carbon fiber tube, about a meter in length, each end of which holds a rotor. The rotors rotate counter to each other for torque control, and each is mounted to a servo-controlled gimbal for thrust vectoring. The control electronics and battery are strategically mounted on the tube to place the center of gravity just about equidistant between the rotors.

But is it flyable? Yes, but just barely. The video below shows that it certainly gets off the ground, but does a lot of bouncing as it tries to find a stable attitude. [Paweł] seems to think that the gimballing servos aren’t fast enough to make the thrust-vectoring adjustments needed to keep a stick flying, and we’d have to agree.

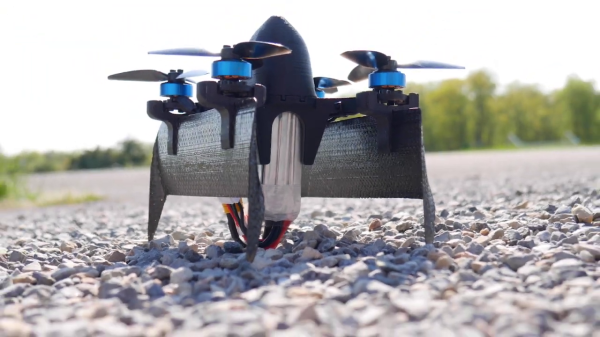
This isn’t [Paweł]’s first foray into bicopters; he earned “Fail of the Week” honors back in 2018 for his coaxial dualcopter. The flying stick seems to do much better in general, and kudos to him for even managing to get it off the ground.

Continue reading “When Sticks Fly”

Modular Anti-Drone Drone Sacrifices Itself For Self Defense

Part Racing Drone, Part RC Airplane, Part Rocket…all Menace. How else could you describe a quadcopter that shoots off at high speed and is designed for taking down other small quadcopters? The Interceptor Drone by [Aleksey] borrows elements from all of the aforementioned disciplines of flying things.

Built with standard racing drone parts, [Aleksey] assures that no prohibited parts are used in its construction. Instead, the Interceptor Drone relies on a very powerful motors and a light weight frame to keep the power to weight ratio in the “rocketing into the sky” category.

A close up shows the details: Detachable motors and rotors and the stowed net.

But what Interceptor Drone would be complete without a way to take its target out of the sky? This is where the biggest divergences begin. The motors are all oriented to point away from the center-line of the craft. Upon command, these motors actually detach from the frame, each spreading out and deploying the corner of a net that’s designed to entangle the rotors of the target, causing its battle with gravity to come to a grinding halt.

How does the Interceptor Drone survive the attack? Without its motors, the core of the quadcopter falls to the earth. Arresting the fall is a parachute much like those used in model rocketry. An audio beacon sounds the alarm to help somebody to find it — a move taken straight from the RC aircraft hobby.

There’s certainly a lot of room to discuss legalities in localities, but regardless of opinion about the craft’s intended use, the system looks very slick, and there are some great hacks baked right in. Don’t want to build a drone-killing-drone? Maybe all you need is a pumpkin and good (bad?) timing.

Continue reading “Modular Anti-Drone Drone Sacrifices Itself For Self Defense”

Keynote Video: Jeremy Fielding Wants To Help You Get Moving

For many DIY hardware projects, the most movement it’s likely to see is when we pick the assembled unit up off the workbench and carry it to wherever it’s destined to spend the rest of its functional life. From weather sensors to smart mirrors, there’s a huge array of devices that don’t need to move one millimeter to function. But eventually, you’re likely to run into a project that’s a bit more dynamic. Maybe you’d like to motorize your window shades, or go all out and build a remote controlled rover. With these more active designs comes a whole slew of new problems you may never have encountered before.

Luckily for us, folks like Jeremy Fielding are out there and willing to share their knowledge. In his fascinating presentation for the 2021 Hackaday Remoticon, Building Hardware that Moves: the Fundamentals that Everyone Should Know, he took viewers on a whirlwind tour of what he’s learned about designing and building complex machines from his years of professional experience. Whether its a relatively simple articulated workbench for the shop, a gargantuan earthmoving machine, or a high-dexterity robotic arm, each project he’s worked on has presented unique challenges that needed to be solved.

Not all of Jeremy’s machines will fit in your average workshop.

A lot of the projects that Jeremy has worked on are on a much larger scale than what your average hobbyist is ever going to run into. When there’s an arrow pointing out the tiny human in a picture of you and the machine you’re currently working on, you know things are getting serious. But as anyone who’s watched his YouTube videos knows, he’s got a real knack for taking these high-level concepts and distilling them into something more digestible for the home gamer.

Continue reading “Keynote Video: Jeremy Fielding Wants To Help You Get Moving”

A 3D-printed DIY ambisonic microphone

Ambi-Alice Goes Down The Rabbit Hole Of Ambisonic Microphones

Theoretically, ambisonic microphones allow you to perfectly encode the soundscape around you and recreate it from the focal point of any direction. To do this, you need at least four microphone capsules and some math. Ambisonic microphones have been around for 50 years, but [DJJules] wanted to bring ease of use to these tools and push them into the open source fold.

Soldering a 3.3uF capacitor and a 100k-ohm resistor inside each XLR plug.As you’ll see in the video below, there were a few iterations before this one. Everything changed for the better when [DJJules] found out about TSB25905 capsules. These are electret condenser mics with 1″ diaphragms and built-in EMI/RFI-suppressing capacitors. Another big help was deciding to color code everything from the XLR cable boots to the cable sleeves to the electrical tape that’s protecting each of the P48 resistor-capacitor pairs inside the XLR plugs.

[DJJules]’ buddy [Tom] designed and printed a single piece that holds the four capsules in a perfect tetrahedral array, and an elegant two-piece basket that protects the mics and provides a base for a one of those furry windscreens. The mics and the basket are separated with four silicone plugs designed for quadcopters that provide both isolation and vibration dampening.

If you want to make one of these yourself, [DJJules] has STLs for both a normal microphone stand and another for GoPro mounts. Check out the build video after the break and the sound demos on Instructables.

No need for a rich soundscape? Build a USB microphone instead, or if that’s too cold and modern, whittle up a wooden a ribbon mic.

Continue reading “Ambi-Alice Goes Down The Rabbit Hole Of Ambisonic Microphones”

VTOL Tailsitter Flies With Quadcopter Control Software

Quadcopters are great for maneuverability and slow, stable flight, but it comes at the cost of efficiency. [Peter Ryseck]’s Mini QBIT quadrotor biplane brings in some of the efficiency of fixed-wing flight, without all the complexity usually associated with VTOL aircraft.

The Mini QBIT is just a 3″ mini quadcopter with a pair of wings mounted below the motors, turning it into a “tailsitter” VTOL aircraft. The wings and nosecone attach to the 3D printed frame using magnets, which allows them to pop off in a crash. There is no need for control surfaces on the wings since all the required control is done by the motors. The QBIT is based on a research project [Peter] was involved in at the University of Maryland. The 2017 paper states that the test aircraft used 68% less power in forward flight than hovering.

(Editor’s Note: [Peter] contacted us directly, and he’s got a newer paper about the aircraft.)

Getting the flight controller to do smooth transitions from hover to forward flight can be quite tricky, but the QBIT does this using a normal quadcopter flight controller running Betaflight. The quadcopter hovers in self-leveling mode (angle mode) and switches to acro mode for forward flight. However, as the drone pitches over for forward flight, the roll axis becomes the yaw axis and the yaw axis becomes the reversed roll axis. To compensate for this, the controller set up to swap these two channels at the flip of a switch. For FPV flying, the QBIT uses two cameras for the two different modes, each with its own on-screen display (OSD). The flight controller is configured to use the same mode switch to change the camera feed and OSD.

[Peter] is selling the parts and STL files for V2 on his website, but you can download the V1 files for free. However, the control setup is really the defining feature of this project, and can be implemented by anyone on their own builds.

For another simple VTOL project, check out [Nicholas Rehm]’s F-35 which runs on his dRehmFlight flight control software. Continue reading “VTOL Tailsitter Flies With Quadcopter Control Software”

Taking Reverse Engineering To The Skies: Cheap Drone Gets PX4 Autopilot

Sometimes bad software is all that is holding good hardware back. [Michael Melchior] wanted to scavenge some motors and propellers for another project, so he bought an inexpensive quadcopter intending to use it for parts. [Michael] was so surprised at the quality of the hardware contained in his $100 drone that he decided to reverse engineer his quadcopter and give the autopilot firmware a serious upgrade.

Upon stripping the drone down, [Michael] found that it came with a flight management unit based on the STM32F405RG, an Inertial Measurement Unit, magnetic compass, barometric pressure sensor, GPS, WiFi radio, camera with tilt, optical flow sensor, and ultrasonic distance sensor, plus batteries and charger! The flight management unit also had unpopulated headers for SWD, and—although the manufacturer’s firmware was protected from reading—write protection hadn’t been enabled, so [Michael] was free to flash his own firmware.

We highly recommend you take a look at [Michael]’s 10 part tour de force of reverse engineering which includes a man-in-the-middle attack with a Raspberry Pi to work out its WiFi communication, porting the open-source autopilot PX4 to the new airframe, and deciphering unknown serial protocols. There are even amusing shenanigans like putting batteries in the oven and freezer to help figure out which registers are used as temperature sensors. He achieves liftoff at the end, and we can’t wait to see what else he’s able to make it do in the future.

Of course, [Michael] is no stranger to hacking imported quadcopters, and if you’re interested in PX4 but want something quieter than a quadcopter, take a look at this autopilot-equipped glider.

LED Hack Teaches DJI Mini 2 Drone New Tricks

Despite its diminutive proportions, the thrust to weight ratio of the DJI Mini 2 is high enough that it can carry a considerable amount of baggage. So it’s no surprise that there’s a cottage industry of remotely controlled payload releases that can be bolted onto the bottom of this popular quadcopter. But [tterev3] wanted something that would integrate better with DJI’s software instead of relying on a separate transmitter.

As explained in the video below, his solution was to tap into the signals that control the RGB LED on the front of the drone. Since the user can change the color of the LED at any time with the official DJI smartphone application, decoding this signal to determine which color had been selected is like adding several new channels to the transmitter. In this case [tterev3] just needed to decode a single color to use as a “drop” signal, but it’s not hard to imagine how this concept could be expanded to trigger several different actions with a few more lines of code.

Examining the LED control signal.

[tterev3] wrote some software to decode the 48 bits of data being sent to the LED with a PIC18F26K40 microcontroller, which in turn uses an L9110H H-Bridge to control a tiny gear motor. To get feedback, he’s using a small magnet glued to the release arm and a Hall-effect sensor.

Concerned about how much power he could realistically pull from a connection that was intended for an LED, he gave the release its own battery that is slowly charged while the drone is running. You could argue that since the motor only needs to fire up once to drop the payload, [tterev3] probably could have gotten away with not recharging it at all during the flight. But as with the ability to decode additional color signals, the techniques being demonstrated here hold a lot of promise for future development.

Folks have been strapping additional hardware to commercial quadcopters for years, but modifications like this one that actually let the craft release its payload and fly away hold particular promise for environmental monitoring and building mesh communication networks.

Continue reading “LED Hack Teaches DJI Mini 2 Drone New Tricks”