I learned to program FORTRAN IV in the spring of 1968 while working as an engineering technician in water resources. One of the engineers knew of my interest in computers and asked if I would like to learn FORTRAN. He needed to calculate the biological oxygen demand in streams but didn’t have any interest in programming. I jumped at the chance.
 This was the days of big iron when the term computer meant a room full of heavily air-conditioned equipment. The State University of New York at Buffalo had an IBM 704 but they soon upgraded to a CDC 6400. To help pay for it they were inviting people to attend a seminar on FORTRAN so they could use the system. My job was with a small State of NY office and getting approval for me to attend was surprisingly easy.
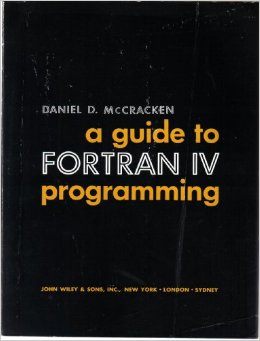
Off I went for 6 weeks of training on one night a week. I still have my black “A Guide to Fortran IV Programming” by [Daniel McCracken]. For years, this was the FORTRAN bible, commonly referred to as just “McCracken”.
The programming went well and somewhere out there is a very old paper with a reference to the results it generated about the Chadakoin River flowing through Jamestown, NY.
This is FORTRAN’s strength – scientific calculations. It’s name says it: FORmula TRANslation.
Origins and FORTRAN IV
[John W. Backus] suggested to IBM a language to replace assembly language. Development began in 1953 for the IBM 704 and the project reached fruition in 1957. Not only was it the first general purpose high-level language, just beating out COBOL and LISP, but its compiler optimized the code since it needed to compete head-on with assembly language. It was the C compiler of its day in that regard.
That was not the only reason it attained success. Reducing the number of punched cards needed for a program by a factor of 20 over assembly helped considerably.
In those days, you needed to use a key punch to create a deck of punch cards. To be really good you had to know how to create a programming card that would let you skip through the fields on a FORTRAN card, or how to edit a card by duplicating it and holding one of the cards in place while you typed in new characters. Because of my fascination with computers I’d taken a key punching and automation machines class in high school so I was all set.
Continue reading “This Is Not Your Father’s FORTRAN” →

 When first given the challenge, it only took the team 3 simple words to get started. Pumpkin. In. Space. What followed was a week-long frenzy of preparing the pumpkin for its maiden flight.