DIY 23mph+ Electric Skateboard

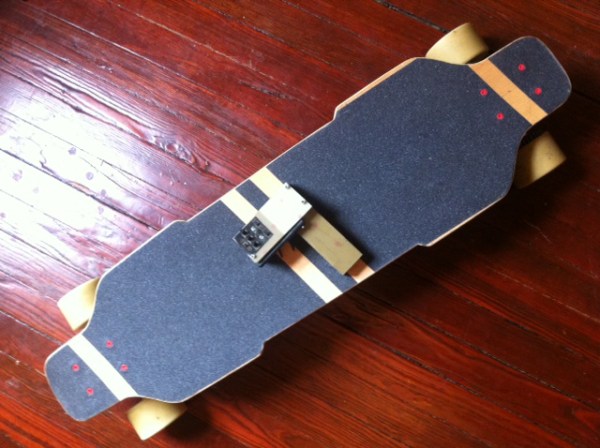
What’s the best way to get around NYC? If you asked [papo2110], he would probably suggest you build your own high-speed, long-range electric skateboard. You can’t cruise through any online maker community without tripping over a dozen e-vehicle projects these days. Nearly 18 months ago, even before the popular Boosted Boards Kickstarter, [papo2110] started piecing together a deck. His boards use a brushless outrunner motor, an RC car ESC (complete with brakes), and a chain drive to power him around Central Park at a top speed of 23mph.

The most impressive feat for this project, however, is the tireless revision through iterative design. The deck gets both an aluminum and a carbon fiber upgrade. Meaty 8S Headway LiFePo4’s replace a smaller 6S configuration. Even lights are added. As the build progresses, the board is pushing 27mph: with only one motor. Grab your helmet and motion-sickness pills and strap in for some videos after the break.

If four wheels are one too many and you want even more dangerous speeds, check out the E-trike build from a few months ago.

Continue reading “DIY 23mph+ Electric Skateboard”

The Hubless Horseman

hublessHorseman

Of all the free parts up for grabs at a friend’s house, nobody wanted the scrap wheelchair wheels: including [Eric]. That is, of course, until he spontaneously decided to try something a bit crazy and take on a bizarre yet remarkably imaginative hubless wheel bike build.

After attaching the wheelchair’s rim and its affixed handrail to the rim on his bike, [Eric] mounted pairs of rollerblade wheels to a separate piece of metal that essentially act as bearings. As the build progresses, the bike is further refined. More rollerblade wheels, a giant sprocket, and a pile of machined aluminum pieces. The valve stem for the tire had to be relocated to allow the wheel to spin freely.

The finished product is a stunning bicycle, which [Eric] later revisited, updating the rollerblade wheels to precision-lathed plastic (specifically UHMWPE) rollers. Make sure you watch the video of the Hubless Horseman in action. If, for some reason, your only prior exposure to hubless wheels is the TRON light cycle or [Kirk’s] motorcycle from the Star Trek reboot, do yourself a favor and check out their inventor, Franco Sbarro.

Hacking Sensoria, The Smart Sock

sensorSock

Sensor-meets-sock product “Sensoria” won’t hit the shelves for a while, but [Andrew] managed to snag a Sensoria Gaming SDK and has hacked the smart sock to control an inexpensive toy helicopter. Seldom do we see projects this rugged yet clearly effective. The sock sends data via its companion device—a Bluetooth anklet—to LabVIEW. LabVIEW subsequently talks to an attached Arduino to manipulate a servo that [Andrew] just…duct taped to the helicopter’s controller. The result: a a quick and dirty hack that proves surprisingly intuitive, providing accelerator-style foot control to drive the throttle. Check out a video of [Andrew] punishing his helicopter after the break.

This is the first hack we’ve seen for the Sensoria, which is still in the crowdsourcing phase over at Indigogo. They have already reached their funding goal, but a few SDKs remain unclaimed. You can watch an official video of the sock’s sensors lighting up a heat map in real time below.

And, if you missed it, have a look at the AsTeRICS project’s helicopter controlled by neck muscles.

Continue reading “Hacking Sensoria, The Smart Sock”

Dual Extruders In The Space Of One Stepper Motor

The new hotness in 3D printers is – and has been for a while – dual extrusion. With two extruders and the requisite filament supply, it’s possible to print objects in two colors or two different materials. There’s a problem with this setup, though: each extruder requires a separate motor, greatly reducing the print area should you want to print in two or more colors. [Carl] and [Brian] think they have the solution to this with their dual extruder that is powered by one stepper motor.

As you can see from the pic above, the idea is relatively simple. Two strands of filament are fed past one gear attached to a stepper motor. Each strand is moved into the hot end through two idler gears and side of the extruder feeds into the hot end is determined by the rotation of the motor. It’s really one of those, “why didn’t I think of that” ideas.

[Carl] and [Brian] are also offering a quad extruder, a dual-sized extruder able to pump four different filaments onto a printer bed. With this, we expect some people to experiment with CMYK (or CMYW) prints, truly turning any 3D printer into a machine that prints full color parts.

Continue reading “Dual Extruders In The Space Of One Stepper Motor”

Zappo The Robot Mixes Tone Generator, Sensors, Alarm Clock And More

zappo-clock-bot

Now [Kevin] claims he built this robot for his 3-year-old son but we know he just used that as an excuse to spend way too much time in his workshop. The robot is a roundup of all the interesting things you can do with hobby electronics. It’s a great example of what you can teach yourself in one year, as [Kevin] only started tinkering with electronics about fourteen months ago.

The robot centers around an Arduino which manages to control a plethora of auxiliary boards. The alarm clock part of the build has a readout in the center of the robot’s chest. There are a bunch of sounds which can be played as the alarm, including a lot of iconic movie sound bytes. Add to that some playful features — like a tone generator which is altered by the column of potentiometers on the left, motion activated eyes, and sound activated ears — and you’ve got a dream-come-true of a toy for your kid.

As a side note, we wrote this several days ago, but ended up bumping it a couple of times in the publishing schedule. We reached out to [Kevin] to let him know a feature was on the way. When he learned that we bumped it in order to feature [Jamie Matzel’s] giant robot he had to laugh. The two met at a mini Maker Faire about a year ago and that interaction is what gave [Kevin] the confidence to start the project.

Continue reading “Zappo The Robot Mixes Tone Generator, Sensors, Alarm Clock And More”

How To Debug A Faulty Memory Board

ram

While this is not exactly a hack or a fail, it definitely is an inspiring example on how to debug a faulty card.

[Quinn] is one of the very few hobbyists out there that designed her own 6502 based computer. For the young readers of Hackaday, the MOS 6502 was introduced in 1975 and has been used in the Aple // line, the Commodore 64, the Vic-20, the Atari computers, the Nintendo Enterntainment System and others.

[Quinn]’s homemade new RAM board had been working for many weeks until it started to show some weaknesses by only sporadically passing the boot RAM test. Assuming the RAM was the problem, she started by making a more advanced memory test, which showed errors at random addresses.

She didn’t have any more of the same memory chips on hand which could be used with a fresh PCB. Determined to power through the issue, she etched a new board with a new memory design. Unfortunately it also gave memory errors at boot. Only one culprit was left, which is shown in the picture above. It’s a small sizing error in the board artwork which was just enough to cause a misalignment on the connector.

The article contains many details about her debugging process, so it definitely is worth the read.

Rant: Why I Love What The Chromecast Stands For

I’ve had my hands on this Chromecast for almost a week now and I love it. Years ago I hacked my first Xbox after seeing [Kevin Rose] do it on The Screensavers (I did the hardware mod but that’s inconsequential). Why did I do this? So that I could run Xbox Media Center, the predecessor of XBMC. Since then I’ve dreamed of a device which can be hung on the back of the TV with Velcro and run XBMC. We basically got there with the Raspberry Pi, but the Chromecast is the form-factor that I had always envisioned. This lets me watch Netflix, while the RPi runs XBMC. The two are match made in heaven for under a hundred bucks.

That’s why I love the Chromecast device itself, but the bigger picture is that I love what it stands for. Keep reading to see what i mean.

Continue reading “Rant: Why I Love What The Chromecast Stands For”