Improved Hourglass Entropy

improved-hour-glass-entropy

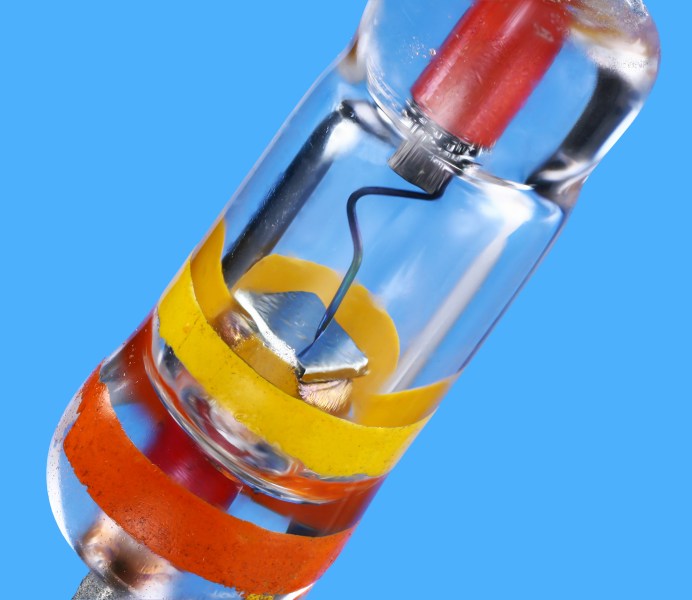
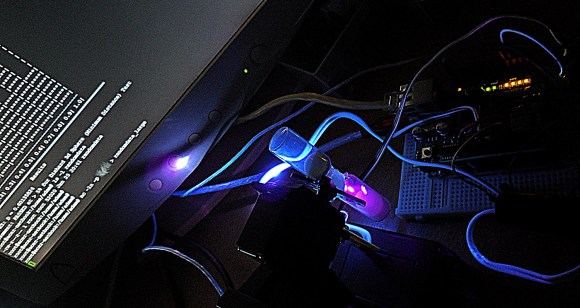
[Wardy] built himself a high quality entropy source with parts he had lying around. It’s based on the hourglass entropy project we saw in a links post earlier this month. Just like that project, he is bouncing a laser off of the falling sand and reading the result. But he brings a few innovations to the party, and has test results to back up his work.

The first change is an obvious one; motorize the hourglass so that you don’t need to flip it by hand. We thought this might mess with the laser alignment but the clip after the break proved us wrong. He changed up the sensor, using an LED connected to the base of an NPN transistor. The next change was to mount the light sensor at an angle to the laser rather than straight on. This picks up reflections of the laser and not the direct beam itself, resulting in a wider range of readings.

He used an Ethernet shield to get the system on the network. It’s pushing 420k random numbers per second and was tested with the DieHarder suite. It didn’t get a very high score, but it did pass the test.

Continue reading “Improved Hourglass Entropy” →

Announcing: Hackaday Videos And Behind The Scenes Mailing List

hadfilm2

We’re starting a few new things at hackaday. As always, our goal is to share awesome hacks from as diverse a crowd as possible. We’ve played with video a bit before, but now we’re really going to start having some fun with it.

Our first exploration into this area was the hacked portal gun. People enjoyed looking at it, and those seeking more in depth technical knowledge came to the site to get it. Instead of focusing the video on the technology or the build itself, we used it as an interesting way to get the attention of people with relevant interests. This video proved to us that our idea was solid.

We have now stepped up our production in terms of quality and quantity.  We will be releasing videos that may be humorous, like a fake commercial or skit, or may be serious in the style of a documentary. They will all have some kind of hack at their core and that hack will be broken down in an article here.

I would also like to extend the opportunity for you to help. There are two ways you can do so:

  1. Sign up for our email list(it is in the right column). I’ll be sharing behind the scenes info and previews about upcoming video projects and asking for ideas on how to improve them.  The list will be very informal, and only deal with behind the scenes kind of stuff it will not be a mailing of the daily posts.
  2. Submit a project or idea that you think would make a cool video. You can email that directly to caleb@. Of course, we would prefer projects that haven’t been released yet, but that isn’t necessary. We’re looking for things that are visually stunning, or could possibly have highly cinematic potential. Not necessarily the most technically difficult thing.

We hope to start releasing videos next week, so keep your eyes peeled. We filmed all week, and my cheeks hurt from laughing so much.

Raspberry Pi Used As A Beacon Transmitter

rpi-beacon-transmitter

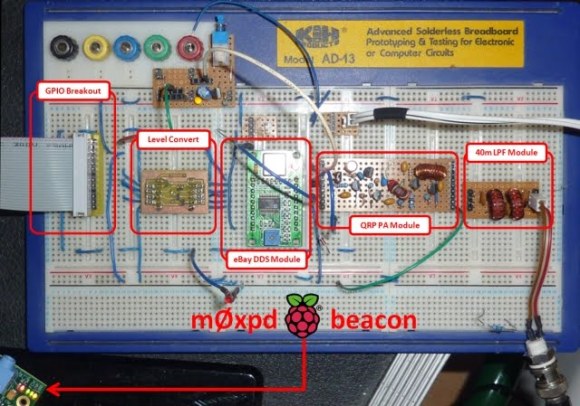
[m0xpd] got his hands on an inexpensive AD9850 DDS Module from eBay but needed a way to control it. He took inspiration from the projects that used a PIC microcontroller, but decided to add his own twist by using a Raspberry Pi to build a multi-mode beacon transmitter.

At the center of this breadboarded circuit lies the green AD9850 module. To its left is a level converter he built to get the 3.3V levels from the RPi board to work with the rest of the 5V hardware. The signal then feeds into a QRP amplifier and a low pass filter.

He didn’t start from square one when it came time to write the code for the RPi. Instead he grabbed an Arduino sketch for the very same DDS and ported it over to Python. The first test signal was his call sign sent in Morse code at QRSS speeds. But he also managed to get Hellschreiber messages working, making it a multiple-mode device.

[via Solder Smoke]

$20 Vacuum Pen Build On Of The Best We’ve Seen

20-dollar-vacuum-pen-build

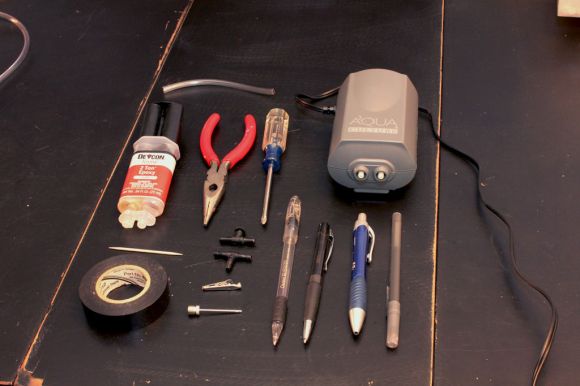
Everything you need to build a vacuum tweezers is laid out in this image. The parts should run you about $20 and when you’re done you’ll have the perfect tool for placing very small surface mount parts for reflow soldering.

This project uses the same concept as other fish pump tweezers projects but builds upon them with some interesting additions. The first step in the conversion process is to tear down the aquarium pump to reverse its flow. There are several steps but all-in-all it’s not very difficult. With the source of vacuum established [Technically Artistic] begins work on the business end of the tool. This is where the array of different pens see some action. The large blue one is the outer assembly, with the others combining to help connect it to the plastic tubing. The business end is made from a needle adapter for an air compressor, with an alligator clip cleverly modified to serve as a valve to release the parts from the tip.

Iron Man Faux Stained Glass Saves $4k

ironman-faux-stained-glass

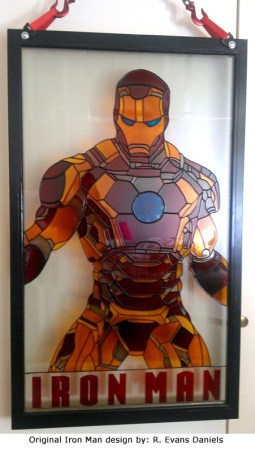
Check out how the light hits this piece of artwork. It’s a very convincing piece of stained glass… except it’s fake. [Sdtacoma] figured out a way to mimic stained glass using a single pane. The inspiration for the project came after seeing a real stained glass panel featuring Iron Man which was available on Etsy for $4500.

Due to popular demand [Sdtacoma] posted an album of the technique he used. Starting with some art found online he made it black and white, blew it up to size (this thing’s about five feet tall) and used posterizer to print it out using multiple sheets of paper.

The frame and pane were found at a recycled building goods store. After cleaning it up he used the paper template to lay out the dividing lines between different colored sections using Liquid Lead. The product had dimension to it (kind of like puffy paint for fabrics) which looks like the lead tracks between panes of stained glass. Once dry the color was added using an eye dropper to apply glass paint.

New IOIO Is Faster, Cheaper

board-nobg

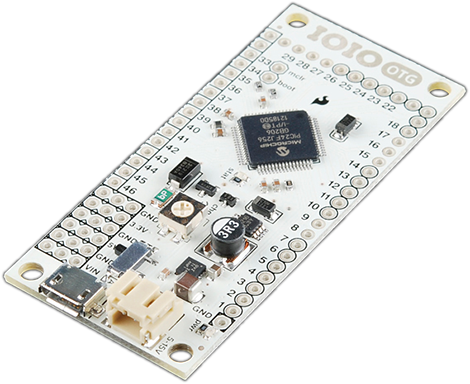
For the last few years, [Ytai] has been working on the IOIO, a device that connects your Android devices to the other homebrew peripherals. There’s a new version of this really cool board out now that includes a few much-needed features like USB-OTG and a lower component cost that is passed on in savings to you.

A few months ago, our own [Mike Szczys] caught a glimpse of this new IOIO board. It’s the same size as the previous revision, but with USB-OTG, the new IOIO can be a master when connected to a phone, or a slave when connected to a PC.

In addition to USB-OTG, [Ytai] improved the power regulation circuit, and even went so far as to refuse royalties to the board to get the costs down. It’s currently available at Sparkfun for $40.

[Ytai] says he’s working on a few software upgrades to the IOIO, including making capacitive sensing a possibility and including support for stepper motors and controllers. There’s also support for the Raspberry Pi coming up, but we’re just glad [Ytai] managed to put a yo-yo graphic on the bottom silkscreen. Finally, and hopefully, everyone will know how to pronounce IOIO.

Build A Bioprinter From Very Old Inkjet Cartridges

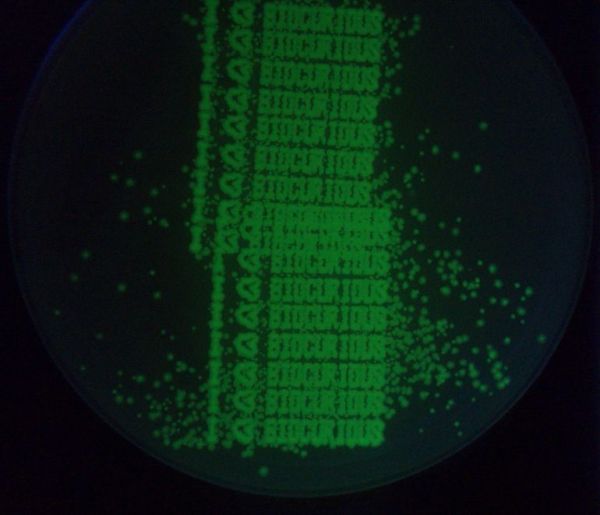
This column of messages was printed with Escherichia coli. That’s the bacteria better known as E. coli which can cause so many problems if it makes its way into our food. But the relative size and the fact that this strain was engineered to glow in the dark makes it a perfect candidate for Bio Printing. We find it even more interesting that it was printed using hacked inkjet and computer parts.

There are legitimate uses for this type of technology. But this project is aimed more at getting the word out about the method and how easy it can be. For us, it’s the close look at modern inkjet print heads that was the most interesting. It turns out that common cartridges have an overly high-resolution for this to work well. In order to get so many dots in such a small area the nozzle openings end up being too small for most biological material to fit through. There is also an issue with a filter built into the silicone technology inside.

The solution was to use the InkShield to drive cartridges from very old printers. This lets the team command the cartridge with an Arduino, making it dead simple to tweak the way the material is deposited. They mounted the cartridge holder (using decades-old technology in the form of HP Deskjet 500 cartridges) on the sled of an optical drive and went from there.

Take a glance at the printer in action in the clip after the break.

Continue reading “Build A Bioprinter From Very Old Inkjet Cartridges” →