Digital TV Converter Reverse Engineering

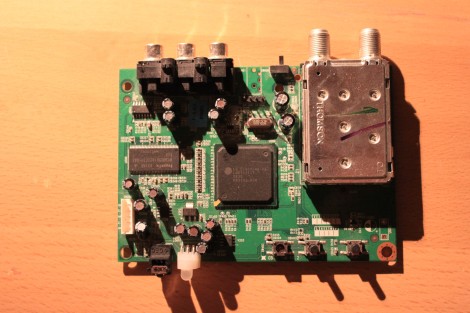
Back when broadcast television was first switching over from analog to digital most people needed to get a converter box to watch DTV broadcasts. Remember that abomination that was “HD-Ready”? Those TVs could display an HD signal, but didn’t actually have a digital tuner in them. Nowadays all TVs come with one, so [Craig] found his old converter box was just gathering dust. So he cracked it open and reverse engineered how the DTV hardware works.

The hardware includes a Thompson TV tuner, IR receiver for the remote control, and the supporting components for an LGDT1111 SoC. This is an LG chip and after a little searching [Craig] got his hands on a block diagram that gave him a starting place for his exploration. The maker of the converter box was also nice enough to include a pin header for the UART. It’s populated and even has the pins labeled on the silk screen. We wish all hardware producers could be so kind. He proceeds to pull all the information he can through the terminal. This includes a dump of the bootloader, readout of the IR codes, and much more.
Hackaday Has Won 1st Place In The RedBull Creation Contest!

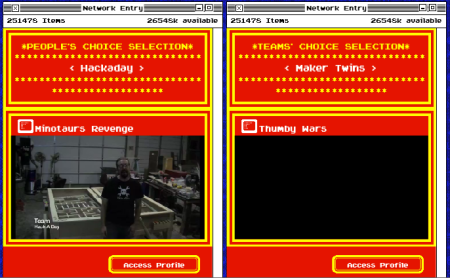
The people have spoken. Hackaday has won the Redbull creation challenge by popular vote.  Despite a few bumpy spots in the voting process, our project, the Minotaur’s Revenge (gameplay footage around the 2min mark in the video), got the most votes from the public winning us $5000 for our hackerspace and a trip to the World MakerFaire in New York.

Thanks to everyone who was able to actually vote, and we totally understand about those who didn’t.

OLinuXino Booting Android

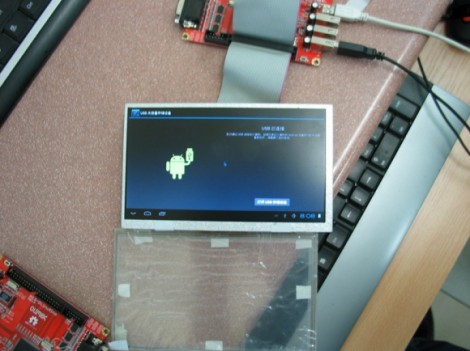
We can’t say the name rolls off the tongue, but it is beginning to look like the OlinuXino is going to happen. Here you can see the prototype hardware booting Android. If this is the first time you’re seeing the hardware you can think of it in the same category as the Raspberry Pi. It’s a butt-kicking ARM platform that comes as a bare-board with which you can do what you please.

Olimex Ltd. put together the offering, which seems to be part of the name mash-up (Olimex + Linux + Arduino?). The board hosts an ARM Cortex-A8 processor which runs at 1 GHz. There’s a half a gigabyte of ram, four USB and one USB-OTG ports, and a big array of breakout pins. One eyebrow-raising choice was not to include an HDMI connector. Instead the board offers VGA and Audio outputs. There is a pin header meant for an LCD screen, as seen in the image above, so it could be that the intention here is for smaller or more portable applications. But like we said, the form factor really lets you do what you want.

Possibly the best part is the price. The target for the top-of-the-line board is 55 Euros (about $68) and that comes with WiFi and 4 GB of NAND storage on the board. There’s a bunch of posts on the project, including a look at the PCB routing work. This link to the A13 tag will give you the widest overview of the work so far.

[Thanks Acce]

Displaying Tweets With A Laser Pointer And Speakers


This year at Toorcamp, [Rich] will be showing off his laser-based vector display, capable of projecting tweets using only a laser pointer, a pair of mirrors, speakers, and an Arduino. Steady hand and curses from lack of an optical bench not included.


[Rich]’s Instructable goes over the finer points of the build; a Python script runs on his computer fetching all recent tweets with a certain hashtag. These tweets are sent over to a ‘duino where a bit of code translates the text into a scrolling vector display. The code for the project is based on one of [Rich]’s previous builds to draw shapes with the same speaker/laser setup.

In theory, using a pair of speakers to draw text on a wall isn’t much different from drawing pictures on an oscilloscope. Of course, [Rich] always has the option of turning his LaserTweet into an oscilloscope when Toorcamp is over.

Relevant videos after the break.

Continue reading “Displaying Tweets With A Laser Pointer And Speakers”

4004 ROM Emulator Allows Fast Development On Slow Computers

Developing for extremely old computers is a chore; not only are you limited by assembly or pure machine language, there’s also the issue of burning ROMs to actually run your programs. [Frank Buss] came up with a neat solution to developing for the venerable 4004 CPU – build a ROM emulator using a modern microcontroller.

The build started off with a ZIF socket for the 4004 CPU and a 256 byte 4001 ROM chip emulated on a PIC micro. The CPU looked a little lonely sitting in the ZIF socket all by its lonesome, so [Frank] updated his board to allow a 4002 RAM chip to be plugged in as well.

Because [Frank] chose a 4004 for his entry for this season’s retrochallenge competition, we need to point we’re offering a prize for loading our retro site with this CPU. Yes, it’s most likely impossible but nothing worth doing is easy.

You can check out a video [Frank]’s ROM emulator after the break.

Continue reading “4004 ROM Emulator Allows Fast Development On Slow Computers”

Hundred Dollar Capacitive Discharge Welder

[Robert] needed to weld metal tabs on a few batteries. In a proper manufacturing situation, this is usually done with outrageously expensive welders. Not wanting to spend thousands of dollars to attach bits of metal together, [Robert] built his own capacitive discharge welder for only $100.

Instead of the giant transformers you’d find in a spot welder, a capacitive discharge welder uses a huge bank of capacitors – greater than 1 Farad – to weld pieces of metal together. Huge caps like these are commonly used for ridiculous car stereo setups, so with the addition of a car battery charger purchased from Walmart, [Robert] had most of a welder on his workbench.

To control the mass of power coming from his huge cap, [Robert] used a 13o amp Silicon controlled rectifier to improve the control of his welder. With the battery charger, cap, and SCR, [Robert] only needed a few bits of heavy gauge wire to tie the entire build together.

[Robert]’s build welds metal tabs on battery terminals beautifully, but the possibilities don’t end there. This welder could easily be repurposed to build the skeleton of outrageously intricate dead bug circuits, or maybe even keeping that thing you made with your Erector set in one piece permanently.

Telepresence Robot With Skype Connectivity

[Claire] sent in a project she’s been working on for the past few years. It’s called Botiful and aims to turn any Android phone into a mobile telepresence robot.

Botiful is built around the IOIO Android to Arduino dev board and provides a very clean way to interface your current cell phone with a tiny – and cute – robotic platform. The big feature of Botiful is its integration with Skype; just call a Botiful owner’s phone or tablet, and a panel pops up allowing you to control the robot, tilt the camera up and down, and even robotic yes, no, and ‘dance’ gestures.

Because Botiful is based on the IOIO, there’s a few pins available inside the bot for an I2C bus, PWM control, and even a serial output. It’s also possible to develop your own apps for Botiful, making for a neat mobile robotics platform.,

Right now, Botiful is only for Android but if [Claire] gets $100,000 out of her Kickstarter, she’s promised to add iDevice support. That seems fairly likely, as more than $60,000 has been pledged with three weeks to go. Pretty cool, and we can think of a few very useful asocial applications of the Botiful including running cable in a drop ceiling, and checking out that thing under your car.