Traffic Signal Controller Pulls Data Over WiFi

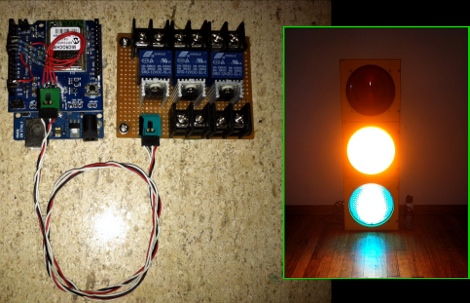
[Travis Brown] just published a post about the traffic light controller he built. His number one goal was to make the device wireless (except for AC power) and he achieved this by using a WiFi shield for his Arduino. But there is also a separate board that provides a way for the chip to switch the AC lights.

He works for a web hosting company, and the boss wanted a fun way to display the status of the servers among other things. He chose to use the WiServer library which controls the CoperHead WiFi Shield and gives him the ability to serve simple web pages from the Arduino. When power is applied the sketch automatically connects to the AP and starts polling the company’s API for status data. If you’re not within eyesight of the traffic lights you can log into the web server and check that way.

We think [Travis] did a great job of explaining his code, and we applaud him for making proper use of the watchdog timer (something we don’t see in very many projects). This joins the pile of traffic-light display devices we’ve seen around here. We still don’t know where people are getting their hands on the things.

Continue reading “Traffic Signal Controller Pulls Data Over WiFi” →
Mantis9 PCB Mill

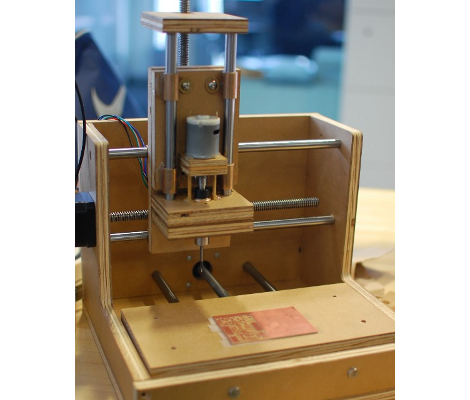
This is the Mantis9 PCB mill. It’s the first time we’ve featured the project, but it’s already well known by some as it keeps popping up in the comments for other CNC mill projects. Yes, it’s made out of wood — which some frown upon — but we’re happy with the build instructions and the especially the price tag (parts as low as $85).

We did feature an earlier revision of the hardware back in 2010. Subsequent versions changed the frame to use an open-front design, but it’s the build techniques that saw the biggest evolution. The problem was getting the holes for the parallel rods to align accurately. In the end it’s a simple operation that solves the problem; clamp both boards together and drill the holes at the same time. A drill press is used for all of the fabrication, ensuring that the holes are perpendicular to the surface of the boards. From there the rods are given some bronze bushings and pressed into place. Only then are the platforms secured to the bushings using epoxy. This is to ensure that the bushings don’t bind from poor alignment. We think it should end up having less play in it than other builds that use drawer slides.

Check out a PCB milling run in the clip after the break.

Continue reading “Mantis9 PCB Mill” →

MyHDL Python Programming Option For FPGA

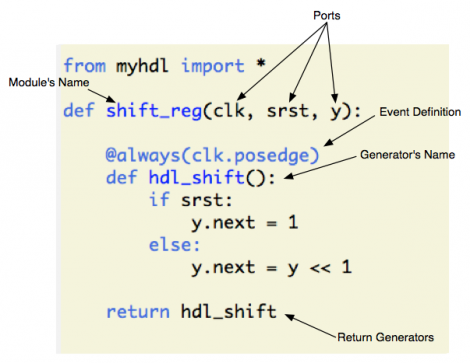
MyHDL is a Python module that brings FPGA programming into the Python environment. [Christopher Felton] tipped us off about a simple tutorial he just finished that gives an overview of how the module is used.

You may remember hearing about PyCPU a couple days ago which can run very simple Python code on a FPGA. There was a healthy discussion in the comments section comparing PyCPU and MyHDL. Although they may seem similar at first, the two are quite different. PyCPU creates a processor on the FPGA chip which can execute a small range of Python code. MyHDL actually implements Hardware Description Language in the Python environment. Once you’re used HDL to model your hardware choices in a Python script, it is converted to VHDL then fed to the toolchain and pushed to the chip like normal.

This is not an absolute beginner’s experience. But if you’re well-versed in Python it makes the jump to HDL a lot easier because you’ll be working with syntax that is already familiar to you.

Making Giant Wooden Balls

One day, we hope, we’ll be as awesome as [Keith Holaman]. He makes humongous wooden balls with a chainsaw, crane, and a truck-mounted lathe.

[Keith] got his start making wooden balls on a small lathe at home. For some reason he always wanted to make a bigger wooden ball, but his equipment at the time couldn’t handle this size in [Keith]’s imagination.

To make his gigantic wooden balls, [Keith] skulks around his local forest looking for downed trees and stumps. After getting these huge logs home, he roughs out the sphere with a chainsaw, mounts a chuck on the log with huge bolts, and attached it to a diesel motor.

Because the logs are so huge, he can’t turn the log very fast. to remove a whole lot of wood very quickly, [Keith] spins his tool head at a few thousand RPM.

There aren’t many build details or even an indication of how big these wooden balls are. We’d guess they’re easily over a meter in diameter. If anyone knows where we can see these balls in person, drop a note in the comments.

Toorcamp Is Coming!

Hey, I like a good party like anyone else. I’ve been drooling over some of the projects coming out of burning man for years. However, the ratio of “gettin’ crazy” to “build awesome stuff” seems to be slanted in favor of the party experience. There’s absolutely nothing wrong with that. However, when I saw this, my eyes welled up with tears of joy.

ToorCamp is Burning Man with less drugs and more hacking. This summer ToorCamp will take place on the northwest corner of the staggeringly beautiful Olympic Peninsula. Just get yourself out there!

Located at the Hobuck beach resort near Neah Bay WA, Toorcamp is a 4 day event that should pull in roughly 1,000 enthusiastic hackers. There are four “villages” that you can wander through; the lock picking village, the hardware hackers village, the maker’s village, and the crafting village. All should include bountiful talks and hands on workshops. There’s also a quiet camp if you really really want to avoid the inevitable sporadic parties.

Two Motor Walking Robot With A TI Launchpad

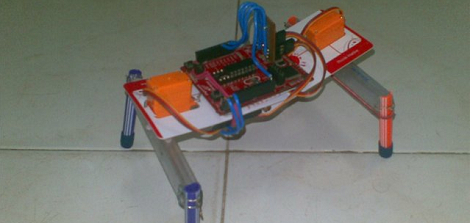
Last month, [Vinod] bought a pair of hobby servos on a whim. These servos sat on the shelf for a while until [Vinod] asked his friend what he should use them for. [Achu] suggested using the servos for a walking robot, so after checking out a few YouTube videos of some servo-powered walkers, [Vinod] built his own.

The robot is built around a TI Launchpad housing an MSP430 microcontroller. An extremely simple circuit (just some servos and a cap) power the robot along by alternating the direction the servos turn.

[Vinod]’s two-servo locomotion mechanism is very reminiscent of BEAM robots, extremely simple walking (or rolling) robots made out of just a few logic circuits. This TI Launchpad is in some ways even simpler; where [Mark Tilden]’s Walkman robot used several 74-series octal buffers, [Vinod]’s project is just a Lanuchpad and a pair of servos.

All the code is available on [Vinod]’s blog. Check out the demo video after the break.

Continue reading “Two Motor Walking Robot With A TI Launchpad” →

Turning An IBM Selectric Into A Printer.

In the days when computers took up an entire room, a CRT monitor was a luxury. Most of the time, input and output was handled with a teletype – a typewriter connected directly to the computer. [Josh] wanted his own typewriter terminal, so he took apart an IBM Selectric II and got to work.

Instead of an electronic keyboard, the IBM Selectric II uses and electromechanical keyboard to tilt and rotate the Selectric’s typeball. In normal operation, a series of shafts underneath the keyboard are engaged. [Josh] added parts of an erector set to those levers and tied each one to one of 16 solenoids.

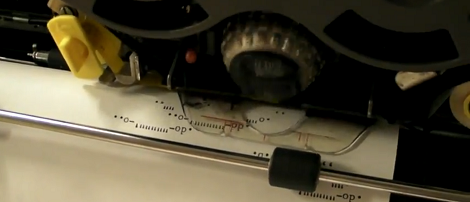
With a set of solenoids able to print any key with the help of an Arduino, [Josh] had a fully automated typewriter from the early 1970s. [Josh has been printing out a lot of ASCII art lately in preparation for the Kansas City Maker Faire later this month. You can check out the build videos after the break.

Continue reading “Turning An IBM Selectric Into A Printer.” →