Sous Vide With Racing Stripes

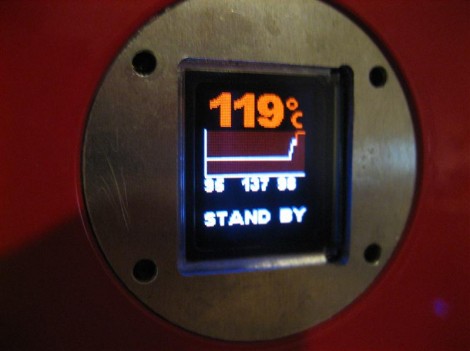
We’re not going to question the logic that went into putting racing stripes on a slow cooker, but [Evan]’s sous vide machine is the most professional one we’ve seen.

After [Evan] found a cooking book that went into the physics and chemistry of making a meal, he wanted to make some really good meals. Sous vide spoke out to him and [Evan] committed himself to building an immersion cooker.

After trolling around on the Internet, [Evan] came across a little gem on Make. The Make build was cheap – it was built around an off-the-shelf PID controller and thermocouples. [Evan] though about building his own PID controller, but time is money and he couldn’t beat the commercial version in features.

The enclosure was the most time-consuming part of [Evan]’s build. It’s a 1/8″ sheet of aluminum cut and bent to the correct size. The sharp edges were filed down and joined with epoxy; definitely not the ‘normal’ way of building an enclosure. The color scheme is borrowed from this Renault – French cooking inspired by a French car.

As for [Evan]’s results, he cooked a 5oz filet marinated in garlic, thyme, olive oil, salt and pepper. This dish was flanked with some roasted Yukon Gold potatoes and sautéed broccoli. Our mouth is watering just looking at the picture, so we’re betting [Evan] did an excellent job.

Rebuilding A Bridgeport Mill

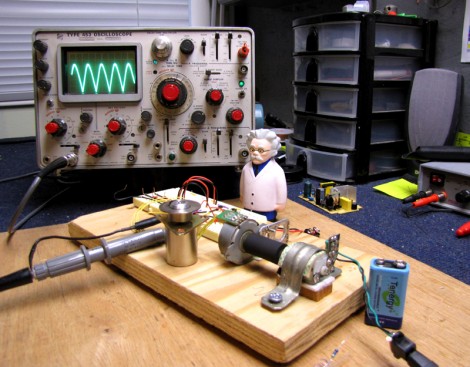
It looks like the Internet’s resident steampunker is moving up a century or two. [Jake Von Slatt] rebuilt the CNC portion of a Bridgeport Series II mill so it can interface with a computer. It’s a feat even more impressive than moving the mill into [Jake]’s garage.

The first step of the build was tearing out the BOSS 5 industrial microcomputer and replacing it with a Win XP laptop running ArtSoft’s Mach 3. This allows G-code to be displayed directly on the screen. The old power supply for the mill did give [Jake] a few problems. The Gecko stepper drivers that replace the old electronics couldn’t handle the voltage of the old power supply. That can be dealt with by opening the transformer and removing a few turns of wire.

[Jake] has been sending in a few of his hacks as of late, so it’s good to see Hack a Day has another fan, especially one of [Mr. Von Slatt]’s caliber. There is a problem with the mill modifications though – [Jake] hasn’t figured out how to program it. If any HaD readers would like to chime in on the best way to program G-code for the mill, feel free to leave a message in the comments.

A Kinect Primer

Yes, the Kinect is over one year old now, and after some initial unhappiness from [Microsoft], it’s become a hacker’s best friend. [Eric] decided to celebrate this with an Article all about how it works.  If you’re new to this piece of hardware and want to get into working with it, this should be a good hacking introduction.  If you’ve been reading [HAD] lately, you will have noticed this information being used to “build a Kinect bot for 500 bones.”

Some interesting facts in this article include that the Kinect measures 307200 distance point, known as a “point cloud” in the gaming area. From this, it’s able to construct a 3D image of the environment around it and allow interaction. Such interesting hardware didn’t take long to hack after Adafruit announced a $3000.00 bounty to open it up to the masses.  This only took four days to do, making one wonder why, with their incredible resources, [Microsoft] wouldn’t either more effectively lock it down or officially open it to be hacked and modified to begin with. Our vote would be to officially open it up, but no one consulted us on the decision.

Lego NXT Creations Are Even Cooler With WiFi On Board

nxt-wifi

The folks at Dexter Industries have just wrapped up a week of Lego NXT projects, most of which centered on the use of their NXT WiFi sensor. Developed over the last few months, the group has been hard at work refining their design and getting some of the kinks worked out, so now you too can control your NXT creations sans wires.

The demonstrations have covered various topics throughout the week, starting out with a short tutorial on how to use a computer to communicate with the NXT device using the TCP protocol. After taking a look at WiFi power-saving capabilities, they touched on pinging other networked machines as well as querying DNS records from an NXT device. An NXT-based webserver was the next project on the list, as was remote robot control over the Internet. Finally, they wrapped the week up by configuring their Lego robot to send a tweet.

If getting your NXT creations on the move with full-fledged network access is something that sounds interesting, be sure to check out their site for downloads, a WiFi manual, and more.

Video: Working With The 3pi Robot’s Line Sensors

This week, we are serving up part five in our series where we are using the Pololu 3pi robot as a fancy development board for the ATmega328p processor. This week we are taking a quick break from working with the perpherals specific to the processor and will show how to work with the 3pi’s line sensors. A quick look at the schematic for the 3pi might lead you to think that you should be reading the line sensors with the A2D peripheral. Even though they are wired to the A2D pins, they need to be read digitally. In the video, [Jack] will show how to read raw values from the sensors and then how to calibrate the results so that you can get a nice clean 8-bit value representing what the sensors are seeing. Of course, that would happen under normal circumstances. Murphy had his way in this video and it turned out that our studio lighting was interfering a bit with the sensor readings when we were shooting so we didn’t get as good of a calibration as we would have liked when we shot.

Video is after the break.

In case you have missed the previous videos here are some links:

Part 1: Setting up the development environment
Part 2: Basic I/O
Part 3: Pulse Width Modulation
Part 4: Analog to Digital conversion

Continue reading “Video: Working With The 3pi Robot’s Line Sensors”

Adding RS232 To A Multimeter The Hard Way

You might want to store information from a multimeter to be graphed over time. This comes with pretty much all of the high-end professional models. But if you buy a super cheap meter you can bet this isn’t an option. [Jazzzzzz] has found a way to pull the data from a $4 meter via RS232. It’s not impossible, but we definitely think he’s doing it the hard way. That’s because he’s not just tapping into a dormant feature. He’s actually adding a microcontroller to sample the data and push it via the RS232 protocol.

On the bright side, this is easier than building a multimeter from scratch. The sampling circuits are still being used, with a PIC 16F688 intercepting the signals as they enter the stock microcontroller. The signal he was after comes into the chip on just one pin, but to get the readings right on the PIC he had to use an OpAmp. That’s only part of the puzzle as he also needed a way to tell what the selector switch was set at. In the end, adding a potentiometer and reading its value let him calculate the position.

[Thanks Karl]

Ghostly Images Appear Thanks To Projections On Fog

This wire-frame cube appears to be floating in mid-air because it actually is. This is a project which [Tom] calls a Laminar Flow Fog Screen. He built a device that puts out a faint amount of fog, which the intense light from a projector is able to illuminate. The real trick here is to get a uniformed fog wall, which is where the laminar part comes in. Laminar Flow is a phenomenon where fluids flow in a perfectly parallel stream, not allowing errant portions to introduce turbulence. This is a favorite trick with water.

[Tom’s] fog screen starts off with a PC fan to move the air. This airflow is smoothed and guided by a combination of a sponge, and multiple drinking straws. This apparatus is responsible for establishing the laminar flow, as the air picks up fog from an ultrasonic fogger along the way.

The only real problem here is that you want the projector shooting off into infinity. Otherwise, the projection goes right through the fog and displays on the wall, ruining the effect. Outdoor applications are great for this, as long as there’s no air movement to mess with your carefully established fog screen.

You can find a short test clip embedded after the break but there are other videos at the link above.

Continue reading “Ghostly Images Appear Thanks To Projections On Fog”