Xoscillo Turns Arduino In An Oscilloscope

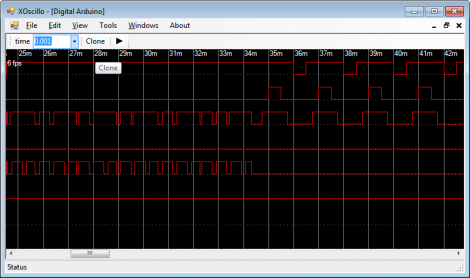
If you don’t have an oscilloscope you’d be surprised how many times you find yourself needing one. But if you have an Arduino on hand, the next time you might be able to get by with this software suite that can use a development board as oscilloscope inputs. The project is called xoscillo, and it allows an Arduino, or a Parallax USB Oscilloscope, to probe the signals while a computer does the heavy lifting.

The Arduino can be used for up to four input channels at 7 kHz. It’s possible to probe seven signals at 4 kHz as well. But the main feature that caught our eye is the ability to use several Arduino boards at one time in increase the number of channels available to you.

Granted, this is pretty slow for many digital electronic troubleshooting needs. But at least it’s something you can pull out when you just don’t have any other ideas about what is going wrong with your prototype circuit. We’re sure that sooner or later you’ll break down and buy a proper hackable oscilloscope. After all, your Arduino is probably already occupied as an I2C sniffer.

[Thanks Adam]
PCB Milling With A Makerbot

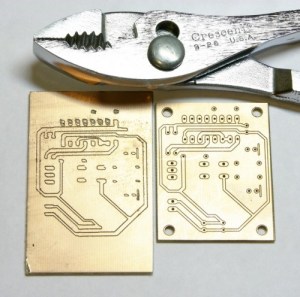
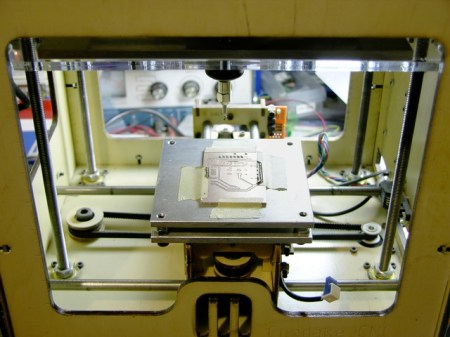
[Keith] wanted to use his makerbot for some PCB milling, but he ran into a pretty big problem. The platform that his PCB would sit on was mounted with a layer of double sided foam tape and was not perfectly aligned to the head. Not only that, but it would tilt when pressure was applied. This made the result of the milling completely unacceptable. To remedy this, he made a new platform that is not only rigid, but he has made it so that there is the ability to adjust it for perfect alignment via adjustment screws in the 4 corners. At the beginning of each session, he can be absolutely sure that everything is aligned perfectly and his PCBs show a huge improvement. You can see a comparison of the two in the following picture.

[via HackedGadgets]

Arduino I2C Sniffer

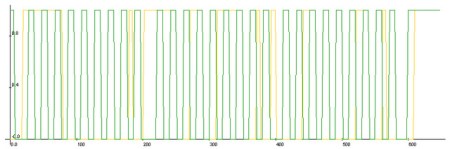
[Johngineer] found himself in need of an I2C sniffer, but didn’t have one available. Necessity is the mother of invention, so he put together this I2C sniffer sketch for Arduino. The arduino will record what is going on for a set time interval, then dump the data via serial as a .csv. You then have to plot it to see what is going on. [Johngineer] recommends Livegraph, since it is portable and easy. As you can see in the code, the time interval is adjustable, but you have the physical limitations of the RAM on the board to consider. This seems like a pretty handy piece of code stored around, effectively giving you a passable I2C sniffer in a pinch.

Bay Area Maker Faire: Hackaday Has Arrived!

It’s a madhouse already at the 2011 Bay Area Maker Faire. Though the show doesn’t officially start until tomorrow, Friday is “Education Day”, a special preview for local schools. As makers scramble to set up their displays, a thousand impressionable young minds seek the most cacophonous mixture of taiko drumming, ArcAttack’s musical Tesla coils, and the beeping and booping of the R2-D2 Builder’s Club.

Maker Faire is returning for its sixth year at the San Mateo Event Center, and is shaping up to be bigger and zanier than ever. We’ll do our best to provide some live updates through the weekend. As always, check out the official site for pointers on hours, admission, parking and especially public transit options.

(Photo: Colossus, the death-defying centerpiece of the Midway area of the Faire.)

Send Email, Receive Surveilance Picture

This deathstar like ball is actually an autonomous surveillance camera. [Basil] wrote in to tell us about it. The body is custom designed for the project, then 3d printed.  It can be dropped anywhere, as it is battery powered for up to a month,  and communicates via cellar networks.  It checks an email folder once an hour and responds to any requests with a snapshot of what is going on. In the video, which you can see after the break, he gets an immediate response.  You can download the sourcecode as well as the files for the enclosure here.

If you wanted to reduce costs, that case could be done away with, but we suspect it helps with some moderate weather conditioning. We would also love to see a version that rotated around that equator on command for better pictures. Great job [Basil].

Continue reading “Send Email, Receive Surveilance Picture”

Introduction To The H-bridge Motor Controller

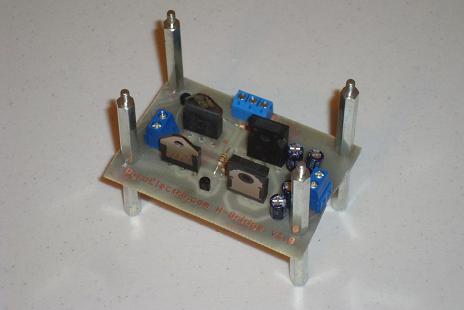
[Chris] sent us this fantastic tutorial, introducing beginners to H-bridge motor drivers. While many of you will consider this stuff basic, those who are trying to expand from building only things the arduino board can handle to bigger more expansive (and powerful) projects will find this quite helpful.  [Chris’s] tutorial is very in depth, not only going through the construction of the basic circuit but also showing you how to make your own PCB.  Pop on over there and learn some theory and some practice. Then you can build that battle bot you’ve always been dreaming of!

Using An AVR As An RFID Tag

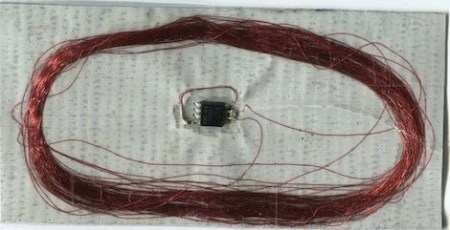
A few years ago, [Beth] came up with the idea of using an AVR as an RFID tag. She’s gotten sidetracked with a few other projects in the meantime but her idea has surfaced again, this time as a duct tape RFID tag. The build is just four components: 0.1 µF and 1 nF capacitors, an ATtiny85 microcontroller, and 100 turns of 40 AWG magnet wire, all soldered together and placed on a duct tape substrate.

Like most RFID tags, the power is drawn from the reader through the coil, but even in low power versions the ATtiny is only rated down to 1.8 Volts. Since the microcontroller is only getting about 1 Volt from the coil, the clock oscillator of the ATtiny won’t work. This isn’t a problem in this build, because the coil is connected to the the clock input – the 125 kHz coming off the reader provides the clock. Very clever.

Of course, the microcontroller is going to need some firmware to send some bits to the reader, so she used the AVRFID firmware (check out the comments in the source for a great walkthrough) to transmit under the HID protocol, itself a derivative of [Beth]’s earlier work with the EM4102 protocol.

Not only are we impressed with this hack, we’re amazed [Beth] is still perfecting her work more than two years after her first post on the subject. That’s dedication and unbridled cleverness.

Via adafruit