If there’s any one benefit to having a cat as a pet instead of a dog, it’s that they’re a bit more independent and able to care for themselves for many days without human intervention. The only thing that’s really needed is a way to make sure they get food and water at regular intervals, but there are plenty of off-the-shelf options for these tasks. Assuming your cat can be fed dry food, that is. [Ben Heck]’s cat has a health problem that requires a special canned wet food, and since there aren’t automatic feeders for this he built his own cat-feeding robot.
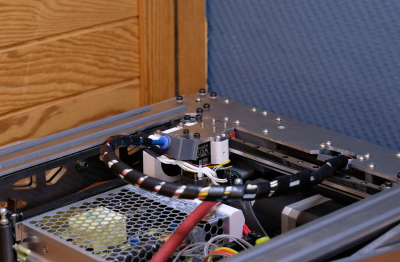
Unlike dry food that can dispense a measured amount from a hopper full of food, the wet food needs to be opened and dispensed every day. To accomplish this, his robot has a mechanism that slowly slides a wedge under the pull tab on the can, punctures the can with it, and then pulls it back to remove the lid. From there the food is ejected from the feeder down a ramp to a waiting (and sometimes startled) cat. The cans are loaded into 3D-printed cartridges and then stacked into the machine on top of each other, so the machine can dispense food cans until it runs out. This design has space for six cans.
Although there are many benefits to having pets of any sort, one of the fun side quests of pet ownership is building fun things for them to enjoy or to make caring for them easier. We even had an entire Hackaday contest based on this premise. And, if biological life forms aren’t your cup of tea, there are always virtual pets to care for as well.
Thanks to [Michael C] for the tip!