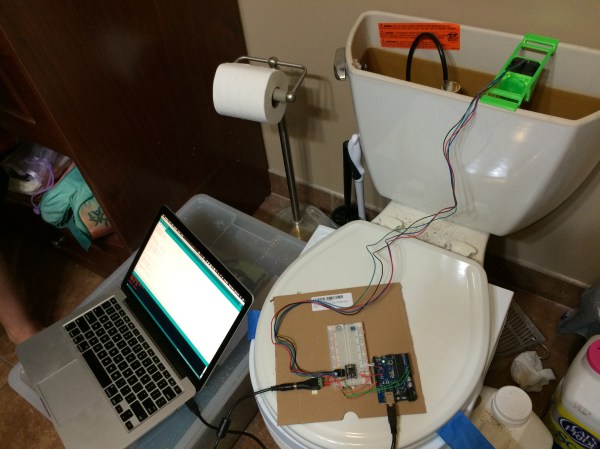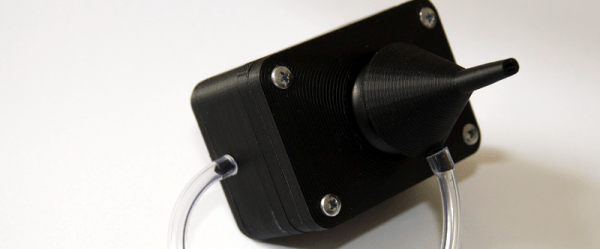
At Hackaday, we think the highest form of hacking is hacking for good. Sure, it’s fun to build robots and gadgets, and universal remotes. But it is even better to create things that make people’s lives better. In that spirit, we enjoyed seeing the Assistive Tech Challenge over on Thingiverse that ended last month. The winner was [0_o] who used 3D printing and an Arduino to produce a mouth-operated mouse for under $20.
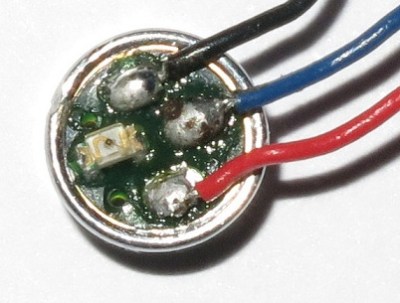 Instructions on Thingiverse can be spotty, but [0_o] did an excellent job of laying out what you need to buy and how to assemble it. One of the most interesting parts of the build is the blow sensor. [0_o] tore apart a $5 electronic cigarette and used the sensor within. The mouthpiece is moved like a joystick to actuate the cursor, and the user blows into it for the mouse clicks. Perhaps not a true sip-and-puff system but it made us wonder what other uses you might find for these sensors.
You can see a video about the mouse after the break. These kinds of projects have the power to make someone’s life better and what could be better than that?
Continue reading “$20 Sip-and-Puff Mouse From E-Cig And 3D Printing”