3D Printed Bristle Bots (Robot Cockroaches!)

Bristlebots are one of our favorite projects to teach young hackers the basics of electronics. They’re easy to build, fun, and most importantly — cute. Usually you make them out of the head of an old toothbrush and a cellphone vibrating motor, but [Kevin Osborn] figured out a way to 3D print the entire thing!

He got the idea from [Mark Peeters] who figured out how to turn one of the disadvantages of FDM style printers, into a new way of producing more abstract 3D prints… He calls it the Drooloop method, and you can make some really cool 3D printed flowers with it! Basically, it means you design parts without support structures and design in a droop. If you do it right, you can create the bristles for your Bristlebot!

Continue reading “3D Printed Bristle Bots (Robot Cockroaches!)”

We Should 3D Scan People

In a perfect futuristic world you have pre-emptive 3D scans of your specific anatomy. They’d be useful to compare changes in your body over time, and to have a pristine blueprint to aid in the event of a catastrophe. As with all futuristic worlds there are some problems with actually getting there. The risks may outweigh the rewards, and cost is an issue, but having 3D imaging of a sick body’s anatomy does have some real benefits. Take a journey with me down the rabbit hole of 3D technology and Gray’s Anatomy.

Continue reading “We Should 3D Scan People”

There are 96 macbooks in this rack

96 MacBook Pros: Most Expensive Server Rack We’ve Ever Seen

Ever see a standard server rack stuffed full with 8-dozen MacBook Pros? Well now you have.

Now before the torrential downpour of anti-Mac comments come, this actually has a purpose. No seriously. Besides, what company in their right mind would spend that much money on a rack full of paperweights? Kidding.

[Steve] works for a company that designs electronics, and for a particular launch they needed to perform a lot of testing — using MacBook Pros. There are ways he could have emulated OS X on a much cheaper hardware setup, but the whole point was to test the product with Apple hardware. So he took a stroll down to the local Apple store and picked up two pallets worth. Continue reading “96 MacBook Pros: Most Expensive Server Rack We’ve Ever Seen”

3D Printing Helps Rekindle Old Love With An Uncommon Truck 

People may know many name and brands of cars and trucks, and there’s tons of scale models available for the average popular ones. What happens if your favorite truck is a 1960 Bucegi? You could do what [Arin] did and 3D print your own custom model.

[Arin] used to drive these machine back in his youth and it made an impression on him. In the few years of production, the 140HP V8 truck was adapted to all sorts of uses from farm trucks to military vehicles and even cranes.  The base truck and the desired configuration is modeled up in quite a bit of detail, then it’s 3D printed.

Once the printing is done the models are smoothed out using body filling primer paint, (and we imagine some fine sanding) , painted with acrylic paint, and assembled into an accurate model complete with working steering systems.

Below is a video showing assembly and painting and a second video showing off the steering system.

Continue reading “3D Printing Helps Rekindle Old Love With An Uncommon Truck “

Ninja Chess

Make Your Own Ninja Chess Board

You’re going to want to take a look at this fun project [Alistair MacDonald] just finished up. He calls it Ninja Chess.

He’s had the idea to 3D print a complete set of ninjas vs pirates for a chess board, but, let’s be real;  printing thirty-two chess pieces would take a long time. He opted to use a laser cutter instead, and so far, only has the Ninja characters drawn. But it still makes for a pretty awesome chess board.

Ninja Character

He drew the characters in Inkscape and they’re pretty darn cute. He has all the files available over on his Instructable including the .DXF for the laser cut outlines, and the image files for you to print off the decals. But unless you’re good with scissors, we recommend using your hackerspace’s automated paper cutter to help speed things up.

Is it a hack? Not really, but it’d be an excellent addition to anyone’s workshop. And while we sail under the Jolly Wrencher, we too can appreciate the novelty of a Ninja chess board.

For a more detailed build, did you see the 3D laser cut chess pieces we shared a few weeks ago? No that’s not a typo — you can use a laser cutter to do more than just two-dimensional cutting…

3d printed webcam mount

Repackaging A Webcam In A 3D Printed Enclosure

One of the beauties of having a 3D printer is the ability to print accessories for it to make it better. [Sky] had been using a Logitech C920 webcam to record some of his prints, but it wasn’t really designed to mount off a 3D printers frame. So he designed his own enclosure for it.

He started by taking the webcam apart, getting down to the bare PCB  level and taking some measurements. It turned out to be pretty compact! He modeled a rough outline of it in SketchUp, and then started designing his new enclosure around it. After a few failed prints — thanks to the 3D printer company that shall not be named — he put it altogether and did some test fits. It worked!

The new enclosure is designed to mount off the frame of his 3D printer, allowing for a wide angle view of the print bed. If you print something that makes use of the entire z-axis, you might run into some visibility issues, but [Sky] isn’t too worried about this.

For the full explanation and design, he gives a great walk through on all the details in the video below.

Continue reading “Repackaging A Webcam In A 3D Printed Enclosure”

Better 3D Prints By Mixing Slicing Techniques

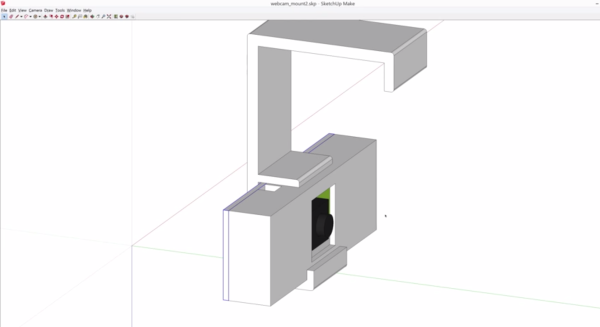
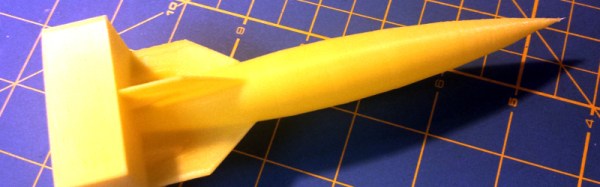
Most 3D printing projects start with a 3D model of some kind. Slicing programs transform the model into gcode. The gcode file contains the commands that actually drive your printer. There are different ways to slice a model and sometimes you want to use more than one on a single model. I’ve been working on a way to make that easier.

When you slice a 3D printing model, you can select different attributes for the resulting gcode file. For example, you might set the slicer to produce different infill density, temperatures, or print speeds. These settings can have a big impact on your printing results. For example, a piece that needs high strength might require a denser infill  than some trinket or key chain. You might want an artistic piece to have a finer layer height than some internal part for some gadget no one will ever see.

One Size Fits All?

The problem is that for most open source slicers, these settings will apply to the entire model. Cura has some plugins that can change settings at different Z heights, and Slic3r can vary layer height, but in the general case, what you set for the slicer will apply to the entire model. Of course, a gcode file is nothing more than a text file, so if you are industrious, you can manually merge two or more files into one.

A manual merge is a pain, which is why I wrote gblend. It can stitch together gcode files to get various effects. The program takes multiple gcode files in as inputs and can combine them in different ways. The most useful feature allows you to get a certain number of layers from each source file and combine them into a single print. Measurements are in millimeters, so you don’t have to worry about layer numbers. The entire process is much easier than anything else I’ve come across.

Continue reading “Better 3D Prints By Mixing Slicing Techniques”