Metal Forming With A 3D Printer

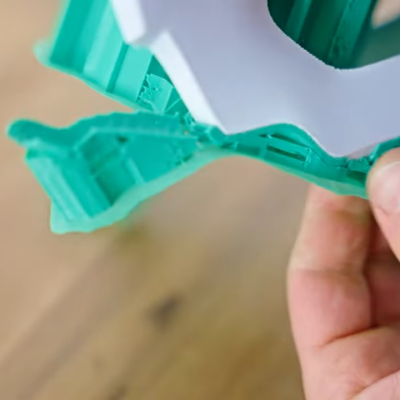
How do you use a 3D printer to bend metal? One way would be to take it to a machine shop and offer to trade the owner your printer for some time in their shop. A smarter way is to do like [Jaba 3D], and print dies using the printer. You can then use those dies in a press to make the shapes you want.

In the case of [Jaba], the Harbor Freight press uses a hydraulic cylinder to develop about 6 tons of pressure. We don’t think Harbor Freight carries this particular press, but for between $150 and $250, you can get a 12-20 ton press, and, of course, there are other suppliers, as well.

The target object, in this case, was an automotive bracket. The process of grabbing an image, converting it to an SVG, and then creating a 3D part has many uses. Apparently, PLA is sufficient for this purpose, although the print uses ten top and bottom layers along with 80% infill. That does make the prints take a long time.

As you might expect, the dies don’t last very long. In this case, they needed two shots, and they got them, but PLA is probably not the right material if you wanted to go for mass production.

Metal forming does occur at large scales, too. If you want to make your own press-forming tools, we have advice for you.

Better 3D Prints, Courtesy Of A Simple Mass-Produced Bracket

On the “hack/not-a-hack” scale, a 3D printed bracket for aluminum extrusions is — well, a little boring. Such connectors are nothing you couldn’t buy, and even if you insisted on printing them instead, Printables and Thingiverse are full of ready-to-use designs. So why would you waste your precious time and effort rolling your own?

According to production 3D printing company [Slant 3D], a lot of times, we forget to take advantage of the special capabilities of 3D printing. The design progression of the L-bracket shown is a perfect example; it starts as a simple L, moves on to a more elaborate gusseted design, and eventually into a sturdy sold block design that would be difficult to make with injection molding thanks to shrinkage but is no problem for a 3D printer. Taking that a step further, the bracket morphs into a socketed design, taking advantage of what 3D printers can do by coming up with a part that reduces assembly time and fastener count while making a more finished, professional look.

Again, this isn’t really about the bracket. Rather, it’s about a different way of thinking about your designs and leveraging the unique capabilities of 3D printers relative to other mass-production methods, like injection molding. We’ve covered some of [Slant 3D]’s high-volume design insights before, such as including living hinges and alternatives of pins and holes for assembling printed parts. Continue reading “Better 3D Prints, Courtesy Of A Simple Mass-Produced Bracket”

Fiber-Infused Ink Allows 3D-Printed Heart Muscle To Beat

Illustration from Anatomy & Physiology, Connexions Web site. http://cnx.org/content/col11496/1.6/, Jun 19, 2013.

What makes a body’s organs into what they are is more than just a grouping of specialized cells. They also need to be oriented and attached to each other and scaffolding in order to create structures which can effectively perform the desired function. A good example here is the heart, which requires a large number of muscle cells to contract in unison in order for the heart component (like a ventricle) to effectively pump blood. This complication is what has so far complicated efforts to 3D print complex tissues and entire organs, but recently researchers have demonstrated a way to 3D print heart muscle which can contract when stimulated similarly to a human heart’s ventricle.

At the center of this technique lies a hydrogel that is infused with gelatin fibers. Using a previously developed Rotary Jet-Spinning technology that was reported on in 2016, a sheet of spun fibers was produced that were then cut up into micrometer-sized fibers which were dispersed into the hydrogel. After printing the desired structure – taking into account the fiber alignment – it was found that the cardiomyocytes (the cells responsible for carrying the contractile signal in the heart muscle) align along the thus laid out pattern, ultimately creating a cardiac muscle capable of organized contraction.

These findings come after many years of research into the topic, with e.g. Zihan Wang and colleagues in a 2021 paper reporting on the challenges remaining with 3D printing cardiac tissue, yet also the massive opportunities that this could provide. Although entire heart replacements (via therapeutic cloning with the patient’s own cells) might become possible too, more immediate applications would involve replacements for damaged cardiac muscle and other large structures of the heart.

Splitting 3D Prints Into Parts Can Add Strength

One of the great things about 3D printers is their ability to make a single part all at once. Separating a part into multiple pieces is usually done to split up objects that are too big to fit on the 3D printer’s print bed. But [Peter] at Markforged (manufacturers of high-end 3D printers) has a video explaining another reason: multi-part prints can benefit from improved strength.

This part can be easily printed as a single piece, but it can be made nearly twice as strong when printed as two, and combined.

The idea is this: filament-based 3D printers generally create parts that are strongest along their X-Y axis (relative to their manufacture) and weakest in the Z direction. [Peter] proposes splitting a part into pieces with this in mind. Not because the part is inconveniently large or has tricky geometry, but so the individual pieces can be printed in orientations that provide the best mechanical strength.

This is demonstrated with the simple part shown here. The usual way to print this part would be flat on a print bed, but by splitting the parts into two and printing each in their optimal orientation, the combined part withstands nearly twice as much force before failing.

[Peter]’s examples use Markforged’s own filaments, but gives advice on more common polymers as well and the same principles apply. This idea is one worth keeping in mind the next time one is seeking to optimize strength. because of how simple it is.

We’ve seen a variety of methods to toughen up or ruggedize prints in the past, but they’re usually more complex (or at least messier.) Examples include embedding braided steel cable, embedding fiberglass mesh, applying electroplating to a printed structure, and plain old embedding some bolts and washers to buffer load-bearing areas.

Continue reading “Splitting 3D Prints Into Parts Can Add Strength”

Giant 3D Printer Can Print Life-Sized Human Statues

We’ve seen a few makers 3D scan themselves, and use those to print their own action figures or statuettes. Some have gone so far as building life-sized statues composed of many 3D printed parts. [Ivan Miranda] is no regular maker though, and his custom 3D printer is big enough that he can print himself a life-sized statue in one go.

The printer is a gargantuan thing, using an aluminium frame and a familiar Cartesian layout. It boasts a build volume of 1110 mm x 1110 mm x 2005 mm, making it more than big enough to print human-sized statues. Dogs, cats, and some great apes may be possible, too.

Many of the components are 3D printed, including the various braces and adapters that hold the frame together. The build uses NEMA 23 stepper motors, with Duet3D hardware running the show. Notably, it uses V-wheels for the Z-axis, as linear rails would be prohibitively expensive at the sizes required.

[Ivan] shows off the printer by having it produce a statue of his body at 1:1 scale. It’s not a perfect print, with some layer shifts and an awkward moments where the filament supply was interrupted. It took 108 hours in total, with 76 hours of that being actual print time, and is made up of 4375 layers. Despite its flaws, its an incredibly impressive way to demonstrate the capabilities of the machine.

Eager to build such a printer for yourself? [Ivan] will sell you the design files for a reasonable fee.

[Ivan]’s giant printer was once a large tabletop affair; just look how far it’s come. He’s even come up with a system for using smaller printers to create large-scale construction kits, too. We can’t wait to see what mad project he comes up with next. Video after the break.

Continue reading “Giant 3D Printer Can Print Life-Sized Human Statues”

3D Printer Recognizes Third-Party Build Plates, Just Make Your Own ID Codes

The Bambu X1C 3D printer is a machine known for its speed, and it has a number of useful features like automatic build platform recognition. Factory build platforms are marked with an identifier code, and thanks to [elumspe] it’s now possible to make your own identifiers to stick onto third-party platforms and have the printer recognize them as though they were factory offerings. There’s even a super handy 3D-printable alignment tool that ensures the identifier goes in the correct spot, which is a nice touch.

These codes aren’t DRM so much as they are used by the printer to automatically verify that the installed build plate matches the slicer settings before a job begins. Printing one and sticking it in the right place is an easy way to get third-party plates recognized the same as factory offerings.

The identifier codes aren’t DRM so much as they are a way for the printer to verify that the installed build platform matches the slicer settings before a print begins, and throw up a warning if it doesn’t. The printer is perfectly happy to use third-party build surfaces, but since they lack an identifier, the printer will throw a warning each time. One solution is to simply disable checking the build platform before a print, but for those who would prefer to have the printer see what it expects to see, printing a small 2D barcode to stick on is an easy way to do it.

We see these sometimes called QR codes, but they look more like AprilTags. Both are types of 2D barcode, but while QR codes can encode a variety of information types, AprilTags are simpler and usually represent identifiers. In this case, they’re an appropriate way to let a camera-enabled printer know what kind of build plate is installed.

AprilTags are common in computer vision applications, and even relatively modest hardware can detect and decode them almost in real time. AprilTags are convenient and easy to use, as this gate access system demonstrates.

Sweet Hacks

While talking about a solar powered portable Bluetooth speaker project on the podcast, I realized that I have a new category of favorite hacks: daily-use hacks.

If you read Hackaday long enough, you’ll start to categorize everything. There are the purely technical hacks, beautiful hacks, minimalist hacks, maximalist hacks, and then the straight-up oddball hacks. Sometimes what strikes us is the beauty of the execution. Sometimes it’s clever choice of parts that were designed to do exactly the right thing, and simply watching them do their job well is satisfying, and other times we like to see parts fooled into doing something they have no right to.

While I really like the above speaker build because it’s beautiful, and because it uses a clever choice of audio amplifier to work with the supercapacitors’ wild voltage swings, what really struck me about the project is that [Jamie Matthews] has been using it every day for the last nine months. It’s on his desk and he uses it to listen to music.

That’s a simple feat in a way, but it’s a powerful one. Some of my absolutely favorite projects of my own are similar – they are ones that I use all the time. Not the cliche “life hack”, which are usually like a clever way to peel a grapefruit, but rather hacks that become part of daily life. So look around you, and if you’re anything like me, you’ll find a number of these “daily driver” hacks. And if you do, celebrate them.

(And maybe even send ’em in to the tips line to share!)