Finally! A Typeface For Hardware People

When it comes to novelty typefaces there is no shortage of weird and wonderful fonts to be found when you have finally tired of Comic Sans. Everything from bananas forming letters to Wild West saloon lettering can be yours, plus of course our favourite, the embossed Dymo label. But there’s a new kid on the novelty typeface block, and for us it sweeps all before it.

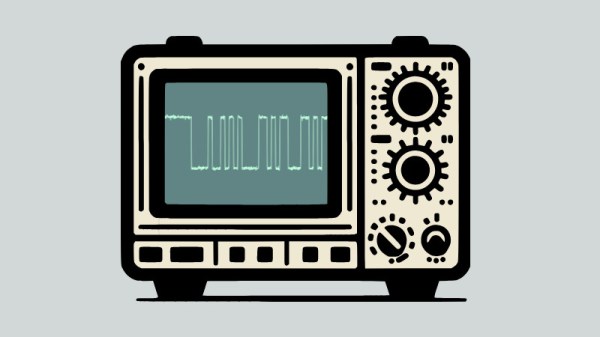
Scopin’ Sans is as its creator [Guy Dupont] calls it “A typeface for hardware people”, and its party trick is that it doesn’t produce letters. Instead it forms an oscilloscope trace that displays what it would look like as serial data. Instantly your text jumps straight to 1337, and you win the internet.

We have shamefacedly to admit that we don’t know binary ASCII by sight, so we’ll have to take his word for it. But for the curious there’s a demo from which you can amuse yourself creating traces, and if you can’t recognize serial ASCII then the chances are few of the people around you can either. We take our hats off to [Guy], and it’s something we’re sure we’ll use at some point to delight and confuse our friends. It’s not the first font we’ve brought you, here are some more if you come from the bitmap era.

Better 3D Printing Overhangs? Dive! Dive!

If you want better 3D-printed overhangs, you need better cooling, right? What would be better for cooling than printing submerged in water? It turns out [CPSdrone] tried it, and, at least for overhangs, it seems to work pretty well. Check it out in the video below.

Of course, there are some downsides. First, the parts of the 3D printer don’t want to work in water. The guys used deionized water to minimize water conductivity and also sealed open connections. Some components were replaced with equivalents that were less likely to corrode. However, the bearings in the stepper are still going to corrode at some point.

There’s no free lunch, though. Cooling is good for some parts of 3D printing. But for the hot parts, it could cool down too much. They encased the hot end in a large silicon block to help prevent this. They also potted the controller board, which works but makes future maintenance and upgrades painful. Initial tests looked promising.

Continue reading “Better 3D Printing Overhangs? Dive! Dive!”

Stereoscopic Macro Lens Shows Two Is Better Than One

You’d be forgiven if you thought [Nicholas Sherlock’s] new lens design was a macro lens that was 3D printed. In fact, it is, but it is also a macro lens that takes 3D images using two different cameras. If you have a pair of Sony E/FEs, you can 3D print your own copy today. If you don’t, you might have to adjust the design or wait for future releases. In any event, you are sure to enjoy the example photos, and there’s a video review of the device you can watch below.

The design merges two 4x microscope lenses to provide a 2X stereo image with a 5mm baseline. As you might expect, the secret is a prism in the assembly that allows one camera to shoot directly at the subject and the other to shoot with a 5mm offset. This is trickier than you might think because the cameras shift the image some, also.

Continue reading “Stereoscopic Macro Lens Shows Two Is Better Than One”

Powering A Cavity Magnetron, From A Battery

While vacuum electronic devices have largely been superseded over much of consumer electronics, there’s one place where they can still be found for now. The cavity magnetron is a power RF oscillator device in which electrons are induced to move in a circular path through a tuned cavity, inducing a high-power RF field, and it lies at the heart of a domestic microwave oven. They usually need a high-voltage mains transformer and a rectifier to work, but [Hyperspace Pirate] has managed to make a solid-state power supply to power one from a 12 volt battery. Better still, he’s put the resulting combo in a Care Bears lunchbox. Take a look at the video below the break.

The video starts with a potted history of the magnetron before looking at the circuit of a typical oven, which uses a single diode and a capacitor in a simple voltage multiplier. The capacitor value is adjusted to lower the power output, and a pretty thorough job is done of characterising the circuit.

The low-voltage supply starts with an XVS inverter to make the high voltage via another multiplier, but the interesting part comes with the magnetron’s heater. It’s designed for 50 or 60Hz household electricity, but there it’s receiving 40 kHz and has an appreciable impedance. The addition of a capacitor soon restores it to a reasonable performance.

In case you noticed that the ZVS converter might be improved upon, take a look at a flyback converter. Meanwhile, we should probably echo the safety message in the video that playing with magnetrons and their associated transformers can be a nasty way to die. Please take care out there!

Continue reading “Powering A Cavity Magnetron, From A Battery”

Retrotechtacular: The Story Of Turpentine

If someone in 2023 has ever had much call to use turpentine, chances are good it was something to do with paint or other wood finishes, like varnish. Natural turpentine is the traditional solvent of choice for oil paints, which have decreased in popularity with the rise of easy-to-clean polymer-based paints and coating. Oh sure, there are still those who prefer oil paint, especially for trim work — it lays up so nice — but by and large, turpentine seems like a relic from days gone by, like goose grease and castor oil.

It wasn’t always so, though. Turpentine used to be a very big deal indeed, as shown by this circa 1940 documentary on the turpentine harvesting and processing industry. Even then it was only a shadow of its former glory, when it was a vital part of a globe-spanning naval empire and a material of the utmost strategic importance. “Suwanee Pine” shows the methods used in the southern United States, where fast-growing pines offer up a resinous organic gloop in response to wounds in their bark. The process shown looks a lot like the harvesting process for natural latex, with slanting gashes or “catfaces” carved into the trunks of young trees, forming channels to guide the exudate down into a clay collecting cup.

Continue reading “Retrotechtacular: The Story Of Turpentine”

USB-C For Hackers: Program Your Own PSU

Last time, I showed off a few ways you can convert an existing PSU to USB-C duty, and zoomed in on a particular way you can use to convert one of the ever-abundant 18 V – 20 V laptop PSUs to USB-C. All we have left is to write software for it, and I’ll explain how it works. There’s also that one cool USB-C secret I’ve found out, but you’ll have to read on to find out more.

From the last article, we have a board that has an RP2040 and FUSB302 combo on it, which takes a 20 V DC PSU input from a laptop brick, and can switch either 5 V, 20 V or 0 V to its USB-C socket using FETs. The USB-C communication firmware is simple enough, but there’s caveats, especially regarding safety. Let’s go through those!

The Code Logic

VBUS has to be non-powered by default – we only supply 5 V when the FUSB302 detects a 5.1 kΩ pulldown on one of the CC lines. After supplying 5 V, we send out PSU capability advertisements, of the kind that we’ve learned to parse in the Replying PD article – and whenever we get a Request, we have to switch to the requested profile, connecting the voltage rail requested to the FET. I opt to not do any current consumption control in this design, assuming a well-behaved device, but you theoretically should do that. It wouldn’t be hard to add a high-side current sensor, say, something from Analog Devices – I just don’t want to do that now, especially given that I’m already using two of the exposed ADC pins to do Lenovo/HP PSU capability detection instead, one is used up for VBUS measurement, and the fourth is used for VIN (20 V rail) measurement – that’s four ADCs, which is as much as the RP2040 has got. However, if I ever need more ADCs, I can add an analog mux like 4051 in the next version! Continue reading “USB-C For Hackers: Program Your Own PSU”

The Hoarder’s Dilemma Hack Chat

Join us on Wednesday, December 6 at noon Pacific for the The Hoarder’s Dilemma Hack Chat with Gabe Emerson!

There’s a lot to be said for the power of a well-stocked junk bin. It’s almost a magical thing, being able to dive into a random box and retrieve just the right part to perform a needful repair or to complete a project without the need to hit the web or hop in the car for a trip to the hardware store. For those who pride themselves on their resourcefulness, it can be a heady experience indeed.

But as with everything, such feats of fix-it come at a price. That little squirt of dopamine that comes from having just the right thing can make your monkey brain fixate on a simple equation: “More stuff is better stuff.” The higher and deeper your stash, the better your chances of having what you need, assuming you can find it, of course. This way lies madness, and perhaps an appearance on a reality TV show.

join-hack-chatIs there a better way? It’s hard to say, but we figured it would be a good idea to loop in someone with a lot of experience collecting junk that somehow finds its way into some pretty cool projects. Gabe Emerson runs the popular and aptly named “saveitforparts” channel over on YouTube, and fancies himself an accomplished hoarder. We’d have to agree, given his recent 1,000-mile drive to pick up a used geodesic dome, or his ever-increasing collection of RV satellite dishes, which he somehow puts to good use. His junk collection is pretty epic; he even has a whole piece of property devoted to the larger pieces of his collection, like an entire monorail train. He seems uniquely qualified to discuss the “Hoarder’s Dilemma” and the painful process of deciding what stays and what goes.

Our Hack Chats are live community events in the Hackaday.io Hack Chat group messaging. This week we’ll be sitting down on Wednesday, December 6 at 12:00 PM Pacific time. If time zones have you tied up, we have a handy time zone converter.