Slip casting can be messy both in processing and in making the original plaster mold. What if there was a better way, thanks to 3D printing?
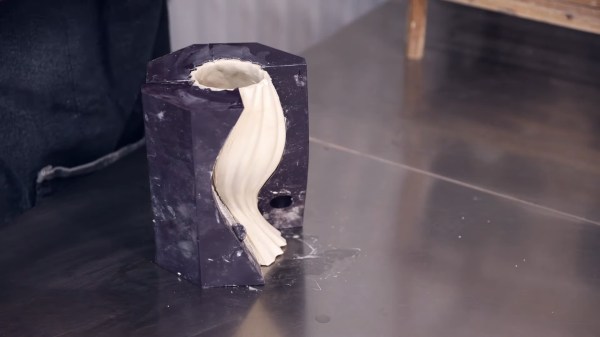
[Allie Katz] has developed a new technique using 3D printed slab molds to make ceramics. By combining the ability of 3D printing to make intricate designs and the formability of clay, they have found a way to make reproducible clay objects without all that tedious mucking about with liquid clay.
[Katz] takes us through a quick “Mould Making 101” before showing how the slab casting press molds were made. Starting with a positive CAD design, the molds were designed to eliminate undercuts and allow for air infiltration since a plastic mold can’t suck the water out of the clay like a plaster one would. Some cookie clay cutters were also designed to help with the trickier bits of geometry. Once everything was printed, the molds were coated with cornstarch and clay was pressed in. After removal, any final details like handles can be added and the pieces are then fired as normal.
If you’d like to see some more 3D printing mixed up with ceramics, check out 3D printing glass with a laser, reliable ceramic slurry printing, or this TPU-based approach.
Continue reading “Slab Casting – A New Way To Combine 3D Printing And Ceramics”