If you have an FDM printer that features multiple hotends or can otherwise switch between different filaments, you’ve surely thought about using the capability to lay down dedicated support material. Historically the filament of choice for this is PVA, since it can be dissolved in water once the print has finished. But if you’ve ever used it, you’ll know it’s not without its own challenges. Luckily, there may be an alternative — [ModBot] had heard that it is possible to use PLA to support PETG and vice-versa so he decided to try it. You can see how it works in the video below.
Of course, you can simply use PLA to support PLA and PETG to support PETG. Depending on the supports and slicer settings, though, it can be hard to remove the support after printing cleanly. Slicers have made major improvements in this area, but it still isn’t ideal. Some use HIPS for support, but that requires a solvent to dissolve and is also a bit exotic compared to PLA and PETG.
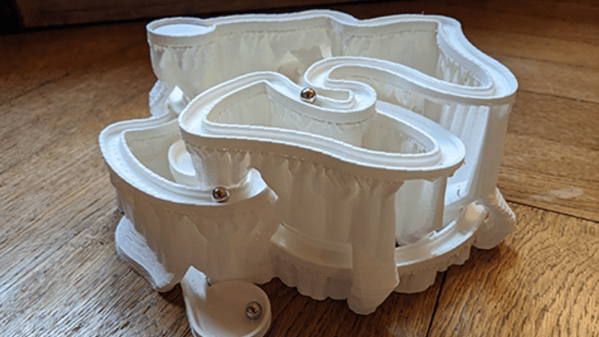
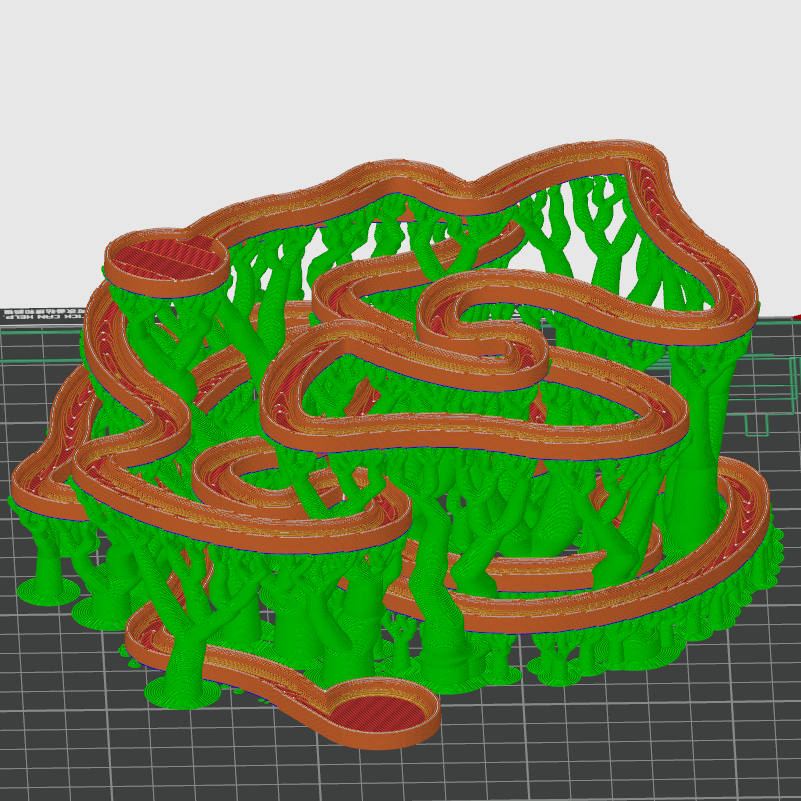
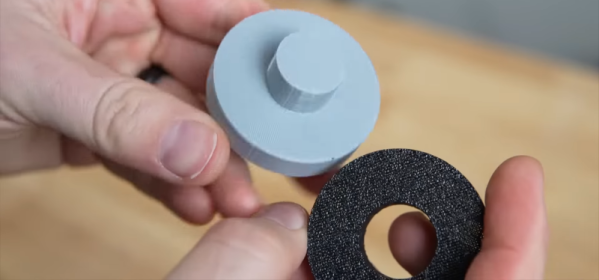
To illustrate, [ModBot] printed some test articles with the alternate support and did more reference prints using the same material with different parameters. The typical gap slicers use is 0.2 mm, but when using the different materials you can set the gap to zero. For the reference parts he set the gap to zero and 0.1 mm, both closer than you would normally print.
The PLA-only prints were essentially impossible to separate. While the PETG prints separated with tools, the resulting surfaces were ugly, with support residue and scarring. But the prints with two materials and zero gap pulled apart readily with no tools and left a beautiful surface underneath.
If you have the ability to do dual extrusion, this could be a great trick to have in your toolbox. Granted, PVA will still be of interest if you have support buried deep inside some structure where it is physically difficult to get to. Water can go where tweezers can’t. But for supporting large accessible areas, this looks like a game-changer.
Sometimes automatic supports can use a little help. There are plenty of supports and best practices for supports if you want to fine-tune your process.