3D Printing Tiny Metal Parts

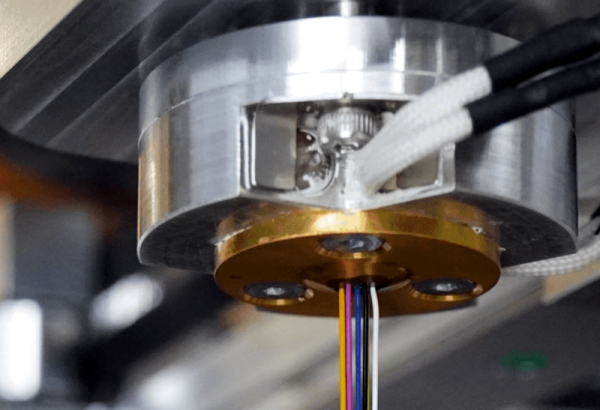
It may sound like a pop band, but μ-WAAM is actually a 3D printing technique for making small metal parts from the NOVA University Lisbon. Of course, WAAM stands for wire arc additive manufacturing, a well-known technique for 3D printing in metal. The difference? The new technique uses 250 μm wire stock instead of the 1mm or thicker wires used in conventional WAAM.

The thinner feed wire allows μ-WAAM to create fine details like thin walls that would be difficult to replicate with traditional methods. Typically, for fine structures, printers use fused metal powder. This is good for fine details, but typically slower and has higher waste than wire-based systems.

Continue reading “3D Printing Tiny Metal Parts”

Complicated Calculated Solution To 3D-Printed Puzzle

3D printers have made a lot of things possible that were either extremely difficult or downright impossible with traditional tooling. Certain shapes lend themselves to 3D printing, and materials and tooling costs are also generally greatly reduced as well. One thing that may not be touched on as often, though, is their ability to rapidly prototype solutions to complex mathematical problems, in this case taking the form of a 3D printed maze, known as a dodecahedral holonomy maze, with an interesting solution.

The puzzle presents itself as a sphere composed of various inlaid hexagons which form a track for the puzzle piece, or “rook”. The tracks create the maze for the rook to travel, as some paths are blocked when the rook is oriented in certain ways. To solve the puzzle, the player must rotate the rook by moving it around the hexagons in such a way that its path isn’t physically blocked by any of the pegs in order to successfully reach the exit. This might seem like a fun toy to have on its surface, but the impressive thing about this is that the solutions are designed to reduce the likelihood of solving the puzzle with any “brute force” methods while at the same time having more than one path that will reach the exit as well as several bottlenecks that the puzzle solver must traverse as well.

There are actually many possible puzzles that can be produced in this size and shape, and all have predetermined solutions with cleverly chosen paths. This might seem like a lot but when you realize that the entire build from concept to 3D modeling to implementation was done by [Henry Segerman] and a group of other mathematicians at Oklahoma State University it starts to become more clear how the puzzle was so well-designed. In fact, we’ve featured some of his other mathematically-modeled builds in the past as well.

Thanks to [Inne] for the tip!

Continue reading “Complicated Calculated Solution To 3D-Printed Puzzle”

Pump Up The Resin

Sometimes the best ideas are simple and seem obvious after you’ve heard them. [Danny] showed us a great idea that fits that description. He uses a peristaltic pump to move resin in and out of his print bed. (Video, embedded below.) Normally, you remove the tank and pour the resin out into a container. With the pump, you can leave the tank where it is and simply pull the resin through a tube. The process is slower than pouring, but not as messy and doesn’t risk damage to your FEP film.

You can also use the pump like a vacuum to clean up resin. According to [Danny], the biggest value is when working with very large printers. He shows a Peopoly Phenom which has a huge tank compared to the other printers he shows in the video.

Continue reading “Pump Up The Resin”

3D Printing Rainbows

[The Action Lab] had a very serious technical problem. His daughter wanted to 3D print sparkly unicorns. But how do you make a 3D print sparkly? Turns out, he had used a diffraction grating before to make rainbow-enhanced chocolate.

The method turns out to be surprisingly simple. Using a diffraction grating as a print bed, puts the pattern on the bottom of the 3D print and — thanks to how a diffraction grating works — the 3D print now works like a grating, too.

Continue reading “3D Printing Rainbows”

Homemade Probe For 3D Printer: $3

You have a few choices if you want to use a probe to level your 3D printer bed. Rarely, you’ll see optical or capacitive probes. More commonly, though, your probe will sense a metal print or uses a physical probe to touch the print bed. [Design Prototype Test] has long used a BLTouch which uses the latter method. However, putting it in a heated build chamber prevented it from working so he set out to make his own simple design using an Allen key.

We’ve seen Allen key sensors before, but usually, they use a microswitch. We’ve also seen microswitches used to directly probe the bed. But, in this case, a 3D printed fan shroud uses an optical sensor to note when the Allen key hits the bed.

Continue reading “Homemade Probe For 3D Printer: $3”

Resin-Printed Gears Versus PLA: Which Is Tougher?

When it comes to making gearboxes, 3D printing has the benefit that it lets you whip up whatever strange gears you might need without a whole lot of hunting around at obscure gear suppliers. This is particularly good for those outside the limited radius served by McMaster Carr. When it came to 3D printed gears though, [Michael Rechtin] wondered whether PLA or resin-printed gears performed better, and decided to investigate.

The subject of the test is a 3D-printed compound planetary gearbox, designed for a NEMA-17 motor with an 80:1 reduction. The FDM printer was a Creality CR10S, while the Creality LD02-H was on resin duty.

The assembled gearboxes were tested by using a 100 mm arm to press against a 20 kg load cell so that their performance could be measured accurately. By multiplying the force applied to the load cell by the  length of the arm, the torque output from the gearbox can be calculated. A rig was set up with each gearbox pushing on the load cell in turn, with a closed-loop controller ensuring the gearbox is loaded up to the stall torque of the stepper motor before letting the other motor take over.

Continue reading “Resin-Printed Gears Versus PLA: Which Is Tougher?”

Invisible 3D Printed Codes Make Objects Interactive

An interesting research project out of MIT shows that it’s possible to embed machine-readable labels into 3D printed objects using nothing more than an FDM printer and filament that is transparent to IR. The method is being called InfraredTags; by embedding something like a QR code or ArUco markers into an object’s structure, that label can be detected by a camera and interactive possibilities open up.

One simple proof of concept is a wireless router with its SSID embedded into the side of the device, and the password embedded into a different code on the bottom to ensure that physical access is required to obtain the password. Mundane objects can have metadata embedded into them, or provide markers for augmented reality functionality, like tracking the object in 3D.

How are the codes actually embedded? The process is straightforward with the right tools. The team used a specialty filament from vendor 3dk.berlin that looks nearly opaque in the visible spectrum, but transmits roughly 45% in IR.  The machine-readable label gets embedded within the walls of a printed object either by using a combination of IR PLA and air gaps to represent the geometry of the code, or by making a multi-material print using IR PLA and regular (non-IR transmitting) PLA. Both provide enough contrast for an IR-sensitive camera to detect the label, although the multi-material version works a little better overall. Sadly, the average mobile phone camera by itself isn’t sufficiently IR-sensitive to passively read these embedded tags, so the research used easily available cameras with no IR-blocking filters, like the Raspberry Pi NoIR.

The PDF has deeper details of the implementation for those of you who want to know more, and you can see a demonstration of a few different applications in the video, embedded below. Determining the provenance of 3D printed objects is a topic of some debate in the industry, and it’s not hard to see how technology like this could be used to covertly identify objects without compromising their appearance.

Continue reading “Invisible 3D Printed Codes Make Objects Interactive”