Control Your HTPC With Scavenged IR Parts

If you’ve built yourself a home theater PC, one of your highest priorities is probably coming up with a convenient control solution. The easiest way to do this is to simply use something like a wireless keyboard and mouse. But, that’s not very conducive to an enjoyable home theater experience, and it feels pretty clunky. However, if you’ve got the right components lying around, [Sebastian Goscik] has instructions and an Arduino sketch that will let you control your HTPC with any IR remote control.

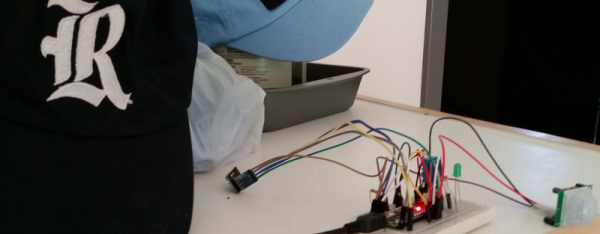
There are a number of ways you could control your HTPC, and we’ve featured more than one build specifically for controlling XBMC over the years. Unfortunately, most of those methods require that you spend your hard earned money (which is better spent on popcorn). [Sebastian’s] setup can be replicated with things you probably have on hand: an Arduino, an IR remote, and a scavenged IR receiver. The IR receiver can be found in many devices, like old stereos or TVs that themselves were controlled via an IR remote.

It starts with an Arduino Sketch that lets you can see on the serial monitor what code is being generated by the button presses on your remote. These are then scripted to perform any task or function you like when those buttons are pushed. The most obvious use here is simple directional control for selecting your movies, but much more complex tasks are possible. Maybe someone can program a T9 script to type using the number buttons on most remotes?

Physical Fitness For The Truly Lazy

We’re going to get in shape around here, starting today. Well… in the United States, it is almost Thanksgiving, so we might as well wait until… but then it is going to be the end of the year and between Christmas, Hanukkah,  and New Year’s, we should put it off until then.

OK, we get it. There’s always some excuse. We know we should go on and do some push ups today. Of course, we are a lazy bunch, so not everyone’s going to do a full push up. Then we’ll all argue how many we actually did. If this sounds like you, maybe you need an Arduino-based project that counts proper push ups.

Continue reading “Physical Fitness For The Truly Lazy”

FleaFPGA + Arduino Uno = FleaFPGAUno

Some things are better together: me and my wife, peanut butter and jelly, and FPGAs and Arduino Unos. Veteran hacker [Valentin Angelovski] seems to agree: the FleaFPGA Uno is his latest creation that combines an FPGA (a Lattice MachX02 700HC) with an Arduino-compatible CPU.

It’s a step-up model from the origional FleaFPGA. With a few other components thrown in (such as a HDMI and composite video output and a WiFi option), you have a killer combination for experimenting with FPGAs or building an embedded system. That is because the Arduino part frees the FleaFPGA Uno from the breadboard: you can easily program, control and interface with the FPGA over a serial line or a wireless link using the Arduino IDE. There is even support for Arduino shields (albeit only 3.3V ones), making it even more expandable. This would be an awesome starting point for a retro gaming system, as many 8-bit consoles can be easily emulated in an FPGA. [Valentin] is currently selling the boards directly, and they are very reasonably priced at $50 or $60 for the WiFi version.

Continue reading “FleaFPGA + Arduino Uno = FleaFPGAUno”

Tiny Arcade, Based On Arduino

Who can resist video games when they’re packed up in tiny, tiny little arcade machines? [Ken]’s hoping that you cannot, because he’s making a cute, miniature Arduino-based arcade game platform on Kickstarter. (Obligatory Kickstarter promo video below the break.)

The arcades are based on [Ken]’s TinyCircuits Arduino platform — a surprisingly broad range of Arduino modules that click together using small snap connectors in place of pin headers. The system is cool enough in its own right, and it appears to be entirely open source. Housing these bits in a cute arcade box and providing working game code to go along with it invites hacking.

There’s something about tiny video cabinets. We’ve seen people cram a Game Boy Advance into a tiny arcade cabinet and re-house commercial video game keyfobs into arcade boxes. Of course, there’s the Rasbperry Pi. From [Sprite_TM]’s cute little MAME cabinet to this exquisite build with commercially 3D-printed parts, it’s a tremendously appealing project.

But now, if you’re too lazy to build your own from scratch, and you’ve got $60 burning a hole in your pocket, you can get your own tiny arcade — and tiny Arduino kit — for mere money. A lot of people have already gone that route as they passed the $25k funding goal early yesterday. Congrats [Ken]!

Continue reading “Tiny Arcade, Based On Arduino”

Akiba’s Awesome Lighting Tutorial

[Akiba] over at FreakLabs just put up a detailed tutorial outlining how to control and sequence lighting wirelessly using an Arduino and Vixen lighting sequencer software.

For those that don’t know [Akiba], he’s the guy behind Wrecking Crew Orchestra (TRON Dance) and their EL wire costumes. [Akiba] hacks on his projects at Hacker farm out in rural Japan.

board1

In the tutorial, he sets up a simple 6 LED circuit on a Fredboard (an Arduino compatible board with integrated breadboard). [Akiba] then describes configuring the Vixen sequencer software to control the Arduino, providing simple example code to decode the Vixen serial protocol. Finally [Akiba] shows how to use the ChibiArduino protocol stack to build a wireless illumination system.

[Akiba] has used these tools in many stage performances including with the Wrecking Crew Orchestra (shown above) and the world number 1 flair bartending crew, UPT.

This tutorial is particularly awesome, as it includes both step-by-step videos and a text reference. The videos give a great overview of the process, while the text provides a handy reference to refer to as you hack on your own illumination projects.

Thanks for the writeup [Akiba]! With Christmas just round the corner we hope to see readers using these techniques in their own festive illuminations soon!

Continue reading “Akiba’s Awesome Lighting Tutorial”

Halloween Doorbell Prop In Rube-Goldberg Overdrive

[Conor] wired up his 3D-printed coffin doorbell to an array of RGB LEDs, a screaming speaker, and a spinning skull on a cordless screw driver to make a “quick” Halloween scare. Along the way, he included half of the Adafruit module catalog, a relay circuit board, and ESP8266 WiFi module, a Banana Pi, and more Arduinos of varying shapes and sizes than you could shake a stick at.

Our head spins, not unlike [Conor]’s screaming skull, just reading through this Rube Goldbergy arrangement. (We’re sure that’s half the fun for the builder!) Smoke ’em if ya got ’em!

Start with the RGB LEDs; rather than control them directly, [Conor] connected them to a WiFi-enabled strip controller. Great, now he can control the strip over the airwaves. But the control protocol was closed, so he spent a week learning Wireshark to sniff the network data, and then wrote a Bash script to send the relevant UDP packets to turn on the lights. But that was not fancy-schmancy enough, so [Conor] re-wrote the script in Go.

Yes, that’s right — a Go routine on a Banana Pi sends out custom UDP packets over WiFi to a WiFi-to-LED-driver bridge. To make lights blink. Wait until you see the skull.

spooky_eye_animThe plastic skull has Neopixels in each ping-pong ball eye, controlled by an Arduino Nano and battery taped to the skull’s head. The skull is cemented to a driver bit that’s chucked in a cordless drill. A relay board and another Arduino make it trigger for 10 seconds at a time when the doorbell rings. Finally (wait for it!) an Arduino connected to the doorbell gives the signal, and sets a wire high that all the other Arduini and the Banana Pi are connected to.

Gentle Hackaday reader, now is not the time for “I could do that with a 555 and some chewing gum.” Now is the time to revel in the sheer hackery of it all. Because Halloween’s over, and we’re sure that [Conor] has unplugged all of the breadboards and Arduini and put them to use in his next project. And now he knows a thing or two about sniffing UDP packets.

Continue reading “Halloween Doorbell Prop In Rube-Goldberg Overdrive”

Avoid Procrastination With This Phone Lock Box

Smart phones are great. So great that you may find yourself distracted from working, eating, conversing with other human beings in person, or even sleeping. [Digitaljunky] has this problem (not surprising, really, considering his name) so he built an anti-procrastination box. The box is big enough to hold a smart phone and has an Arduino-based time lock.

The real trick is making the box so that the Arduino can lock and unlock it with a solenoid. [Digitaljunky] doesn’t have a 3D printer, so he used Fimo clay to mold a custom latch piece. A digital display, a FET to drive the solenoid, and a handful of common components round out the design.

Continue reading “Avoid Procrastination With This Phone Lock Box”