It’s Time To Roll Your Own Smartwatch

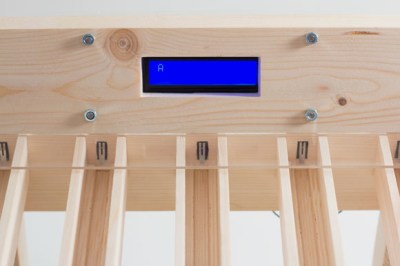
Giant wristwatches are so hot right now. This is a good thing, because it means they’re available at many price points. Aim just low enough on the scale and you can have a pre-constructed chassis for building your own smartwatch. That’s exactly what [benhur] did, combining a GY-87 10-DOF module, an I²C OLED display, and an Arduino Pro Mini.

The watch uses one button to cycle through its different modes. Date and time are up first, naturally. The next screen shows the current temperature, altitude, and barometric pressure. Compass mode is after that, and then a readout showing your step count and kilocalories burned.

In previous iterations, the watch communicated over Bluetooth to Windows Phone, but it drew too much power. With each new hardware rev, [benhur] made significant strides in battery life, going from one hour to fourteen to a full twenty-fours.

Take the full tour of [benhur]’s smartwatch after the break. He’s open to ideas for the next generation, so share your insight with him in the comments. We’d like to see some kind of feedback system that tells us when we’ve been pounding away at the Model M for too long.  Continue reading “It’s Time To Roll Your Own Smartwatch”

Irrighino, An Arduino Yun Based Watering System

There are many different ways to keep your plants watered on a schedule. [Luca Dentella] just created a new one by building the irrighino watering system. He used standard off the shelf, hardware to keep it simple. Irrighino is a complete watering system based on the Arduino Yun, featuring a user friendly AJAX interface. This allows scheduling in a manner similar to creating appointments in Outlook. It’s also possible to manually control the various water solenoids. The code is fully customizable and open source, with code available from [Luca’s] github repository. The web interface is divided in to three tabs – “runtime” for manual control, “setup” to configure the scheduling, and “events” to view system logs.

The Arduino Yun activates solenoid valves via a relay shield. A switch panel has indicator Status LED’s and three position switches. These allow the outputs to be switched off or on manually, or controlled via the Yun when in auto mode. [Luca] describes how to read three states of the switch (On-Off-On) when connected to a single analog input of the Arduino. He’s also got another tutorial describing how to connect a USB WiFi adapter to the Yun. This is handy since the Yun is mounted inside an enclosure where the signal strength is very weak. While the Yun has on-board WiFi, there is no possibility to attach an external antenna directly to the test SMA socket.

One interesting part is the commercial rain sensor. It’s a switch surrounded by a spongy material. When this material absorbs rain water, it begins to expand and triggers the switch. The Arduino sees the sensor as a simple digital input.

Check a short demo of his system in the video after the break.

Continue reading “Irrighino, An Arduino Yun Based Watering System”

Arduino Based Remote Shutter For Beme

The well-dressed hacker [Sean Hodgins] has put together a neat little project: a battery powered remote shutter. He built it for use with Beme, the latest Snapchat clone that all of the cool kids are now using.

This service is designed to get away from the selfie culture by starting to record when you hold your phone against your chest, so you are looking at the thing being recorded, not your phone. [Sean] wanted a bit more control than that, so he built a remote control that starts the recording by moving the servo arm over the proximity sensor.

He built this neat little device from an Arduino Pro Mini, a battery, a small servo, a couple of power control boards and a cheap RF link from SeedStudio, all glued onto an iPhone case. It’s a bit rough around the edges (the servo makes some noise that is picked up on the recording, for one thing), but it is a great example of how to lash together a quick prototype to test a project out.

Continue reading “Arduino Based Remote Shutter For Beme”

Lego Exoskeleton Mimics Pacific Rim

Lego Exoskeleton Controls Pacific Rim Robot

As hilariously outrageous as Pacific Rim was, it was still an awesome concept. Giant robot battle suits, duking it out with the aliens. Well, it looks as if it wasn’t quite as far-fetched as we first imagined. Maker [Danny Benedettelli] just released a video of his very own Lego exoskeleton suit that when worn can be used to control a desktop size Cyclops robot. You might remember [Danny] as the author of The Lego Mindstorms EV3 Library,

The Cyclops robot (also his design) was originally built four years ago using Lego Mindstorms NXT system with an Android phone running a custom app. Cyclops has been upgraded a bit for this demonstration. Now it communicates over Bluetooth with an Arduino to [Danny’s] telemetry suit.

Relatively speaking, the system is pretty simple. The Lego exoskeleton has potentiometers on each joint, which map to a degree of freedom for the robot. When one potentiometer spins, the associated robot joint mimics it. Simple, right?

Continue reading “Lego Exoskeleton Controls Pacific Rim Robot”

Hackaday Prize Entry: Gas Grenade Helps Instead Of Exploding

If someone lobs a grenade, it’s fair to expect that something unpleasant is going to happen. Tear gas grenades are often used by riot police to disperse an unruly crowd, and the military might use a smoke grenade as cover to advance on an armed position, or to mark a location in need of an airstrike. But some gas grenades are meant to help, not hurt, like this talking gas-sensing grenade that’s a 2015 Hackaday Prize entry.

Confined space entry is a particularly dangerous aspect of rescue work, especially in the mining industry. A cave in or other accident can trap not only people, but also dangerous gasses, endangering victims and rescuers alike. Plenty of fancy robots have been developed that can take gas sensors deep into confined spaces ahead of rescuers, but [Eric William] figured out a cheaper way to sniff the air before entering. An MQ2 combination CO, LPG and smoke sensor is interfaced to an Arduino Nano, and a 433MHz transmitter is attached to an output. A little code measures the data from the sensors and synthesizes human voice readings which are fed to the transmitter. The whole package is stuffed into a tough, easily deployed package – a Nerf dog toy! Lobbed into a confined space, the grenade begins squawking its readings out in spoken English, which can be received by any UHF handy-talkie in range. [Eric] reports in the after-break video that he’s received signals over a block away – good standoff distance for a potentially explosive situation.

Continue reading “Hackaday Prize Entry: Gas Grenade Helps Instead Of Exploding”

Fisher Price Bluetooth Speaker Hack

A good hacker hates to throw away electronics. We think [Matt Gruskin] must be a good hacker because where a regular guy would see a junky old 1980’s vintage Fisher Price cassette player, [Matt] saw a retro stylish Bluetooth speaker. His hack took equal parts of electronics and mechanics. It even required some custom 3D printing.

You might think converting a piece of old tech to Bluetooth would be a major technical challenge, but thanks to the availability of highly integrated modules, the electronics worked out to be fairly straightforward. [Matt] selected an off the shelf Bluetooth module and another ready-to-go audio amplifier board. He built a custom board to convert the stereo output to mono and hold the rotary encoder he used for the volume control. An Arduino (what else?) reads the encoder and also provides 3.3V to some of the other electronics.

The really interesting part of the hack is the mechanics. [Matt] managed to modify the existing mechanical buttons to drive the electronics using wire and hot glue. He also added a hidden power switch that doesn’t change the device’s vintage look. Speaking of mechanics, there’s also a custom 3D printed PCB holder allowing for the new board to fit in the original holder. This allows [Matt] to keep the volume control in its original location

Continue reading “Fisher Price Bluetooth Speaker Hack”

Aurora Painting

“Arduino Borealis” Combines LEDs And Paint

[Stef Cohen] decided to combine three different artistic mediums for her latest project. Those are painting, electronics, and software. The end goal was to recreate the aurora borealis, also known as the northern lights, in a painting.

The first step was to make the painting. [Stef] began with a shadow box. A shadow box is sort of like a picture frame that is extra deep. A snowy scene was painted directly onto the front side of the glass plate of the shadow box using acrylic paint. [Stef] painted the white, snowy ground along with some pine trees. The sky was left unpainted, in order to allow light to shine through from inside of the shadow box. A sheet of vellum paper was fixed to the inside of the glass pane. This serves to diffuse the light from the LEDs that would eventually be placed inside the box.

Next it was time to install the electronics. [Stef] used an off-the-shelf RGB LED matrix from Adafruit. The matrix is configured with 16 rows of 32 LEDs each. This was controlled with an Arduino Uno. The LED matrix was mounted inside the shadow box, behind the vellum paper. The Arduino code was easily written using Adafruit’s RGB Matrix Panel library.

To get the aurora effect just right, [Stef] used a clever trick. She took real world photographs of the aurora and pixelated them using Photoshop. She could then sample the color of each pixel to ensure that each LED was the appropriate color. Various functions from the Adafruit library were used to digitally paint the aurora into the LED matrix. Some subtle animations were also included to give it an extra kick.